| Page Created |
| January 1st, 2023 |
| Last Updated |
| March 4th, 2024 |
| Country |
 |
| Special Forces |
| Long Range Desert Group |
| September 1st, 1942 – September 17th, 1942 |
| Operation Caravan |
| Objectives |
- T1 patrol was to attack the airfield.
- G1 Patrol was to go to the barracks at nearby Campo Maddalena and neutralise it as a threat, disrupt communications and do what damage it could to the railway station.
| Operational Area |
Barce area, Libya.
| Unit Force |
- B Squadron, Long Range Desert Group
- The G1 patrol, commanded by Captain J. A. L. Timpson
- T1 patrol, led by Captain N. P. Wilder
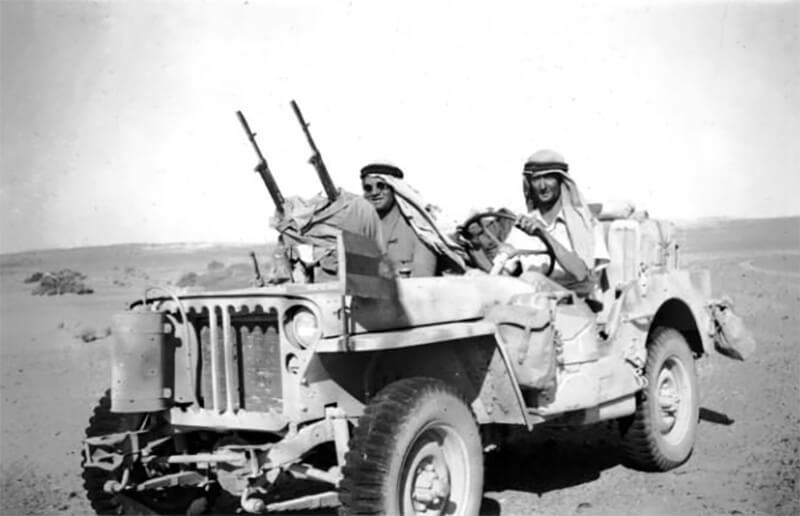
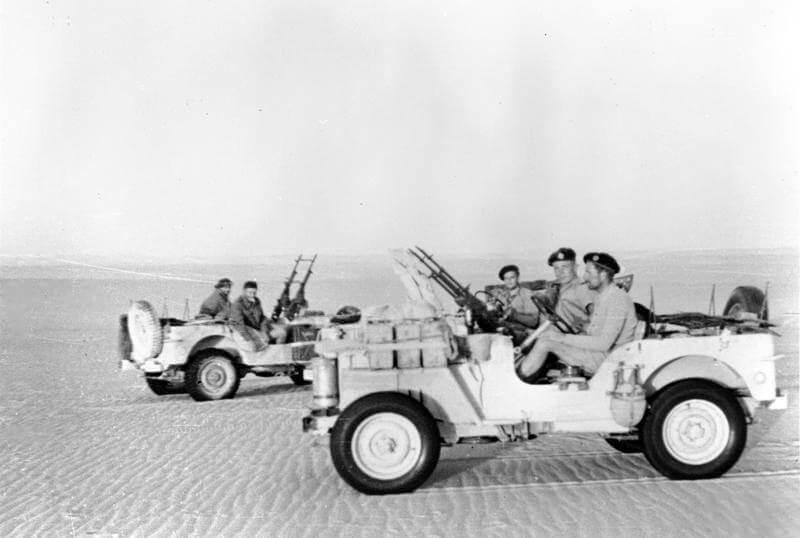
- Totalling forty-seven men in 12 Chevrolet 1533X2 trucks and five Jeeps.
- Four 10-ton Mack trucks of the Heavy Section.
- The two patrols are accompanied by Major Vladimir Peniakoff and two Senussi tribesmen of the Libyan Arab Force.
| Opposing Forces |
- Barce Township
- One company of the Polizia dell’Africa Italiana with Autoblinda AB.41 armoured cars
- One company of Carabinieri Reali
- 8a Sezione Camicie Nere
- 17o Battaglione Mitraglieri
- 10a Compagnia Carri L with L3/35 tankettes
- One battery of 127-mm guns (captured British 60-pounder guns) of the 51o Gruppo Artiglieria
- Barce airfield
- 35o Stormo da Bombardamento (35th Bombing Wing) less one squadriglia (squadron/flight), equipped with Cant Z.1007 bis three-engined bombers.
- 131a Squadriglia of the 66o Gruppo Osservazione Aerea equipped with Caproni Ca 311 twin-engined observation aircraft.
- Several other units of cavalry, carabinieri and Libyan-manned irregulars.
| Operation |
Operation Caravan (Hyacinth) was part of Operation Rosemary. A four-part undertaking designed to keep the Axis forces off balance in North Africa in the second half of 1942. The other three elements were Operation Bigamy (Snowdrop) against Benghazi, Operation Nicety (Tulip) against the Jalo oasis, and Operation Agreement (Daffodil) against Tobruk.
September 1st, 1942
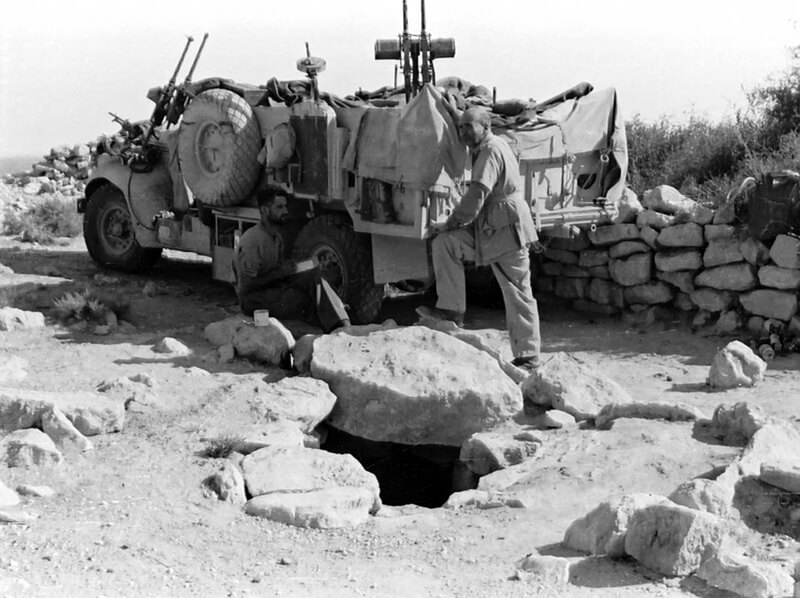
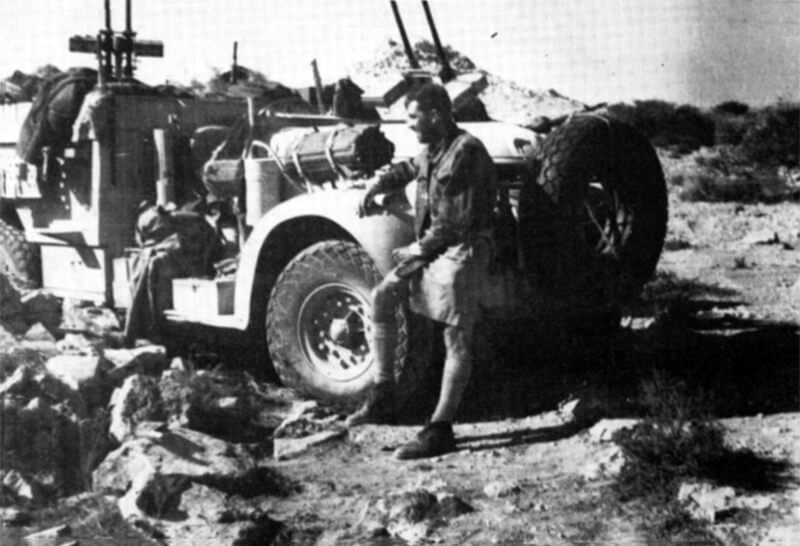
Major John Easonsmith leads two half-patrols of the Long Range Desert Group, known as B Squadron, from their base at Faiyum in Egypt on a mission to “cause the maximum amount of damage and disturbance to the enemy.” Alongside them was Major Vladimir Peniakoff (Also known as Popski) and two Senussi tribesmen of the Libyan Arab Force. Before the raid, Peniakoff has arranged for the Senussi to collect information on Axis dispositions from locals near Barce and report back to him.
The assault force’s destination was Barce, located about eighty kilometres northeast of Benghazi. Barce was a major administrative center of the Italian colonial government of Libya, and it was home to a large airfield on the northeast side of town. This airfield was the main objective of Operation Caravan.
To prevent overcrowding on the external routes, for the other operations, the Long Range Desert Group choose a course for B Squadron that necessitated a double crossing of the Sand Sea. The Jeeps of the Patrols were able to carry enough fuel to last them approximately 1,450 kilometres, while the Chevrolet trucks had a range of 2,415 kilometres. Accompanying them were two Mack trucks of the Heavy Section, which supplied enough fuel to last them the first 320 kilometres. After the initial week, B Squadron was able to refuel once more when they rendezvoused with two additional Mack trucks at Howard’s Cairn.
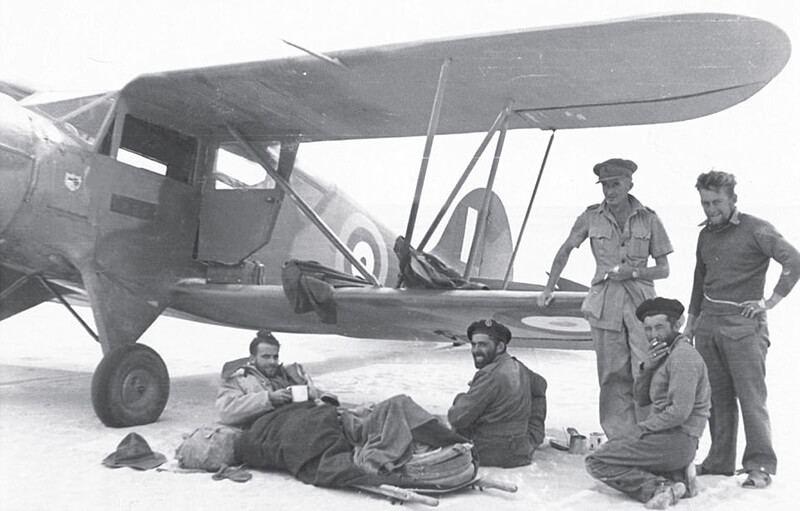
On the third day, misfortune befell Timpson and his driver when their Jeep raced up a steep sand dune and flipped over the top, necessitating their evacuation by a Lockheed Hudson aeroplane. Sergeant Jack Dennis was appointed leader of the G1 patrol following this incident.
September 13th, 1942,
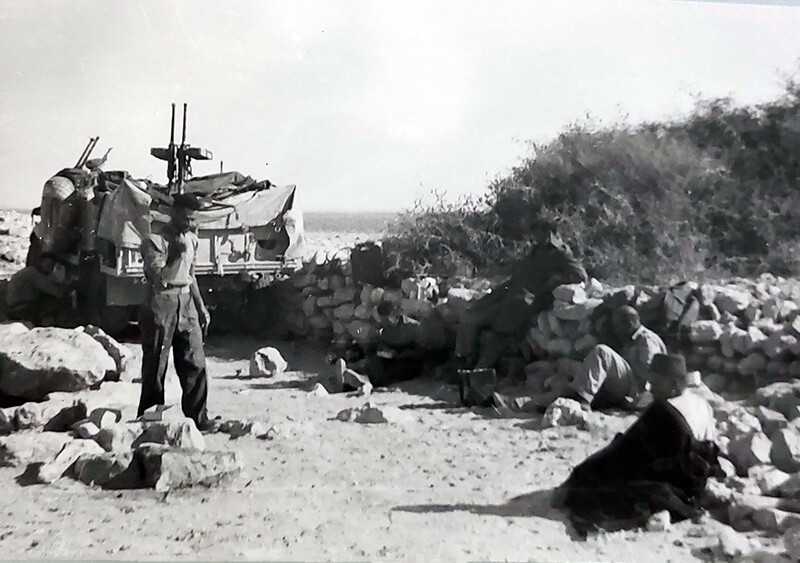
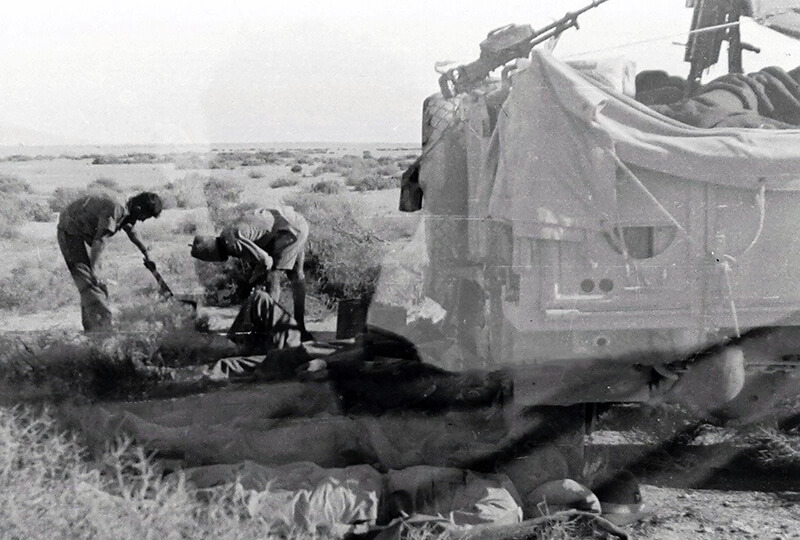
The Long Range Desert Group arrives at Benia, located twenty-four kilometres south of Barce. They set up camp on a hill among a belt of trees and hide one truck at the G5 rear rendezvous point along with food and water rations. The men prepare their weapons and explosives for the rest of the day.
15:00. Easonsmith holds a final briefing with the help of Peniakoff, who is familiar with the town. T1 patrol is assigned to attack the airfield, the main objective, while the G1 patrol is to create a diversion by attacking the Campo Maddelena barracks, three kilometres southwest of Barce, and the railway station to the south.
Despite the Long Range Desert Group’s efforts to remain undetected, their approach is spotted, and notifications are sent to the Barce sector command. In response, the sector’s commander, Generale di Brigata Umberto Piatti del Pozzo, orders aerial and ground reconnaissance and makes other preparations against an imminent attack. Although the vehicles of both patrols have taken well-hidden positions among the trees, the Long Range Desert Group is still seen by a Ca 311 Light Reconnaissance Bomber, which drops a message to a nearby cavalry headquarters.
After sunset, the force begins their voyage, severing telephone wires on their way. When they reach the outskirts of the town, they are challenged by a sentry at a police checkpoint. The man is taken captive. A non-commissioned officer, who is alerted by a shout, is shot and killed while the nearby buildings are bombarded with hand grenades. The rest of the guard, leaving twelve horses in a stable, deserts the post. The British vehicle column abruptly stops when the T1 patrol truck, carrying a Breda cannon, crashes into the back of the radio truck, damaging its radiator. All useful equipment is removed from the gun truck and its crew joins other vehicles. The radio truck is still able to proceed, but the removal of the Breda cannon is a setback in the patrols fire power. Additionally, a G1 patrol vehicle, crashes into a rock and ruins its sump. This vehicle is also stripped of its useful components and abandoned.
T1 patrol’s radio truck leaves the column and parks in a field at Sidi Selim, located approximately twelve kilometres to the south-east of Barce. The truck’s position is to act as a rendezvous point after the attack, and to maintain a constant radio watch for any messages from Lieutenant Colonel D. Stirling’s SAS unit which was operating that night against Benghazi in Operation Bigamy.
23:00. The two patrols reach a main road heading east to Barce and drive along with their headlights on, in order to simulate an Axis convoy. When they reach the top of an escarpment leading to the Barce plain, they encounter two stationary L3 tankettes guarding the road and open a heavy machine gun fire as they quickly pass by. The tankettes have not been properly prepared for this, even though the crews should have been aware that night traffic is forbidden.
September 14th, 1942
At midnight, the Long Range Desert Group patrols split up at the crossroad outside Barce. They have two hours for their mission before returning. Easonsmith, with two Headquarters Jeeps, takes off on his own to scout for targets. Meanwhile, Peniakoff stays behind with G1 Patrol’s radio truck to protect the group’s retreat. T1 patrol takes the main road to the north of Barce to get to the Airfield, passing an Italian motorised unit along the way. Both sides exchange friendly greetings.
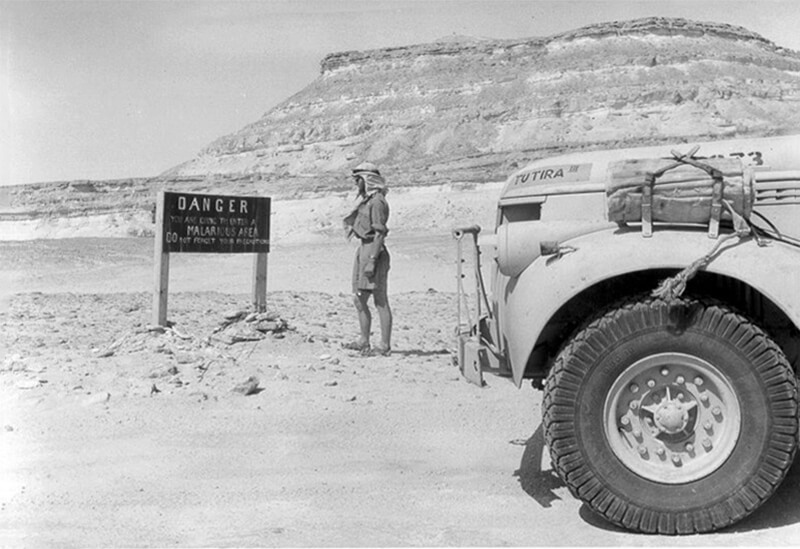
As Captain Wilder and his unit approach the airfield, he decides to drive his own vehicle, Tutira III, rather than the commander’s Jeep. Accompanying him were Troopers Parker and Holland in the truck. When the patrol is challenged by sentries at the entrance. The sentries are shot. Wilder opens the unlocked gates of the airfield and the assault force drives in. Once inside, the first target they encounter is a truck and trailer carrying fifty-two cans of aviation fuel. The vehicle and trailer are destroyed with machine gun fire. The resulting fireball illuminates much of the airfield, making navigation easier. The Italians had been expecting an attack, but they did not anticipate the unit would arrive by vehicle from the main road. Therefore, T1 patrol encounters little resistance.
The concrete administration building, which also contains the mess and barracks, is the next target. Grenades are thrown through the windows and ignite a fire within the building. Additionally, a hangar and other buildings, as well as some motorized vehicles, are shot up and a petrol dump of 200-litre drums is destroyed. Once on the airfield, T1 patrol moves in a single file in a clockwise direction, shooting at parked the aircraft with a mix of tracer, incendiary and explosive bullets from three sets of 0.303-inch Browning machine guns, two 0.5-inch Vickers heavy machine guns, and 0.303-inch Vickers K single and twin machine guns firing from pintle mounts either in the back of the truck or on the passenger doorpost. Corporal Merlyn Craw of the T1 patrol had devised small incendiary time bombs made from gelignite in addition to their existing firepower. Craw and Yealands are in the last vehicle in the column, Te Paki III, which has a box of these explosives. As they reach the aircraft which are not already burning, the two men jump off and run to each aircraft, placing a bomb on top of a wing above the fuel tanks. Craw lits the fuse, and they both dive to the ground as the plane burst into flames. Miraculously, neither Craw nor Yealands are hurt. They manage to destroy at least ten aircraft.
For an hour, T1 patrol remains on the airfield without any of the patrolmen being injured or their vehicles being damaged. This was likely due to the Long Range Desert Group drivers’ ability to drive quickly, making the vehicles hard to hit, and the gunners firing with accuracy and strength at their targets. Additionally, the anti-aircraft guns protecting the airfield were unable to fire at lower angles. According to Wilder’s post-action report, the patrol has taken out or ruined thirty-two aircraft, mostly bombers, whereas official Italian figures indicate that sixteen aircraft are destroyed and seven damaged.
G1 patrol also had a successful night, despite the noise coming from the airfield alerting the barracks. The alerted Italian garrison took up position on a low veranda outside the barracks. The patrol used grenades and heavy machine gun fire to silence the garrison. Major Easonsmith leads a team of two jeeps in attacking other buildings, throwing grenades at the Italians in the streets, and destroying a dozen vehicles in an unattended transport park. As the patrol was running low on grenades, they withdrew. Unfortunately, two Italian L3 light tanks blocked their only exit from the camp, so the patrol had to escape through a gap in the outside wall, losing a jeep in the process. Additionally, a truck is damaged and separated, and its four-man crew is captured by the Italians. Finally, the patrol began the challenging task of extracting and made its way to the rendezvous at Sidi Selim.
T1 patrol also meets increasing resistance from the Italians as they make their way through Barce, with four L3 tanks blocking their path. Captain Wilder, determined to continue, drives his 30cwt Chevrolet into one of the tanks with such force that it is pushed off the road. The truck is destroyed, but the way is cleared for the rest of the patrol to pass the tanks. Two men from another truck, Corporal Tippett, and Trooper Dobson, disable the tank that Wilder had crashed into by climbing onto it and detonating grenades and bombs inside the turret. They also immobilise another tank with machine gun fire and by throwing a bomb under it. Dobson is wounded in the hand during this attack.
Tippett’s truck then makes a wrong turn, crosses a rubbish dump, and eventually finds a way out through a backyard to the main road. Meanwhile, Corporal Craw’s truck, at the rear of the patrol, stops at Wilder’s abandoned truck, sees that nobody is there, and continues down the street. Craw and his crew attempt to evade two or three armored cars by turning down a narrow side street. Realising they could not escape that way, they decided to run the gauntlet. Their truck is set on fire and crashes into a concrete air-raid shelter. The impact of the crash throws Craw into the shelter, where the Italians capture him. Trooper K. Yealands, who is badly wounded, and Trooper R. E. Hay, who stops to help Yealands escape from the burning truck, are also captured. Trooper T. A. Milburn is able to escape from the town before the enemy eventually captures him.
The crew of Wilder’s truck manages to escape in a jeep. However sometime later it overturns, trapping the Wilder’s men underneath it wounded or unconscious. Fortunately, they are rescued by a following truck and the patrol is able to continue to their rendezvous with G1 patrol.
After these actions, the Long Range Desert Group reassembles at the designated rallying point and withdraws to the south. The patrols have suffered the losses of six men, two trucks, and a jeep in Barce, while G1 has lost four men and a truck. Two of the guardsmen of G1 Patrol are able to rejoin their patrol later. Just before dawn the two patrols approach a police post to the south of Sidi Selim and are ambushed by enemy troops. The troops consist of around 150 Tripolitanians led by three Italian officers who had been waiting for their return. The enemy opens fire from both sides of the road, causing damage to one of the trucks which has to be towed. This in addition to the two trucks they had to leave close to the police post the previous evening. The enemy’s gunfire also wounded three men, including Major Peniakoff and Trooper F. W. Jopling, just south of the post.
The mechanics attempt to get the three damaged trucks moving under their own power, but the enemies forces renew their attack before the repairs could be completed. Easonsmith chases the enemy back three kilometres in his jeep while the petrol and supplies are removed from the damaged vehicles and time bombs are placed inside them to blow them. The force then resumes their withdrawal until the wireless truck of the Guards stops due to a damaged rear axle. A reconnaissance plane flies overhead before the truck could be moved to a safer location. It alerts six Italian fighters which are distracted by the explosion of the time bombs in the three abandoned trucks. The aircraft start strafing the area around the burning vehicles but quickly locate the vehicles of the Long Range Desert Group hiding under some scattered trees.
That night, the two patrols decide to separate into smaller groups in the hopes of reaching British lines. Jopling and nine Guardsmen started walking towards Bir el Gerrari, where G1 patrol has left a vehicle on their way north to Barce. Lawson sets off in a truck and jeep with the wounded Wilder, Peniakoff, Parker, Dobson, Burke, and a Guardsman. He is accompanied by navigator Davis, and driver Private D. P. Warbrick. Easonsmith organises the remaining fourteen men into a walking party, who take rations and water with them in the other jeep.
September 15th, 1942
After their Jeep broke down due to a hole in the petrol tank on their way to Bir el Gerrari, the group with under doc Lawson has to abandon it. Nonetheless, they manage to reach their destination later that day. From there, they travel to a landing ground near the Kalansho sand sea, where they are luckily found by another Long Range Desert Group patrol. The Royal Air Force then evacuates the wounded to Kufra.
September 17th, 1942
After walking for 130 kilometres, Easonsmith’s party unexpectedly runs into S2 patrol. Since the other walking party has not yet arrived at the rendezvous, Easonsmith and the Rhodesians search the area for three days but are only able to locate eight men. Jopling and Guardsman Gutheridge were still missing. Easonsmith later met the Rhodesian S1 patrol, which included two Guardsmen who had walked out of Barce. The LRDG then retreated to Kufra, arriving there during an air raid.
Jopling, whose leg wound had turned gangrenous, and Gutheridge, who was exhausted, are unable to keep up with the pace of the other eight members of their party. However, they are close to Bir el Gerrari when the search parties missed them. Believing that they would not be able to reach the rendezvous in time and desperately needing water, they turn north towards the hills. They arrive at an Arab camp on the night of September 20th, 1941. Unfortunately, they are captured by a group of Italians on September 25th, 1941, 12 days after the raid. Despite Jopling’s leg injury, the two men walked at least 240 kilometres, mostly at night and using the stars to navigate.
The other two that were missing were Roy Duncalfe and Paddy McNabola. They had the idea to primarily travel during the night, as it was cooler, and they could use the stars to find their way since they had no compass. Unfortunately, after three days, the partially filled water bottle they had with them is nearly empty, so they turn back towards the foothills of Cyrenaica. Fortunately, they stumble upon a Bedouin encampment. The sheikh of the tribe informs them that a British officer had visited them the day before and would be returning in five days. Due to the increased activity of Axis forces in the area, they could not stay at the camp. Therefor the sheikh’s son takes them to a cave five kilometres away in the desert and leaves them with flour, salt, and water as supplies.
After waiting for six days without any sight of the British officer, Roy and Paddy decide to continue their journey through the desert. When they arrive at their meeting point at Bir el Gerrari, they find no truck, but they do find three tins of runner beans. Having gone through many difficulties in the desert, the two men return to the Bedouin sheikh, where they stay until the end of October, when the British troops were getting close to El Alamein. They manage to hitch a ride with a 25-pounder crew and make it back to the British lines.
The Allies lost twenty men in Operation Caravan (eight wounded, ten captured and two Senussi disappeared), while the Italians reported four killed, fifteen wounded and one prisoner, sixteen aircraft destroyed and another seven damaged. Furthermore, considerable quantities of other matériel and buildings were destroyed.
| Multimedia |