| Page Created |
| August 31st, 2022 |
| Last Updated |
| September 24th, 2022 |
| Great Britain |
 |
| British Commando Operations |
| Operation Bristle Operation Chariot Operation Jubilee |
| Objectives |
- The destruction of the Normandie dry dock, the dock pumping machinery and other installations associated with the dry dock.
| Operational Area |
Saint-Nazaire in France.
| Allied Forces |
Army
- 265 Commandos
- No. 2 Commando
- Demolitions detachments from No’s. 1, 3, 4, 5, 9 and 12 Commando
Royal Navy
- H.M.S. Tynedale
- H.M.S. Atherstone
- Hunt-Class Destroyers
- H.M.S. Brocklesby
- H.M.S. Cleveland
- H.M.S. Sturgeon
Assault Force
- H.M.S. Campbeltown
- Motor Gun Boat 314
- Motor Torpedo Boat 74
- 28th ML Flotilla
- ML 298
- ML 306
- ML 307
- ML 341
- ML 443
- ML 446
- ML 447
- ML 457
- 20th ML Flotilla
- ML 192
- ML 262
- ML 267
- ML 268
- 7th ML Flotilla
- ML 156
- ML 160
- ML 177
- ML 270
Royal Air Force
- No. 51 Squadron RAF
- No. 58 Squadron RAF
- No. 77 Squadron RAF
- No. 103 Squadron RAF
- No. 150 Squadron RAF
| Axis Forces |
Heer
- 333rd Infantry Division
Kriegsmarine
- 22. Marine-Flak-Regiment
- 703 Marine-Flak-Abteilung
- 705 Marine-Flak-Abteilung
- 809 Marine-Flak Abteilung
- (All with 20 mm, 37 mm and 240 mm dual-purpose mountings)
- 280. Marine-Artillerie-Abteilung
- Stab/Marine-Artillerie-Abteilung 280: Batterie Chémoulin (4 x 150mm)
- 1/Marine-Artillerie-Abteilung 280: Batterie St Gildas (4 x 75mm)
- 2/Marine-Artillerie-Abteilung 280: Batterie le Pointeau (4 x 75mm)
- 3/Marine-Artillerie-Abteilung 280: Batterie Behncke-West (4 x 170mm)
- 4/Marine-Artillerie-Abteilung 280: Batterie de Kermoisan (2 x 240mm)
- 6th U-boat flotilla
- 7th U-boat flotilla
- 16th Minesweeper flotilla
- 42nd Minesweeper flotilla
- Torpedo boat Jaguar
- Sperrbrecher 137
- Armed trawler
- Harbour Defence Companies
| Preperations |
The strategic context for the operation is rooted in two pivotal encounters between 1941-1942. The initial confrontation sees the British Home Fleet, spearheaded by the British Admiral-class H.M.S. Hood and the King George V-class Battleship H.M.S. Prince of Wales, chase the German Bismarck and Prinz Eugen. The Bismarck is the first of two Bismarck-class Battleships built for Germany’s Kriegsmarine. The ship is named after German Chancellor Otto von Bismarck. The Prinz Eugen is the third of a class of five Heavy Cruisers of the Admiral Hipper class.
Their clash on May 24th, 1941, is brief and devastating, with H.M.S. Hood catastrophically hit within minutes, leading to its destruction. Following this, the Bismarck, lightly damaged and leaking oil, aims for repairs at the harbour of Saint Nazaire. During the voyage to the harbour, the ship is attacked by aircraft of the H.M.S. Ark Royal and suffers unrepairable damage to its rudder. The next day the Bismarck is destroyed by an overpowering British naval force.
Another significant episode takes place in February 1942, when the Scharnhorst-class battlecruisers Scharnhorst and Gneisenau evade the Royal Air Force and Royal Navy, navigating the English Channel to reach the relative safety of Baltic Ports.
While the Bismarck is defeated, the looming threat remains in the form of its sister ship, the Tirpitz. By 1941, isolated Britain is heavily reliant on sea routes for vital war supplies, with U-Boats severely threatening these lines. While smaller naval vessels counter the U-Boats, the battleships of the Kriegsmarine are an altogether different menace. By January 1942, the operational Tirpitz, stationed in Norwegian fjords, poses a significant concern for Prime Minister Winston Churchill. As a contingency against its potential breakout into the North Atlantic, six battleships (four British, two American) stand prepared. Strategies are being developed to either neutralise the Tirpitz in its stronghold or upon its breakout.
This moment is also when the significance of Saint Nazaire comes into the spotlight, being the sole port on the French Atlantic coast capable of housing a Battleship of Tirpitz’s magnitude. The Normandie Dock, constructed initially for the massive passenger liner Normandie in 1932, is the world’s most extensive dry dock at the time. Depriving the Kriegsmarine of this facility will likely deter them from deploying the Tirpitz in the North Atlantic, redirecting its focus to the Arctic Convoy routes instead.
By the dawn of 1942, the strategic importance of Saint Nazaire’s Normandie Dock is evident, but its assault poses a formidable challenge. Given the dense civilian presence, a Royal Air Force-led aerial bombardment is considered impractical due to the absence of advanced precision-bombing techniques at that time. A direct assault will be equally challenging, as evidenced by the subsequent Dieppe raid. A voyage to the port via the hazardous River Loire estuary will inevitably come under the surveillance of coastal gun stations. At the same time, the Special Operations Executive (SOE) explores the prospect of sending agents for sabotage but deems it unfeasible given their limited capabilities.
| German Defences in Saint Nazaire |
The Germans heavily fortify the vicinity of Saint Nazaire, with approximately 5,000 troops stationed in its immediate surroundings. The port’s defenses are spearheaded by the Marine-Artillerie-Abteilung 280, under Kapitän zur See Edo Dieckmann’s command. This battalion boasts an arsenal of 28 guns, with calibres ranging from 75 mm to the massive 280 mm railway guns, all of which are strategically placed to protect the coastal entries.
While entering the Loire estuary ships would see 75 mm guns of Battery Saint Gildas to their starboard side, monitoring the southern boundary of the estuary. To their port side, guarding the northern perimeter, were the railway guns situated just inland from Pointe de Penchâteau. Ahead to their starboard, as they navigated into the shallows, the Battery le Pointeau was situated, reinforced by the luminescence of the 150 cm searchlight dubbed, Gelb 3. To their port, they would see a concentration of artillery consisting of the 150 mm guns of Battery Chémoulin, along with the 75 mm and 170 mm guns atop of the cliffs near Pointe de l’Eve. Enhancing these defences near the cliff-top batteries was the 150 cm searchlight, Blau 2.
This formidable firepower is further bolstered by the 22 Marine-Flak-Regiment weaponry, commanded by Kapitän zur See Karl-Konrad Mecke. The brigade is equipped with a total of forty-three anti-aircraft guns of varying calibres, from 20 to 40 mm. These guns are not only purposed for anti-aircraft operations but also serve as coastal defense armaments.
So, while entering the constricted channel of the estuary, situated less than 4 kilometres from the Normandie Dock are the three flak battalions from Kapitän zur See Karl-Konrad Mecke. Equipped with lighter, dual-purpose armaments, the 703rd, 705th, and 809th Battalions, comprising primarily of 20 mm and 40 mm guns, with a few 37 mm pieces, these units could swiftly transition from targeting aircraft to attacking surface vessels.
The 703rd Battalion under Korvettenkapitän Thiessen, illuminated by the Blau 1 searchlight, you would enter within effective range of the defences encircling the outer harbour as well as those at Pointe de Mindin to their starboard side. Here, Korvettenkapitän Burhenne’s 809th Battalion has mounted searchlights and 20 mm cannons. A significant number of these guns are securely positioned in concrete bunkers atop the submarine shelters and other strategic dockside facilities at the Saint Nazaire submarine base.
The expected resistance Saint-Nazaire consists of a varied array of forces under the command of Zuckschwerdt, including naval personnel, improvised infantry units from guard companies, crew members from docked ships, and technical staff, all prepared to hold the front lines until the arrival of the well-equipped Wehrmacht troops who will launch a structured offensive against the attackers.
Among these defenders are also the personnel of the Organisation Todt, present due to ongoing construction at the submarine pens and port fortifications, who are ready to fight if the situation demands. Naval technicians from the 2nd and 4th Works Companies, with secondary roles as infantry, are poised for early engagement to counteract the attackers. The complement of seamen from the numerous vessels harboured will bolster defenses by operating ship weaponry and joining ground counterassaults. Although the elite U-boat crews are quartered at a safe distance in La Baule, the auxiliary personnel from the 6th and 7th U-Flotillas stands ready to protect their submarines, even to the extent of scuttling them to prevent capture.
Under Zuckschwerdt’s command, who is responsible for all defensive operations within the port and estuary, are also the guard companies and the harbour-defence vessels of the Harbour Commander. In terms of naval presence, the Kriegsmarine has a destroyer and an armed trawler. Moored in the fairway east of the Avant Port and posing a significant challenge to the attackers, is the heavily armed and robustly constructed Sperrbrecher 137, a vessel comparable in size to the H.M.S. Campbeltown, which can encounter the attackers on their path to the targeted landing zones.
Although the 333. Infantrie Division has authority over the coastal defences between Saint Nazaire and Lorient, they have no stationed troops in the town itself. However, some units are garrisoned in nearby villages, poised to counter any attacks on the port.
| January 1942 |
Responding to Churchill’s call for solutions regarding Tirpitz in January 1942, Lord Louis Mountbatten, the newly appointed Chief of Combined Operations, revisited the idea of targeting the Normandie Dock. An innovative strategy emerges capitalising on March’s anticipated high spring tide to traverse the sandbanks of the Loire estuary. However, conventional landing vessels are ill-suited for this task. The selected vessel needs to be agile enough to navigate the estuary and robust enough to carry a substantial payload. A preliminary blueprint for this critical mission is crafted by Combined Operations by January’s end.
The initial proposition involves two outdated destroyers, specifically modified for reduced weight. The primary vessel will be loaden with explosives and commandos skilled in demolition. After breaching the dry dock’s outer gate, the commandos will sabotage adjacent infrastructures. Post-sabotage, timed explosives will annihilate the destroyer, and the secondary destroyer will facilitate the commandos’ extraction. Concurrent Royal Air Force raids will divert German focus. Despite the dock’s strategic significance, the Admiralty is reluctant to risk two destroyers. They propose employing the old Free French vessel, Ourangan, for ramming and a convoy of motor launches for personnel transportation and evacuation. This adjustment, though not ideal, makes the mission palatable for the Joint Chiefs of Staff.
The Joint Chiefs of Staff expresses concerns about deploying a French vessel. Engaging the Free French leader, General Charles de Gaulle, will expand the circle privy to the operation’s details, heightening security risks. Thus, the decision sways towards sourcing a suitable vessel from the Royal Navy to preempt potential security breaches.
Combined Operations is the organisation vested with the responsibility of orchestrating attacks on the Axis powers. At a time when the resources aren’t abundant for a full-fledged counteroffensive, Great Britain’s priority is to sustain an offensive posture. This strategy serves dual purposes: lifting morale domestically and shaping propaganda abroad. The rationale is also to ensure that Germany doesn’t have an uncontested hold over the occupied territories. Therefore, these raids aim to compel the Germans to deploy troops along the coastlines, diverting their focus from other fronts. However, Combined Operations orchestrates the complexities of coordinating between the Army, Navy, and Air Force. This inter-service dynamic occasionally leads to alterations or outright cancellations of planned raids due to resource constraints. Nevertheless, Combined Operations has at its disposal the formidable Army Commandos, a group of elite soldiers structured into a Special Service Brigade, under the leadership of Brigadier Charles Heydon. From the Special Service brigade, Commando No. 2 is chosen for the attack on the Normandy Dock in Saint-Nazaire.
| No. 2 Commando |
In early 1942, the men of No. 2 Commando are involved in their routine training in Ayr, Scotland, with their headquarters at Wellington Square. During this period, the commanding officer of No. 2 Commando, Lieutenant Colonel Newman, is frequently absent, causing some speculation among the men about a potential upcoming operation.
During the Newman’s absence, Major Bill Copland, the second-in-command, is managing the unit’s daily activities without revealing anything about Newman’s whereabouts or the reason for his absence. However, unusual requests are being relayed to Copland from Newman, who is somewhere in the South.
Notably, there are several absences within the ranks, with men send across the country to receive training on technical aspects of dockyard operations, indicating preparations for a mission involving maritime infrastructure. Strict security protocols ensure that no information is leaked.
The anticipation of an impending operation grows when a second medical officer, Captain Dave Paton, joins the unit, suggesting that the Commando is being prepared for a significant action. This is further confirmed when a large number of the Commando are ordered to turn in their full kits for storage, leading to a sense of exclusion and dissatisfaction among those not selected, particularly among the veterans.
The selected members embark the Landing Ship Infantry H.M.S. Princess Joséphine Charlotte (LSI(S)-4238). This ship ferries the men from Ayr to Falmouth, indicating that the unit is finally moving towards active engagement. The high spirits are bolstered by decent food and duty-free cigarettes, reinforcing the sense that the Commando is gearing up for an important mission.
| February 1942 |
| Royal Navy |
The naval aspect of Operation Chariot is entrusted to Commander Robert Ryder age 34, a naval veteran with a varied and eventful career, including submarining, Arctic expeditions, and surviving a torpedo attack. Temporarily in a desk role due to an unfortunate maritime collision, Ryder is tasked with infiltrating Saint Nazaire with a sizable commando contingent using an old destroyer, ensuring its successful collision with the dock’s caisson, and overseeing the subsequent extraction.
In advance of the main convoy, the S-class submarine H.M.S. Sturgeon is set to depart, positioning itself to serve as a navigational reference for guiding the convoy into the Loire estuary.
For this, the H.M.S. Campbelltown is selected. The H.M.S. Campbeltown is sent to Devonport for repairs in January. It is during this time; the destroyer is selected for a special operation and is withdrawn from regular service for modifications. The H.M.S. Campbeltown, originally a U.S. destroyer, the U.S.S. Buchanan (D.D.131), is transferred to the British Royal Navy in 1940 as part of the Lend-Lease program.
The aging destroyer, Campbeltown, is viewed as dispensable, leading to its selection as the ship designated for ramming. Throughout February, it undergoes a series of changes. Two of its funnels, specifically the third and fourth, were taken out, and the remaining pair were slanted to mimic the look of a German Mowe-class destroyer torpedo boat.
The Campbeltown’s weight is reduced for two reasons. First, to be able to enter the shallow waters of the Loire estuary. Second, to allow the ship to reach the necessary speed to ram the gates of the dock. This is achieved by removing much of her armour, all non-essential equipment, provisions and the decks are cleared. In spite of that, the bridge structure and wheelhouse rereive enhanced armour. Additionally, to safeguard the commandos stationed on the open deck, two layers of armour are installed along the ship’s sides.
On the weaponry front, a 12-pounder gun is added to the front while eight 20 mm Oerlikon anti-aircraft guns are placed on the top deck.
The destroyer is prepared with an explosive device made up of 24 Mark VII depth charges, holding 4.1 tons of the explosive, amatol. In the early stages of planning, the original intent is to transport three tons of explosives, divided into 23-kilogram charges, forward after ramming. These charges would then be ignited with a 15-minute delay fuse once everyone had safely evacuated the vicinity.
However, Lieutenant Tibbits proposed an alternative strategy. His idea is to position a massive demolition charge deep within the ship’s structure, equip it with multiple independent layers of fusing, and ensure its placement against the caisson by sinking the ship right where it needed to be. This would also prevent the ship from being towed away before the explosion.
To achieve this, Tibbits plans to use twenty-four depth charges, interconnected through fusing, housed in a compartment made of concrete and steel, located at the top of a fuel tank directly behind the forward gun support. He accurately predicts that the forward section of the ship, upon ramming, will not buckle to such an extent that the charge will be compromised.
Tibbits’ group tests two types of fuses: a 2.5-hour time pencil and an 8.5-hour acetone-cellulose delay. During testing, the time pencils ignite punctually, while the AC fuses are delayed by two hours. The primary distinction between the two is that the time pencils can be triggered remotely from a hidden compartment within a wardroom table leg. In contrast, the AC fuses, once set to the desired delay, are directly embedded within the charges, eliminating the need for any further human intervention.
Lieutenant-Commander Stephen “Sam” Beattie is appointed to Captain of the H.M.S. Campbeltown. The ship’s crew is trimmed down to seventy-five members. Besides the ship’s crew approximately seventy-nine commandos will travel onboard of the H.M.S. Campbeltown to Saint Nazaire to perform their missions in the harbour.
In the event that Campbeltown is incapacitated or immobilised before reaching the Normandie Dock, Motor Launches 160, 270, 298, and 446 are on standby to evacuate the crew and ensure the landing of her commandos. Should this scenario unfold, the explosives aboard the H.M.S. Campbeltown are set to detonate after the final withdrawal of the small boats. If the H.M.S. Campbeltown is absent from the scenario, Motor Torpedo Boat 74 is assigned to launch an attack on the caisson with its specialised torpedoes, aiming to accomplish the mission objectives in the face of adverse circumstances.
If H.M.S. Campbeltown successfully navigates the gauntlet of German defences and reaches the caisson, the condition of the caisson—whether open or closed—will determine the next steps of the operation. In the case that the caisson is closed, the strategy is for Campbeltown to ram it at full speed. This will ideally allow the ship’s bow to mount the caisson, creating a makeshift bridge enabling rapid disembarkation of the troops directly onto the dry-dock.
Alternatively, if the caisson is open, Commander Beattie is to position the H.M.S. Campbeltown parallel to the dry-dock wall on her port side. There, the plan is to sink the ship right next to the caisson sill to ensure the impact of the explosion will be as significant as possible, potentially causing irreparable damage to the dry-dock facilities.
In the scenario where the dock area is clear but the inner caisson remains closed, Lieutenant-Commander Wynn is assigned to bypass H.M.S. Campbeltown with his Motor Torpedo Boat 74 and deploy the specialised torpedoes against the caisson itself. This action aims to destroy or damage the caisson, thereby fulfilling one of the key objectives of the operation—to render the dry-dock unusable by the enemy fleet.
To facilitate the movement of the remaining commandos, 12 Fairmile B Motor Launches (ML) from the 20th and 28th Motor Launch flotillas are designated. They are further fortified with two Oerlikon 20 mm guns positioned at the bow and stern, supplementing their existing twin 0.303-in Lewis guns.
During the latter stages of planning, a concerning oversight came to light: the fleet is ill-equipped to confront potential enemy vessels they might encounter en-route or within the estuary. To address this, four Motor Launches from the 7th (Dartmouth) Flotilla are incorporated. However, due to the time constraints, their primary armament isn’t updated. As a result, these torpedo-armed launches continue to be equipped with their outdated Hotchkiss guns. These launches are assigned to engage any German vessels encountered in the estuary rather than transport commandos. Every Motor Launch is outfitted with a 2,300 litres auxiliary fuel tank on the upper deck to enhance their operational range.
A Fairmile C Type Motor Gun Boat, known as MGB 314, under command of Lieutenant Dunstan Michael Carr Curtis serves as the headquarters vessel for the raid. On board are the Naval Headquarters Party under command of Commander Robert Edward Dudley Ryder, the Commando Headquarters Party under command of Lieutenant Colonel Augustus Charles Newman, an Intelligence Detachment under command of Captain Antony Frederic Aimé Imbert Terry and journalist John Northcote Gordon Holman of the Exchange Telegraph.
Although the planners wanted a second Motor Gun Boat, they receive MTB 74, a Vosper Thornycroft 70, Motor Torpedo Boat, under the command of Sub-Lieutenant Robert Charles Michael Vaughan Wynn, the 7th Baron Newborough. Sub-Lieutenant Michael “Micky” Wynn’s vessel is a late addition to the raid. MTB 74 was modified for an intended assault on the battle-cruisers Scharnhorst and Gneisenau in Brest but was never deployed for this purpose. The Motor Torpedo Boat has significant fuel consumption and is limited to either a pace of 6 knots or 33 knots. This limitation means the Motor Launch can only operate in a stop-start fashion, necessitating intervals of waiting. Given its inefficiencies, it becomes evident the boat will require towing if deployed as it is. The boat’s limitations draw criticism, prompting urgent modifications before the mission. The boat is equipped with two motorless torpedoes mounted on its foredeck. Each torpedo contains 1,800 pounds of delayed-action explosives. However, for these torpedoes to be effective, MTB 74 needs to approach its target very closely. The vessel has a dual mission: If the exterior gates of the Normandie dock are ajar, its task is to launch its torpedoes at the interior dock gates. Conversely, if these gates remain shut, the boat’s objective shifts to targeting the gates of the old entrance leading into the Saint Nazaire basin.
To maintain the utmost secrecy, the vessels involved are referred to collectively as the 10th A/S Striking Force, and all associated training programs are labeled under this guise.
Several measures are implemented to obscure the true nature of the operation and to avoid drawing undue attention or speculation. One such measure is the issuance of tropical clothing to the crews of the Motor Launches, which is intended to mislead and suggest a different climate or region of engagement other than the actual target.
| Commando’s |
Lieutenant Colonel Charles Newman, a seasoned Territorial Army officer and pre-war building contractor, is selected to command the Commando detachment in the operation. Despite being relatively senior at 38, his rapport with his subordinates and undeniable leadership capabilities makes him a respected figure. The bulk of the infantry force is constituted by No. 2 Commando, supplemented with personnel from other units to ensure a diversified combat experience. The Commandos embark on a rigorous regimen of nocturnal urban warfare training. During the training period the commandos are split into three distinct groups for the mission. Group One and Two will land by Motor Launches while Group three will start their mission from the H.M.S. Campbeltown.
Each group further branches into assault, demolition, and protection units. The assault units are tasked with paving the way for the subsequent teams. Demolition units, bearing explosive devices and armed only with sidearms, will incapacitate the strategic targets. Protection teams, equipped with Thompson submachine guns, are responsible for safeguarding the demolition units during their operations.
| Demolition |
Demolition expertise is essential for Operation Chariot. Fortunately, Captain W. H. Pritchard of the Royal Engineers is available.
Prior to the war, Pritchard had apprenticed at the Great Western Railway dockyards, and his father had overseen the Cardiff Docks. During his 1940 tenure with the British Expeditionary Force in France, Pritchard was assigned the duty of strategizing how to incapacitate French dockyards in the event of their capture. Among the docks he assessed was Saint Nazaire. He subsequently pens a comprehensive report detailing the methodologies to disable the dock. His report, co-authored with Captain Bob Montgomery, underscores the need for precision in placing charges, something airstrikes couldn’t achieve. Drawing personnel from various Commando units, the demolition teams are meticulously trained across various locations to simulate real-life conditions, exposing them to diverse scenarios and preparing them for uncertainties.
The very selection of the demolition units indicates the operation’s high stakes. Demolition teams from Commando Number 1, 3, 4, 5, 9 and 12 are chosen. This assemblage of specialised soldiers is vital for the success of the mission given their distinct skills and combat experiences.
Located on the Firth of Forth, Burntisland is chosen for its strategic location and facilities. Here, the demolition teams undergo a rigorous training. This isn’t just about handling explosives but understanding the nuances of dockyard architecture and the effective ways to render them inoperative. The crux of their training is the placement of explosive charges at precise locations to ensure maximum damage.
The Rosyth Dockyard training phase allows the demolition teams to familiarise themselves with a real-world dockyard setting. It is here that they learn about the weak points of a dockyard. The essence is to replicate, as closely as possible, the conditions they will face in the enemy territory.
Transporting the teams to the commercial ports of Cardiff and Southampton is a masterstroke. By simulating operational conditions, the commandos prepare for the challenges they will face. Here, the emphasis is on real-time challenges: operating in the dark, working with reduced numbers due to “casualties”, and ensuring that tasks are completed within the set timelines. Such training ensures that they are not just prepared physically, but also mentally, for the myriad challenges.
In Southampton, the King George V Dry Dock, which mirrors the Normandie Dock, plays a pivotal role in their training. The exercises here are not just about placing charges but understanding the intricate workings of a dock. For example, Lieutenant Chant’s exercise of descending into the pumping chamber reflects the need to target the very heart of the dry dock operations. Similarly, exercises by Lieutenants Brett, Burtenshaw, Purdon, and Smalley indicate the comprehensive nature of their training, ensuring every aspect of the dock is targeted for maximum damage.
The swapping of teams between Cardiff and Southampton after a week ensures that all commandos receive a well-rounded experience. This is essential to prepare the Demolition Teams for any eventuality, given that in real combat situations, unforeseen challenges will occur.
| Objectives Group One |
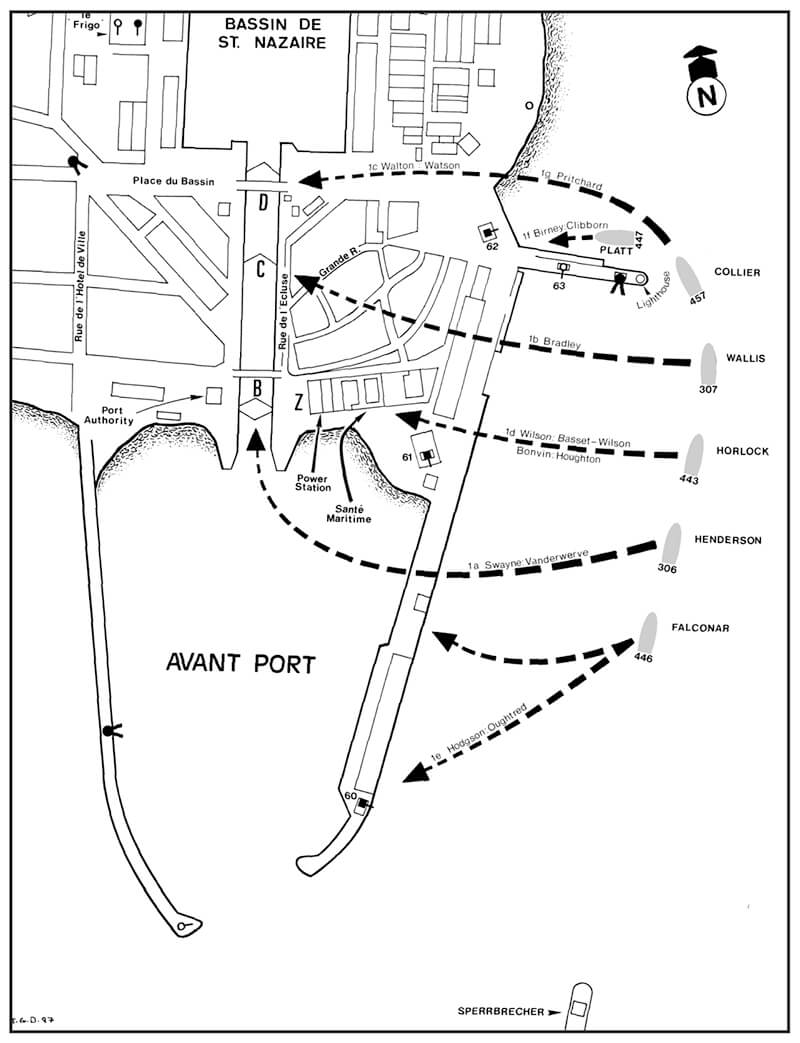
Group One, commanded by Captain Bertie Hodgson, consists of eighty-nine men. The men are transported into Saint Nazaire on Motor Launches 447, 457, 307, 443, 306, and 341. Their main mission is to secure the Old Mole and neutralise anti-aircraft gun placements around the southern docks. Once these objectives are achieved, they are to advance into the old town and destroy the power station complex, bridges, and locks leading from the Avant port into the basin. This strategic demolition is vital to preempt a German counterattack through those routes. Securing the mole is also of paramount importance, as it will serve as the extraction point post-operation.
When the Commandos from Group One accomplish their mission, the Old Town will be effectively shielded by water on three sides, with the security on the remaining side ensured by the Commandos from adjoining groups. This fortified position will then serve as a stronghold, enabling a well-coordinated and successful evacuation when necessary.
The separate assault, demolition and protection parties are instructed as followed.
Assault Party 1F of Group One will be the first to land on the Old Mole from Motor Launch 447. The party consists of fifteen members and is led by Captain David Leslie Birney along with Lieutenant Bill Clibborn. The party is tasked with clearing and securing the Old Mole. After establishing a bridgehead at the landward end of the mole. From this strategic position, the assault party can then offer protection to the remaining five Motor Launches both during their initial landings and later as they attempt to re-embark troops to return to England. A crucial secondary task involves neutralising gun position 62, housed within a nearby building. This action will enable the structure to serve as a Regimental Aid Post for the two Commando medical doctors who are scheduled to land shortly afterwards. Their presence is essential for providing immediate medical attention to the wounded during the operation.
Motor Launch 341 is transporting Assault Party 1 E. This second fifteen-man unit is led by Captain Bertie Hodgson and Lieutenant Neil Oughtred. Also onboard are Captain Mike Barling, the first of the Commando medical officers, along with two Medical Orderlies.
Once landed, Hodgson’s group is tasked with advancing through Birney’s established bridgehead and moving southward to take control of the long East Jetty in the Avant Port. This strategic position, bolstered by gun emplacements M 60 and M 61, is critical as it allowed control over the flanks of any vessels entering or exiting the Mole. Following the securement of the Avant Port, Hodgson’s team is then charged with establishing a picket line and patrolling the densely constructed Old Town area.
From Motor Launch 457 lands a contingent of 15 Commandos. Group 1C is led by Lieutenant Philip Walton. Upon landing this group is divided into three parties: the Demolition Party under the leadership of Lieutenant Philip Walton, the Protection team commanded by Second Lieutenant Bill ‘Tiger’ Watson, and the Demolition Control party led by Captain Bill Pritchard of the Royal Engineers. The demolition party, pairs with a five-man protection squad commanded by Second Lieutenant Bill ‘Tiger’ Watson and are to head westward to engage target group ‘D’ located at the northern extremity of the New Entrance. Here, Walton and his four demolition experts are responsible for rigging the lifting bridge and lock-gate with explosives. Simultaneously, Watson’s team is to provide protection, ready to repel attacks from various angles.
Due to the strategic significance of their position, this unit faces vulnerability to enemy forces. Nevertheless, the demolition process cannot commence until all the planned demolitions across different sites are set up, since the execution requires a synchronised detonation of all the interconnected explosives. Captain Bill Pritchard, who is in overall command of the demolitions within this area, accompanies Walton and Watson, leading his own small Control Party to oversee the precise execution of their segment of the operation.
This group is divided into three parties: the Demolition Party under the leadership of Lieutenant Philip Walton, the Protection team commanded by Second Lieutenant Bill ‘Tiger’ Watson, and the Demolition Control party led by Captain Bill Pritchard of the Royal Engineers.
Motor Launch 307 transports a seven-man 1 B Demolition Party headed by Captain Bill Bradley, while their Protection Party led by Lieutenant Joe Houghton is on board ML 443. The ship also carries, a medical team led by Captain David Paton from the Royal Army Medical Corps and a second journalist, Edward Gilling for the Exchange Telegraph. Captain Bradley’s mission is to destroy the central lock gates located at the New Entrance.
Besides the five men from the Protection Party from Captain Bill Bradley, Motor Launch 443 carries a group 1 B’s, 15-man team under the leadership of Lieutenant Wilson, Lieutenant Bonvin, and Second Lieutenant Basset-Wilson. They are assigned to destroy the Power Station complex, including the Boilerhouse, Impounding Station, and Hydraulic Power Station. at target group “Z” located on the east side of Bridge “B”.
Lieutenant Joe Houghton is designated to lead the protection party, ensuring the safety of the demolition teams as they carry out their precise and dangerous tasks.
Once the demolitions were successfully completed, all three demolition parties are instructed to retreat to the secure zone established by Captain David Birney’s bridgehead. This withdrawal was critical for regrouping and ensuring the safety of the personnel following the completion of their mission objectives.
The last of the party from Group one will land from Motor Launch 306. It transports Lieutenant Ronnie Swayne’s nine-man Demolition Party. The team is tasked with targeting the lock gates and swing-bridge ‘B’ at the southern end of the New Entrance, in proximity to target group “Z”. This action was essential to ensure the complete isolation of the Old Town area.
The Protection Party for Swayne’s unit, consisting of five men, is led by Lieutenant John Vanderwerve. While it is standard procedure for demolition teams to retreat alongside their protection squads, the unique circumstances surrounding the New Entrance targets necessitated a different approach. Given the robust construction of these targets, it is anticipated that they might not be entirely destroyed. Consequently, it is determined that the protection squads under Lieutenants Watson and Vanderwerve will hold their positions until the final phase of the withdrawal. This strategy is to prevent any potential German forces from infiltrating across the remnants of these critical structures.
In light of Group One’s mission’s high stakes, every participating group is emphatically instructed on the vital importance of securing the Mole. The success of Captain Birney’s initial landing is crucial, but should his efforts fail, it is incumbent upon the subsequent parties to prioritise the Mole’s capture and clearance above all else.
The intricate design of the operation requires a seamless execution of tasks and precise timing. The assault on the Mole, an indispensable part of the plan, depends heavily on the ordered and successful landing of most parties. Failure to land as planned will drastically diminish the likelihood of seizing the strategic position. Given that the Mole is the designated rallying point for all forces preparing to withdraw, its control is essential for the retreat’s success.
| Objectives Group Two |
Group Two, commanded by Captain Burn and traveling on the Motor Launches 192, 262, 267, 268, 156, and 177, aims to land at the old entrance to the Saint-Nazaire basin. Their tasks encompass neutralising local anti-aircraft stations, destroying the German headquarters, incapacitating the locks and bridges at the basin’s old entrance, and fortifying defenses against potential counterattacks from the submarine base.
The Motor Launches designated for Group Two are tasked with advancing towards the Old Entrance of Saint Nazaire to disembark their Commandos. When trying to land their men there could be a possibility that a boom is blocking their way in. In that case, the boats will have the discretion to choose their own landing spots. This choice will be contingent on how much the presence of enemy ships already docked within the narrow channel hindered access to the quay.
Upon disembarking, the Group Two Commandos are instructed to take control of the area both to the north and south of the Old Entrance. They are to coordinate with the forces from Campbeltown to secure control over the crucial triangle of land that lay between the dry dock and the Bassin de Saint Nazaire. Their movement is planned to progress southward, traversing the warehouse district to link up with the zone of Group One.
This would effectively seal off the entire area designated for the night’s demolition activities. Establishing this controlled sector is also pivotal to facilitating a structured and systematic retreat for the northern groups when necessary.
The separate assault teams within Group Two have the following tasks:
Captain Micky Burn and Lieutenant Tom Peyton’s Assault Party 2 D will land from Motor Launch 192 at the Old Entrance. The party’s overall objective is to take on targets along the strip of land dividing the Bassin de Saint Nazaire from the Bassin de Penhoët. It’s their responsibility to ensure that the landings of the H.M.S. Campbeltown are not hindered by enemy guns positioned on the pump-house, known as positions 64 and 65. In their designated target zone, the party is also tasked with disabling two wooden flak towers, as well as neutralising any gun placements near the Pont de la Douane. Moreover, they are to establish a defensive blockade at the eastern terminus of the inner caisson to thwart enemy attacks originating from the north side of the oil storage tanks.
Motor Launch 262 brings in Lieutenant Mark Woodcock leading a nine-man demolition team, along with Lieutenant Dick Morgan’s five-man protection squad. Tasked with a critical operation in a zone vulnerable to enemy fire from naval vessels stationed in the Bassin, Woodcock’s mission is to rig the Old Entrance’s lock-gates and swing-bridge for demolition.
If the bridge is positioned to allow crossing, the strategy is to detonate the lock-gates first. The bridge will be destroyed subsequently, but only after ensuring all allied parties to the north have retreated across it. However, if the bridge is not in the crossing position, Woodcock is to attempt to make it operable for allied traffic. In the situation where the bridge remained immovable, the directive is to demolish it on the spot while keeping the lock-gates intact. This is to ensure the Commandos can use them for safe passage during their withdrawal towards the Mole for re-embarkation.
Motor Launch 267 is the ship that disembarks Regimental Sergeant Major Alan Moss along with the rest of Colonel Newman’s select reserve unit. This contingent, although compact in size, hold a significant role. Stationed at the ready for any directives from Colonel Newman, their primary objective upon landing is to engage with enemy vessels positioned in the adjacent Bassin. Additionally, they are to target any U-boats that lay exposed, not adequately shielded by the concrete walls of their protective shelters.
Motor Launch 268, is tasked with delivering Group 2 C. The is composed of Lieutenant Harry Pennington’s five-man demolition squad and their protection team, led by Lieutenant Morgan Jenkins. Travelling with them is a 7-man contingent from Regimental Sergeant Major Moss’s Party on Motor Launch 267. Their mission of Lieutenant Pennington is to converge on the position held by Group 2 D from Captain Micky Burn.From here they have to take charge of demolishing the Pont de la Douane, and thereby thwart any potential German counterattacks over this bridge. Positioned strategically to dominate both the bridge and the inner caisson is a battery of guns located on the old Douaniers’ building. If these guns are operational, Pennington’s additional responsibility is to incapacitate the building using incendiary devices. After executing all his assigned tasks, Pennington is to initiate a retreat, leaving Jenkins and his squad behind to inhibit any German forces attempting to advance from the west bank.
The last two Motor Launches of Group Two transport a combined assault team, designated as Group 2 E under command of Captain Dick Hooper. Motor Launch 156 brings in Captain Hopper and a 14 Commandos under his command. Motor Launch 177 carries Troop Sergeant Major George Haines and 14 menlisted men of Captain Hooper’s assault team. Their mission is to engage targets both to the north and south of the Old Entrance, specifically aiming to neutralise two gun emplacements located on the foreshore. Additionally, they are tasked with neutralising any hostile ships that might be confined within the dry dock. Once they have successfully carried out their assignments, Captain Hooper is instructed to promptly offer his team’s services to Colonel Newman for any further operations deemed necessary.
| Objectives Group Three |
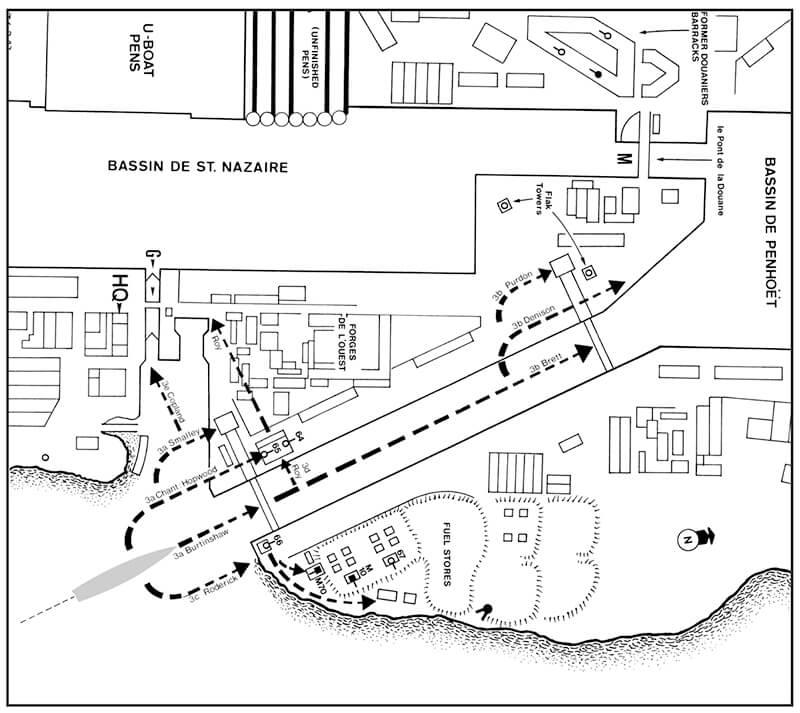
Group Three is commanded by Major William ‘Bill’ Copland, who also holds the position of deputy commander for the commandos. Their assignment is to solidify the area surrounding Campbeltown, incapacitate the dock’s water-pumping and gate-opening mechanisms, and neutralise nearby subterranean fuel reserves. These men are divided into headquarters, assault, protection, and demolition parties each with a specific task.
If fortune favoured the H.M.S. Campbeltown and Commander Beattie managesto ram the caisson as intended, a rapid and efficient disembarkation of her Group Three Commandos is crucial, taking advantage of the momentary disarray among the defending forces.
During the approach, the demolition teams will remain concealed below decks, while the remaining forces, including the protection parties and the assault troops led by Lieutenant Johnny Roderick and Captain Donald Roy, will take cover behind screens aft of the superstructure. The demolition and protection teams have to be ready to spring into action for their designated shore attacks, whereas the assault teams are tasked with supporting the naval fire by engaging German positions as the ship rams the caisson. To bolster this effort, two 3-inch mortars are mounted on the deck near the bridge, complementing the firepower from the Oerlikon, Bren, and Tommy guns, to provide a formidable counter-barrage.
Upon the successful ramming, the assault troops are to disembark first, quickly overtaking the defences near the caisson. Lieutenant Roderick’s team, exiting from the starboard bow, is assigned to neutralise a series of gun positions and to set up a blockade to prevent any counter-attacks across the caisson. If possible, they are also to use incendiaries against the nearby oil-fuel stores.
Simultaneously, Captain Roy’s team will disembark from the port side with the mission of seizing the guns on the pump-house roof, which pose a significant threat due to their vantage point over Campbeltown’s deck. Roy’s plan involves the use of scaling ladders and grenades, a risky operation for which Sergeant Don Randall volunteers to be part of the assault. After securing these positions, Roy’s team is to advance to bridge ‘G’ to establish a bridgehead, ensuring a route for the northern parties to retreat through later on.
From there on the other parties will leave the H.M.S. Capmbeltown.
Demolition Headquarters under command of Captain Robert Kerr Montgomery is responsible for the control of the Group 3 Demolition Parties.
As said earlier Group three has two Assault Parties. Assault Party 3C is under command of Lieutenant John Morgan Roderick. Their primary target is to attack the Flak positions at the south-east corner of the ‘Normandie’ dock. After which they must destroy fuel storage units and prevent the enemy from approaching from the north-east towards the landing area.
Assault Party 3D under command of Captain Donald William Roy is to target the Flak positions on the roof of the Pumping Station and Bridge ‘G’. At the latter they have to form a bridgehead for covering the withdrawal and resist any attacks from vessels in the Bassin de Saint-Nazaire.
Group 3 has 5 Demolition Parties:
Demolition Group 3A1 is commanded by Lieutenant Robert J. G. Burtinshaw. The primary objective of this group is to destroy the outer caisson if H.M.S. Campbeltown fails to ram the dock. When the ship succeeds in doing so they have to reinforce Demolition Party: Group 3B under command of Lieutenant Gerrard Brett team at the inner caisson of the Normandie Dock.
Demolition Group 3A2 led by Lieutenant Christopher John Smalley. Their task is to destroy the southern Winding House.
Demolition Group 3A3 headed by Lieutenant Stuart Whitemore Chant is tasked destroying pumps and motors of the Normandie Dock inside the Pumping Station.
The three 3A Demolitions Groups are protected in their tasks by Protection Group 3A commanded by Lieutenant H.G.L “Hoppy” Hopwood.
Demolition Group 3B1 under command of Lieutenant Gerrard Brett has to move along the west side of the dock after leaving the H.M.S. Campbeltown and destroy the inner caisson.
Demolition Group 3B2 commanded by Lieutenant Corran William Brooke Purdon also has to move along the west side of the dock and from there destroy the northern Winding House.
These two Demolition 3B groups are protected by Protection Group 3B led by Lieutenant M.C. ‘Bung’ Denison.
Auxiliary Headquarters is commanded by Major William Oranmore Copland. This group is responsible for the overall control of Group 3. Major Copland is designated as the last to depart from the H.M.S. Campbeltown, leading a compact unit with the imperative to quickly move through Colonel Newman’s headquarters to the Old Mole. There, in collaboration with the Naval Piermaster, he will orchestrate the extraction process. Following the execution of their duties onboard, the Campbeltown’s sailors are to disembark onto the dock, awaiting evacuation by motor launches (near the Old Entrance. Should this route be compromised, their alternative was to proceed to the Mole for evacuation.
| General Plan |
The pivotal moment of the operation, known as ‘Zero hour,’ is scheduled for 01:30 on the morning of Saturday, March 28th, 1942. The plan strictly allocated a maximum of two hours for the Commandos to conduct their operations on land, with all Motor Launches expected to vacate the Mole by 03:30, initiating their return journey.
The contingency plans for an emergency evacuation are as clear as they are urgent, with multiple redundant systems in place to ensure that no one missed the call to retreat. The combination of visual and auditory signals is designed to cut through the chaos of battle:
- Visually, the firing of 35-star red and green rockets will serve as a stark and unmistakable signal even amidst the turmoil of combat. These pyrotechnics will be easily identifiable by all participating units, signaling them to cease their current engagements and prepare for immediate evacuation.
- Audibly, the operation plans to employ the loud klaxons of the Motor Launches as well as loud-hailers broadcasting the code-word “Ramrod.” These sounds are chosen for their ability to penetrate other noises on the battlefield, ensuring that even in the heat of combat, the command to retreat will be heard.
Upon recognising any of these signals, all ranks are instructed to make haste to the Mole, which is crucially to be captured and hold by the assault force. Holding the Mole is essential as it serves as the primary point of extraction, without which the orderly evacuation of the commando force will be significantly jeopardised.
The retreat itself is also meticulously planned. It is to unfold in four distinct phases, starting with the withdrawal of all demolition teams, except for Lieutenant Mark Woodcock’s team at bridge ‘G’. The subsequent stages are designed to methodically reduce the size of the defended area, eventually consolidating at the position secured by Birney’s bridgehead.
Lieutenant Verity is tasked with managing the boarding of up to forty men onto each Motor Launch and ensuring their expedited departure, as each craft is to make its way independently and as swiftly as possible toward the designated rendezvous point with the Destroyers Atherstone and Tynedale.
Wounded personnel, after receiving initial medical care at the Regimental Aid Post are to be moved to the two Motor Launches specially equipped with medical staff from Falmouth. Once these Motor Launches are filled with the injured, they will set off to join the rest of the escapees. Any Motor Launch too heavily damaged to make the journey back are to be intentionally sunk to prevent enemy capture.
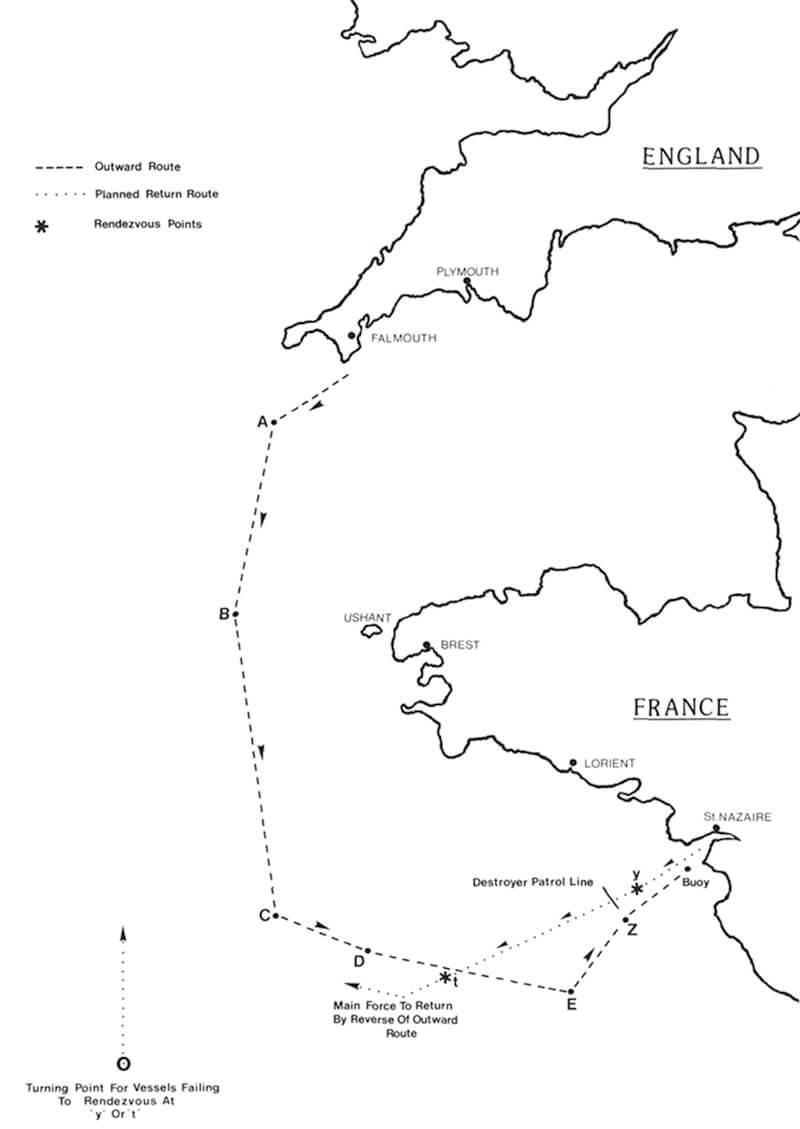
The Motor Launches that manage to evade the coastal batteries and other dangers are to regroup and make their way back to British shores, retracing the route they took to reach the operation site. This careful planning underscores the high stakes of the operation and the importance of a coordinated and efficient evacuation to ensure the maximum possible survival of the personnel involved.
| March 1942 |
| March 3rd, 1942 |
The operation, christened Operation Chariot, receives begrudging approval. However, as plans solidified, the Royal Air Force’s enthusiasm diminishes, owing to their reluctance to target unchosen sites and inadequate bomber allocation. As a result, the number of bombers is lowered to five Royal Air Force squadrons. The squadrons involved are No. 51 Squadron, No. 58 Squadron, No. 77 Squadron, No. 103 Squadron, No. 150 Squadron, comprising 35 Armstrong Whitworth Whitleys and 27 Vickers Wellingtons.
The British Prime Minister Winston Churchill, too, harbours reservations.
| March 12th, 1942 |
Landing Ship Infantry H.M.S. Princess Josephine Charlotte arrives in Falmouth. After disembarking the men of No. 2 Commando resume their regular training routine.
The Naval force designated for this task converges at Falmouth, here the vessels undergo an intensive training. Furthermore, the troops’ embarkation for training is publicly connected to Exercise “Vivid,” a genuine defensive exercise intended to test the defenses of Plymouth. This serves as both a cover story and an actual drill, although it somewhat inconveniently intersected with the “10th A/S Striking Force” training schedule.
| March 18th, 1942 |
Lieutenant Colonel Newman finally provides the details of the upcoming operation to the assembled Commando. Lieutenant Colonel Newman’s presentation distilled an 80-page operational order into a clear and concise briefing, which concludes with resounding approval from the men, despite not revealing the exact location of their mission.
Speculations start ensueing about the potential target, with guesses ranging from Cherbourg to L’Orient, Brest, or Le Havre.
It is noted that an unusually high number of officers from No. 2 Commando have gathered at Falmouth, prompting questions about who is overseeing the remaining men in Ayr. With the arrival of Major Bill Copland and others, the number of officers present with the Commando at Falmouth reaches 40, including ‘guest-worker’ officers from other units. This leads to an unusually high officer-to-enlisted-men ratio, with one officer for every five and a half other ranks, a detail that stands out to the men and indicates the significance and perhaps the complexity of the operation they are about to undertake.
| March 19th, 1942 |
The gravity of the mission becomes when Lieutenant Colonel Newman conveyes a message from Admiral Lord Louis Mountbatten. in this message Mountbatten bluntly states that the high command is writing the Commando force off, having little hope for their safe return post-mission. Despite this daunting prospect, Mountbatten’s offer for any man to opt out of the operation is declined by all. The Commandos chose to stay and face the mission ahead.
| March 23rd, 1942 |
After completing Exercise Vivid the force returns to Falmouth and is held on high alert, with its interactions with the shore greatly minimised. It is during this time that the operation’s details are disclosed to the officers and key ratings, although the exact location of their target is still kept confidential to prevent any leaks or compromises in the operation’s security.
| March 24th, 1942 |
Detsroyers H.M.S. Tynedale and H.M.S. Atherstone, arrive at Falmouth. Commander Ryder and his staff boardthe H.M.S. Atherstone, establishing it as a command vessel for the impending action.
During the nights that followed, specifically the 24th and 25th of March, there is a flurry of activity as military stores and equipment are moved from the accommodation vessel, the Landing Ship Infantry H.M.S. Princess Josephine Charlotte, to the destroyer H.M.S. Campbeltown and the motor launches that will participate in the raid. The Landing Ship Infantry Princess Josephine Charlotte has been housing the troops until this point, but with the arrival of the destroyers, the next phase of preparation is underway.
The transfer of equipment at night is likely an attempt to minimise detection and maintain the element of surprise. The secrecy of the operation is paramount, and as such, the troops are kept out of sight once they are embarked on their respective vessels. This action will have been part of the final preparation before the raid.
| March 25th, 1942 |
The entire force to be deployed during this operation is assembled in the harbour of Falmouth, Cornwall, Great Britain. The fleet consists of three destroyers, the H.M.S. Campbeltown, the Hunt-class destroyers H.M.S. Tynedale and the H.M.S. Atherstone, Motor Gun Boat 314, Motor Torpedo Boat 74, 8 Motor Launches of the 28th Motor Launch Flotilla, 4 Motor Launches of the 20th Motor Launch Flotilla and 4 Motor Launches of the 7th Motor Launch Flotilla.
The departure date is set for March 27th, 1942. However, since everything is ready and there is a chance that the good weather will change, Ryder is given permission to leave a day earlier.
During the evening the Commando’s are ordered to embark the ships that will bring them in. Marking the transition from preparation to execution of the mission. Every measure is taken to ensure that the troops remain concealed post-embarkation to preserve the security and stealth required for the success of the operation.
| Operation Chariot |
| March 26th, 1942 |
0930 The order “Preparative Chariot” from the Commander-in-Chief, Plymouth, Admiral Forbes, is given. On the verge of their departure, the Commando Force learns that their destination is Saint-Nazaire.
12.30. The assault force receives the executive order “Carry Out Chariot” from Admiral Forbes’ Headquarters signifies the official start of the raid. Colonel Newman, with the remainder of the Headquarters Staff, embarks in the H.M.S. Atherstone.
14:00. The small boats sail from Falmouth, followed by the three destroyers H.M.S. Campbeltown, H.M.S. Tynedale and H.M.S. Atherstone. Notably, each launch carries two large petrol drums on deck, vital for refueling on the return journey. While the presence of these fuel tanks is initially met with concern due to the risk of them igniting in an attack, the realisation of their necessity for the mission’s success leads to a shift in perception, and they are regarded with a sense of endearment.
Once the convoy is complete, they form up into three columns and sail south-west towards the first waypoint at thirteen knots. Motor Gun Boat 314 is towed by the H.M.S. Atherstone while Motor Torpedo Boat 74 is towed by the H.M.S. Campbeltown. These craft do not have the range to reach Saint-Nazaire unaided. The convoy is accompanied by a single fighter patrolling overhead. Once clear of land the ships adopt the disguise of an anti-submarine sweep.
The weather during the afternoon is conducive to the operation. With an East-Northeast wind at force 4 on the Beaufort scale, which indicates a moderate breeze, and a considerable amount of haze, conditions are favourable for the force to maintain a degree of concealment as they move. Haze can be advantageous in naval operations as it can help to obscure a fleet from long-range observation.
19.11. The convoy reaches the first waypoint and starts heading slightly west of south. With night falling, the fighter escort heads home. Ryder orders a formation change to Night Cruising Order. Convoy speed is fourteen knots.
23.00. The second waypoint is reached. The new course is now beginning to take the ships directly into enemy waters and routes. They are also within range of German airfields in northern Brittany.
| March 27th, 1942 |
02.14. Lieutenant Platt, Royal Navy Reserve, in Motor Launch 447 mistakenly reports a U-Boat sighting.
02:30. The weather situation changes as the haze clears. The break of dawn brings with it extreme visibility, which will have been a double-edged sword. On one hand, better visibility will aid in navigation and identification of targets or hazards; on the other hand, it will also make the force more visible to the enemy, potentially increasing the risk of detection as they approach their objective.
This shift in conditions will have required adjustments in the operation’s execution, with a heightened need for caution as they will have been more exposed to German reconnaissance and defensive measures. The clear visibility at dawn will have underscored the importance of timing and stealth in the final approach to the target at Saint-Nazaire.
06:50. The three destroyers hoist German Ensigns, while in the Coastal Forces ships the White Ensigns are hauled down and stowed.
07.00. The convoy reaches waypoint three and turns to port, onto course 112 degrees. Speed is reduced to just eight knots. The anti-submarine sweep formation is adopted once more in case the ships might be under observation.
07:20. H.M.S. Tynedale reports it seeing a submarine and proceeds towards it at high speed. At a distance of about 8 kilometres, the submarine signals a recognition code that is answered by the H.M.S. Tynedale with five long flashes, seemingly satisfying the submarine, which continues on the surface.
07:45. The H.M.S. Tynedale raises the white ensign and fires upon the submarine from approximately 4,5 kilometres away. The submarine takes an evasive action and submerges
07:58. A depth charge attack from the H.M.S. Tynedale forces the submarine to resurface, where it comes under heavy fire and takes on a significant list to port before disappearing beneath the waves again. After which the H.M.S. Atherstone joins the H.M.S. Tynedale in the pursuit of the submarine.
09:20. Both destroyers return to their original course to the southwest to rejoin their fleet, taking an indirect route. They assume the submarine might have been destroyed, although there remains a chance that it can resurface and transmit a report to the enemy. Commander Ryder believes that since the submarine has not observed the motor launches, it will only report sighting two destroyers.
Contrary to these assumptions, the submarine, identified as U-593 on a return patrol, has actually observe some of the Motor Launches before the attack and is not destroyed.
11.00. The convoy resumes its south-easterly course.
12:00. Close to waypoint four, two French trawlers, are sighted. Both trawlers, including the Nungesser et Coli, F.267, are sunk after both crews are taken onboard H.M.S. Tynedale.
12:40. The Command-in-Chief Plymouth radios that five German torpedo boats, which are previously reported at Saint-Nazaire, are instead spotted at Nantes two days earlier on March 25th, 1942.
Unbeknownst to the British, the German Group Command had actually received a report from U-593 three hours earlier. However, this information inadvertently benefited the British: the Germans assumed the British force was returning from a minelaying mission and directed their torpedo boats to sweep the area off St. Nazaire during the night. As a result, these German vessels were already out at sea and away from the critical zone when Commander Ryder’s force made their approach to the Loire for the raid.
13.47. Kapitan Leutnant Gerd Kelbling, the commander of U-Boot 593 surfaces again. He radios a sighting report, sighting three destroyers and ten Motor Torpedo Boats at coordinates 46° 52′ N, 5° 48′ W, heading west, based on the intentional diversion of the two destroyers after they forced U-593 to dive.
14:20. Oberbefehlshaber West receives the message from U-Boot 593. Due to the reported westward direction, the Germans surmised that the British force is either retreating after a minelaying operation or relocating Motor Torpedo Boats to Gibraltar, thus dismissing the potential threat of an assault on a French coastal port. Oberbefehlshaber West directs five Torpedo Boats to sweep the area off Saint-Nazaire during the night.
17:18. The Command-in-Chief Plymouth sends another message the that five German torpedo boats have returned to the vicinity of Saint-Nazaire. Although these torpedo boats represented a formidable force, the British believe their presence is still undetected by the enemy since there has been no reports from the U-boat that has been engaged earlier, nor have there been any aerial sightings of the British force. Thus, it is deemed that the enemy is unaware of the British force, and there is no cause to alter the original mission plan.
19:00. The convoy receives another message from the Commander-in-Chief Plymouth to inform them that two more Hunt-class destroyers, H.M.S. Cleveland, and H.M.S. Brocklesby, are sent at full speed to join the convoy.
20.00. The convoy reaches the fifth waypoint and stops. Ryder and Newman transfer from H.M.S. Atherstone to Motor Gun Boat 314, and the force adopts its attack formation of port and starboard columns of Motor Launches with the H.M.S. Campbeltown in between. A north easterly course is now adopted, heading for the mouth of the river Loire at 15 Knotts.
20:30. Motor Launch 341 suffers engine trouble. The ship transfers its troops to Motor Launch 446. Meanwhile, the assault force proceeds as planned. After receiving the troops, Motor Launch 446 hurries to catch up with the assault force, while Motor Launch 341 follows at its best speed—11 knots at that time—but loses contact and returns to England alone. On the way back, it sights one Focke-Wulf about 160 kilometers west of Ushant but is not attacked.
22.00. The flotilla spots the H.M.S. Sturgeon’s light directly in front of them.
22:15. They sail close enough to H.M.S. Sturgeon to communicate by shouting. Waypoint Z is reached, and their course is confirmed by the partially submerged H.M.S. Sturgeon acting as a navigation beacon. After passing H.M.S. Sturgeon, a mist descends, reducing visibility to approximately three kilometers. Around that same time, Motor Launch 446 catches up with the assault force and takes up its place in the convoy.
With only sixty-five kilometers to go, the destroyers H.M.S. Tynedale and H.M.S. Atherstone detach from the assault force to patrol a line where they might best hope to rendezvous with surviving launches coming out of the estuary after the raid. H.M.S. Sturgeon too departs and resumes her interrupted patrol off the coast of Brest, France.
23:30. Five Royal Air Force bomber squadrons (comprising 35 Whitley’s and 27 Wellingtons) start their bombing runs over Saint Nazaire, to draw the attention from the closing convoy.
| March 28th, 1942 |
00:25 The assault force passes the wreck of the troopship H.M.S. Lancastria, sunk in 1940. They are on time and on course, with only eighteen kilometers to go to the Normandie Dock.
00:45 H.M.S. Campbeltown grounds twice on the La Châtelier shoal. Meanwhile, the northern shore becomes faintly visible from near Le Chatelier Shoal, about 12 kilometers from Saint-Nazaire. H.M.S. Campbeltown, serving as the guide, is directed on course, allowing Motor Gun Boat 314 the freedom to navigate for depth soundings and to take radio direction finding (R.D/F) ranges from the shore. Overhead, the five Royal Air Force bomber squadrons are heard making for home.
01:00 Even though the bombers have left, the batteries remain on alert. A patrol vessel sights the assault force but has no radio on board. The commander of the 809 Marine-Flak Abteilung also sights the force. His report is disbelieved.
01:15 The assault force is reported again, this time by a lookout at St. Marc. Enquiries confirm these are not the German destroyers sent to sea earlier in response to the U-593 commander’s report.
01:20 The first ships are passing Les Morées light tower, a mere 3.5 kilometers from the target. The commander of 22. Marine-Flak-Regiment, Kapitän-zur-See Karl-Conrad Mecke, gives the Beware Landing signal and emergency orders come into effect to repel an assault.
01:23 The assault force is challenged by signal, from within the port, and from Batterie Behncke-West. One searchlight from the No. 3 heavy coastal battery illuminates the Charpentier Channel, and then all searchlights along the river banks are activated, fully exposing the British force. Commander Ryder, onboard Motor Gun Boat 314, replies with a coded response obtained from a German trawler boarded during the Vågsøy raid in 1941.
Some searchlights are turned off following this deception, but then Ryder is challenged by the South Entrance station. He responds with a message similar to the previous one. A few bursts are fired from a shore battery and both H.M.S. Campbeltown and Motor Gun Boat 314 reply: “Ship being fired upon by friendly forces,” which successfully halts the firing.
01:28 The Germans open fire. Under heavy fire, the assault force rushes the last 1.6 kilometers in the Loire estuary to the dock; most of the Motor Launches are destroyed in the engagement. HMS Campbeltown clears the end of the Old Mole and cuts through anti-torpedo netting across the entrance.
With only 400 meters remaining to the target, Lieutenant-Commander Beattie navigates H.M.S. Campbeltown at full speed towards the lock gate. Despite sustaining hits from enemy fire, including shells and bullets, the ship’s vital components remain intact. Both the Coxswain and his relief are wounded amid the assault; subsequently, Lieutenant Tibbits takes control of the wheel.
| H.M.S. Campbeltown and Group 3 Commandos |
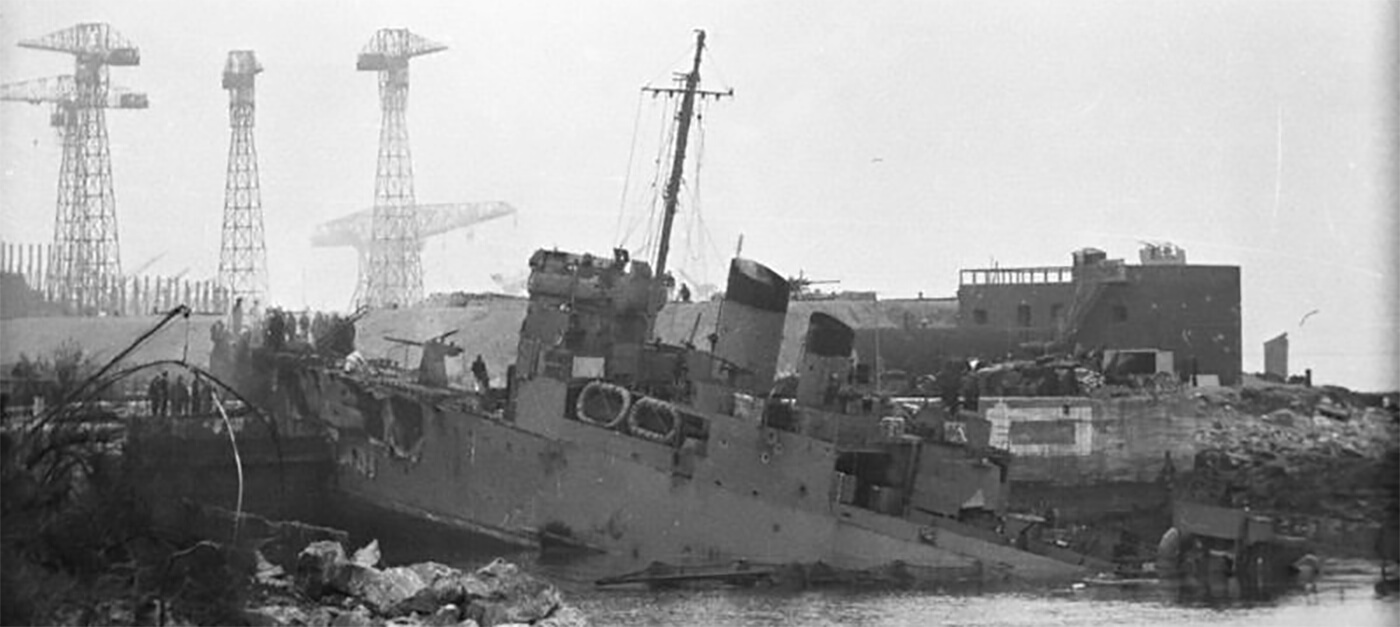
01:34 Just four minutes later than planned, HMS Campbeltown rams the dock gates. The force of the impact drives the ship ten meters onto the gates. The ship’s forecastle is ablaze, and its Oerlikon guns fire aggressively in defense as it is targeted by German anti-aircraft guns.
The attack on Campbeltown is somewhat alleviated by Motor Launch 160. The Motor Launch manages to direct precise fire with her 3-pounder gun at the light anti-aircraft positions located to the starboard side of HMS Campbeltown, successfully neutralizing them.
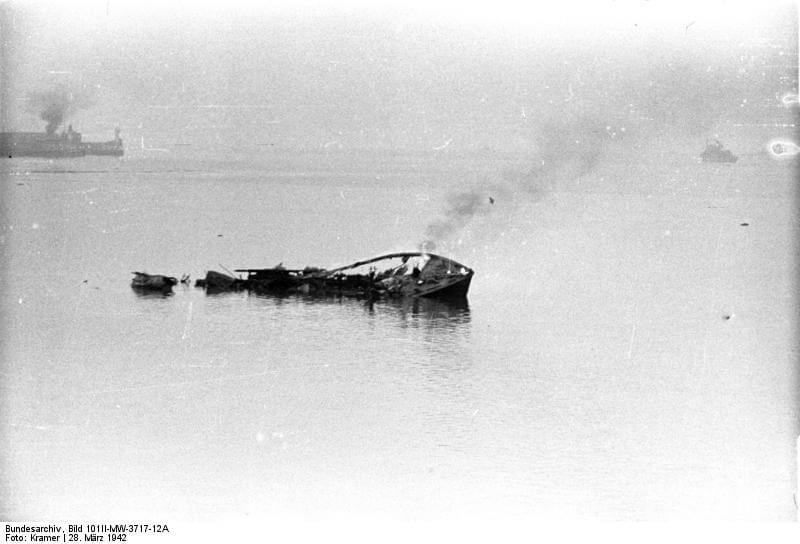
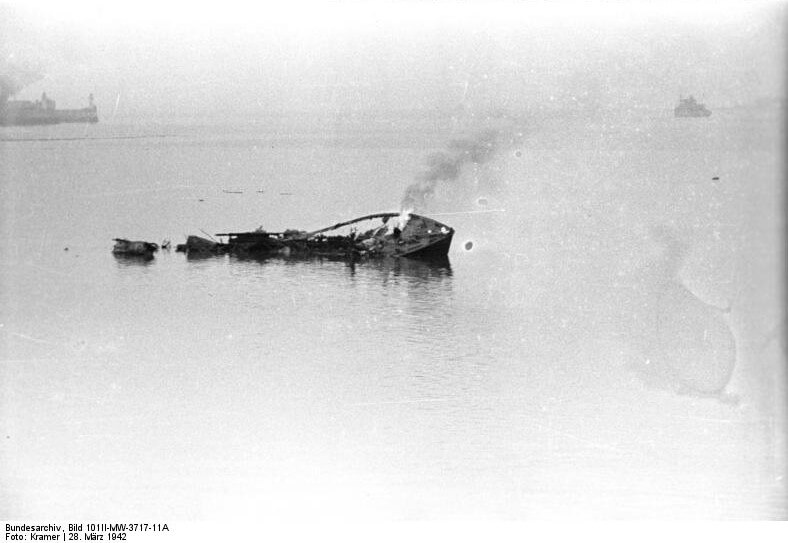
After striking the dock gates, the crew of HMS Campbeltown opens the valves to scuttle the ship, settling the stern on the seabed. The crew then transfers onboard ML 177.
Immediately after the impact, the commandos of Group 3 onboard HMS Campbeltown disembark. Two assault parties, five demolition teams with their protectors, and a mortar group leave the ship.
The two assault parties are the first to disembark from HMS Campbeltown.
Assault Party 3C, led by Lieutenant John Morgan Roderick, is tasked with the assault on the flak positions at the southeast corner of the Normandie dock, followed by the destruction of fuel storage units and preventing the enemy from approaching the landing area from the northeast.
Assault Party 3D, commanded by Captain Donald William Roy, is to assault the flak positions on the roof of the Pumping Station and form a bridgehead at Bridge G to cover the withdrawal. They also have to protect the assault force from any attacks from vessels in the Bassin de Saint-Nazaire. Roy and his thirteen-man assault team succeed in destroying the guns on the roof of the pumping station. They swiftly move to Bridge G and form a bridgehead, enabling the demolition parties to exit the area.
All demolition efforts are under the command of Demolition Headquarters, led by Captain Robert Kerr Montgomery. Copland disembarks with his own team of four. After sending one wounded man for evacuation, he moves towards the Mole with Corporal Cheetham, Lance Corporal ‘Jock’ Fyfe, the radio operator, and his batman, Private Gerry Hannan. Since Captain Roy is still heavily engaged with the enemy at that moment, Copland chooses to circle northwards and approach Headquarters along the Quai des Frégates. As the party heads towards Brett’s caisson, they learn from Hopwood that all is going well at the Pumping Station.
Protection Party 3A, led by Lieutenant Bill “Hoppy” Howell Gaston Lloyd Hopwood, must protect the demolition teams working at the southern end of the dock.
Demolition Party 3A1, under the command of Lieutenant Robert J.G. Burtinshaw, was to destroy the outer caisson if HMS Campbeltown failed. Since HMS Campbeltown completed its mission successfully, the party joins Lieutenant Gerrard Brett’s Demolition Party 3B1 to destroy the inner caisson.
Demolition Party 3A2, led by Lieutenant Christopher John Smalley, has to demolish the southern Winding House. Smalley and his team manage to enter through a window after finding the door locked. They place their charges and attempt to detonate them. When the initial attempt fails, they boldly re-enter, reset the detonators, and successfully detonate the explosives on the second try.
Demolition Party 3A3, commanded by Lieutenant Stuart Whitemore Chant, has the objective of destroying the pumps and motors within the Pumping Station. Chant’s party of four Lance Sergeants reaches the pump house and encounters their protection squad leader, Lieutenant Hopwood. Chant is wounded upon arrival. The lock of the pump house is blown with an explosive device. Escorted by Hopwood and Captain Robert Montgomery, Chant’s team enters the pump house. Their primary targets are the four pairs of motors and pumps, which they believe could not be replaced within a year. After placing approximately 75 kg of explosives, Chant sends his team back up. He waits for the clear signal, pulls the igniters, and rushes out just before the pump house explodes. After assessing the damage, they conclude that their mission is accomplished and report back to Captain Montgomery.
Protection Party 3B, led by Lieutenant M.C. “Bung” Denison, is tasked with providing cover for the demolition parties in the inner caisson area. After disembarking from HMS Campbeltown, they move under fierce and accurate fire from a trench halfway along the dockside. Denison diverts the Germans’ fire, while two of his men throw hand grenades, eliminating the enemy. Denison then advances past the northern caisson and winding shed, positioning his party to protect the demolition teams from
Demolition Party 3B1, commanded by Lieutenant Gerrard Brett, has to advance along the west side of the dock and destroy the inner caisson. After leaving H.M.S. Campbeltown, the party is joined by Demolition Party 3A1 of Lieutenant Burtinshaw. Along with the protection squad and the other 3B teams, they rush the three hundred meters, led by Lieutenant Denison and his men. Upon reaching the area, Brett and Burtenshaw move towards the roadway across the lock gate. At the lock, the two teams come under small arms fire from several groups of concealed enemy troops. Adding to their difficulties, the construction of the caisson differs from that at Southampton. The teams are to place two types of charges on the dock gates: one set consists of twelve ten-kilogram underwater charges to be placed against the caisson walls on the Penhoét Basin side of the gates, and the other set is made up of circular charges to be laid inside the hollow walls of the caisson itself. However, when the team tries to open an inspection door in the center of the road to access the chamber, they encounter difficulty because the top of the caisson has been decked over with timber and sealed with tarmac. Brett is hit shortly after arriving, as are many others in the two parties. Enemy fire continues to sweep across the exposed roadway, picking off the commandos one by one. The underwater charges are lowered over the side and wired into a cordtex ring, ready for ignition.
On the roadway, attempting to get into the caisson proves to be an impossible task. Burtenshaw tries to blow open the trap door but fails. The sound of the explosion brings even fiercer retaliatory fire from the enemy. Ships in the Penhoét Basin and the machine guns on the two tankers below them in the dry dock join in the firefight.
As casualties mount, with men falling on all sides including Burtenshaw, Sergeant Carr takes control. It becomes obvious that no charges can be laid inside the caisson, so he decides to abandon that part of the demolition plan and to fire the underwater explosives. Carr detonates the charges, which hang from the dock gates in the water, producing a low and comforting boom that sends great pillars of water skyward. He returns to the roadway over the caisson and hears water cascading into the hollow structure. The dock gate is not destroyed but is damaged enough that it will take time and effort to repair. Brett orders the men to retreat to the Old Mole, leaving the bodies of their fallen comrades behind.
Demolition Party 3B2, led by Lieutenant Corran William Brooke Purdon, also has to advance along the west side of the dock and demolish the northern Winding House. After leaving HMS Campbeltown, the party, together with the protection squad and the other 3B teams, moves along the three hundred meters along the west side of the dock. Reaching the area, Lieutenant Purdon and his team head for the winding shed. They place their charges on the motors and giant wheels, wiring them up and ready to be detonated but wait for Brett and Burtenshaw to blow the caisson first. Purdon sends Sergeant Chung across to inform the other two officers that he is ready, but Chung encounters small arms fire and is wounded. After hearing the inner caisson being blown, Purdon detonates his charges, destroying the winding shed. This is heard by the commandos on their way back to the bridge held by Roy.
The overall command of Group 3 is under Auxiliary Headquarters, commanded by Major William Copland. They are the last of the commandos to leave the H.M.S. Campbeltown. After leaving the ship they quickly move towards Colonel Newman’s headquarters at the Old Mole.
| Group 1 Commandos |
Motor Launch 341 carries Assault Party 1F under command of the Group 1 commander, Captain Bertie Hodgson and Lieutenant Oughtred. The ship also carries a Commando Medical Party. During the voyage towards Saint Nazaire the ship is forced to return to Great Britain. early due to engine-problems. It’s Commando Assault and Medical Party are transferred to the spare Motor Launch 446.
Motor Launch 447 is at the head of the port column with onboard Assault Group 1 F Captain Birney and fourteen commandos. The primary task of this Assault party is to capture and clear the Mole and establish a bridgehead at its landward end. From here they could then protect the remaining five Motor Launches during landing and re-embarkation. As a secondary task they would clear the building containing gun position 62, so that it could be used as medical post by the Commando Medical Detachment which would land later.
During the way in the Motor Launch is damaged by grenades and heavy close-range fire while attempting to land at the Old Mole. The Oerlikons are knocked out with their crews and many of the commandos killed. The ML misses the landing place and is forced to reverse out and try again. From the stone walls towering above them came a storm of small arms fire and grenades. While manoeuvring the ship back towards its goal a large-calibre shell hits the vessel, penetrating to the engine room. The craft bursts into flames and begins to drift away from the stone pier. The order is given to abandon ship. Many of the men aboard wash away and drowned or die in the river. Only a few men make it to the shore. Just before the ship goes down ML 160 comes alongside to take on the survivors. The ship sinks shortly afterwards.
Motor Launch 457, carries the Demolition Parties 1C consisting of the demolition expert Captain Pritchard and his four-man control party, Lieutenant Walton and his demolition squad and lieutenant Watson and his protection group.
The ship is able to put his craft right onto the landing steps of the Old Mole and land their Commandos. While approaching the Old Mole the commando officers see a group of Germans running along the stone wall with their hands up and think that these are the troops manning the pill boxes surrendering. Thinking, the garrison on the Old Mole is eliminated, they quickly get off the small craft and move to complete their tasks. Motor Launch 457 moves away and waits for the evacuation. The Germans lock into the ships and within minutes it is drifting and on fire. Motor Launch 262 does not hesitate to go to her assistance and moves alongside the burning vessel. Several German searchlights lock onto the stationary motor launches and both ships receive severe hits from enemy guns destroying the small ship.
Motor Launch 307, is carrying Captain Bradley’s demolition party, tasked with the destruction of the centre lock gate in the South Entrance. It also carries Captain David Paton, one of the Commando doctors ordered to man the Medical Post at Position 82. Edward Gilling, reporter with the Exchange Telegraph would also land with the troops.
While closing in on Old Mole they hear a warning cry from Motor Launch 447 to not go in since it was impossible to land. The ship is, however, is already too close to stop and misjudges the landing steps. Above them the German defenders on the mole start dropping grenades onto the deck and firing light machine-guns. The ship backs off and makes another attempt but strikes an underwater obstacle and grounds. German fire continues to hit the boat and due to increasing commando casualties that they are unable to complete their objectives with the men left. The landing is abandoned the motor launch withdraws to the other side of the river. Here the ship attacks the German guns and searchlights that are interfering with the raid, before returning to Great Britain.
Motor Launch 443 carries a 15-man team under command of Lieutenant Wilson and Lieutenant Bonvin, and Second Lieutenant Basset-Wilson. The ship also carries a Protection party led by Lieutenant Joe Houghton for Captain Bill Bradley’s Demolition Party on ML 307. Their objective is destroying group Z. This group of buildings include the Boilerhouse, Impounding Station and Hydraulic Power Station. After completing their objectives, the group would withdraw to the protection of Birney’s bridgehead.
In the confusion around the Old Mole, and blinded by searchlights, she sails too far north, while returning, she finds burning Motor Launches blocking her route to the Mole. The strength of enemy fire forces the ship to withdraw. When it is not able to counter the German fire, it successfully makes her way back to open sea.
Motor Launch 306 carries the 9-man Demolition Party under command of Lieutenant Ronnie Swayne and their 5-man Protection Party Lieutenant John Vanderwerve. Their objectives are the destruction of the lock gates and bridge B at the southern end of the New Entrance. After completing their objectives, they too would retreat to the protection of Birney’s bridgehead.
The ship suffers the same as most of the Motor Launches that try to land their commandos at the Old Mole. The ship overshoots the landing place at Old Mole. It turns around and attempts to land again, but the chaos on the river and the strength of enemy fire makes the ship to withdraw. The ship retires to the open sea where she encounters and engages the German Torpedo-boat destroyer Jaguar. The ship is forced to capitulate, her crew and Commando parties are taken prisoner, and the Motor Launch is captured. It later enters German service.
Motor Launch 446 is promoted from a spare craft to a commando-carrying vessel when Motor Launch 341 is forced to return to England due to motor problems. She carries Assault Party 1E under command of the Group 1 commander, Captain Bertie Hodgson and Lieutenant Oughtred. Their objective is to pass through Birney’s bridgehead and move south to capture and secure the two gun positions at the long East Jetty of the Avant Port. These guns are able to fire into the flanks of any vessels that comes towards the Old Mole. With these objectives secure, the party was then tasked with patrolling the area of the Old Town of Saint Nazaire. The ship would also land Captain Mike Barling and two Medical Orderlies. This Medical Party would prepare a Medical Post at position 62 which would have been cleared by Assault Party 1F earlier.
During their way in the ship overshoots the Old Mole. In the meantime, both of its Oerlikons and their crews are destroyed, Captain Bertie Hodgson of the assault group on board is killed and Lieutenant Oughtred and two of his sergeants are wounded. In view of these heavy losses, the decision is made that further landing attempts are useless, and the ship withdraws. The ship makes it to rendezvous area and is scuttled after having evacuated her crew and Commandos onto H.M.S. Atherstone.
With only Commandos landing from Motor Launch 457, only twenty of the intended seventy men made it to shore at the Old Mole. From Motor Launch 457 Lieutenant Watson and his protection party are the first to land from the vessel. Thinking that Birney’s team from Motor Launch 447 has landed and captured the Old Mole, he immediately moves from the Old Mole with the demolition parties of Walton and Pritchard in the rear.
Captain Pritchard’s role was demolition control. Since he had small demolition teams trained for the specific objectives. he is present to ensure a smooth operation with no specific targets of his own. Lieutenant Walton’s demolition team is tasked with the destruction of the lifting bridge to help isolate the Old Town from the remainder of Saint-Nazaire and prevent any German counterattack from that side. Lieutenant Watson and his four men serve as their close protection team.
Watson and Walton become separated when they
approach Place de la Vielle Ville (Old Town Place). German small arms fire criss-crossed the area and keeps all movement to a minimum. Watson and his men try to move around the western side but run into immediate trouble and are forced to take cover. Walton attempts to get to make for the lifting bridge but is hit by German fire and goes down. His and Watson’s team remains in cover but even there several men are hit among them lieutenant Watson himself was injured. They are surrounded from all sides. Watson had tries again to get to the Bridge but keeps running into German fire while being further separated from the other commandos. He decides to make for Newman’s Headquarters to report on the situation at the Old Mole.
Captain Pritchard and his four-man team take another route to the Bridge They find it deserted and find cover crouched behind to the left of the bridge. While waiting for Walton’s party to arrive, Pritchard spots the French tugs Champion and Pornic laying a few metres away in the Submarine Basin. He decides to attack them. With Corporal Maclagan to help, he dashes fifty metres to the place where the ships are tied. They climb on board the first vessel and lower a charge between it and the ship alongside, pull the igniter and dash back to the shelter of the hut.
Pritchard then decides to take Maclagan with him to check on the progress of the demolition teams. He orders the remaining corporals to do what they could to the lifting bridge and sets off south at the same moment that the charges explode. The two men move down the long lock that links the South Entrance to the Submarine Basin, expecting to come across the three demolition teams going about their work, but there was no sign of the teams of Captain Bradley (Motor Launch 307), Lieutenants Wilson (Motor Launch 443) or Swayne Motor Launch 306). After checking the power station, it becomes clear to him that no other teams have landed. Pritchard decides to return to the lifting bridge but runs into a lone German. Pritchard is stabbed by a bayonet that very moment. Maclagan hits the German with his Tommy-gun. The dying Pritchard orders his corporal to go back with the others. Maclagan leaves his officer with the intention to return with help. When he arrives at the concrete hut near the bridge (After the battle, the enemy found charges had been placed on the bridge.) he finds it deserted, except for the body of Lieutenant Walton. He then moves to Newman’s Headquarters to seek help there.
| Group 2 Commandos |
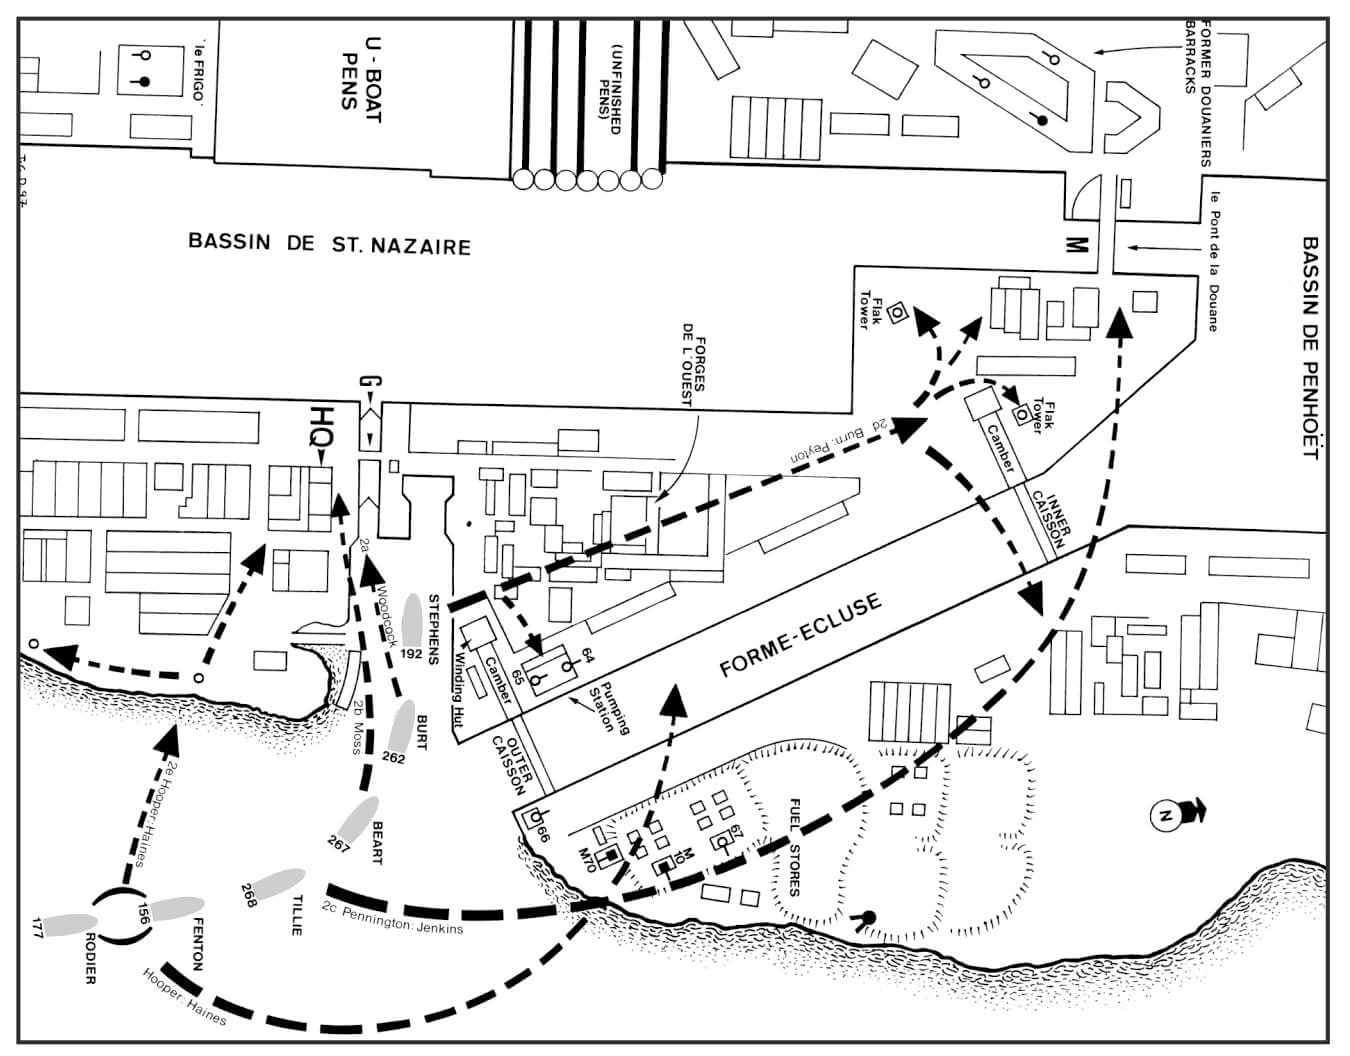
Motor Launch 192, Is the first of the Group 2 Column. This Motor Launch carries a 14-man team under command os Captain Michael Burn and Lieutenant Tom Peyton. They are task to land at the Old Entrance, destroy the flak towers west of the northern dock caisson and form a defensive block east of the caisson. In case the H.M.S. Campbeltown would fail to ram the Normandie Dock, they are tasked with destroying the guns directly to the outer caisson. During the run in the boat is hit almost immediately and severely damaged. Without any control the ship hits the Old Mole and burns out. Eight of her Commando party are killed, along with four of her crew.
Motor Launch 262 carries a Demolition Party under command of Lieutenant Mark Woodcock and their Protection party commanded by Lieutenant Dick Morgan. Their targets are the lock gates and swing bridge G in the Old Entrance.
During the confusion of the approach of the old entrance the ship overshoots but returns, coming under H.M.S. Campbeltown’s stern to land her parties in the Old Entrance. Responding to mistakenly identified withdrawal signals these parties are reembarked, along with Lieutenant Smalley’s team. Taking hits all the time, Motor Launch 262 attempts to withdraw but comes across Motor Launch 457 just off the Old Mole. The only ship which made a successful landing on the Old Mole, is now adrift and on fire. Motor Launch 262 moves alongside the burning vessel to give assistance. Several German searchlights lock onto the stationary motor launches and both ships receive severe hits from enemy guns destroying the small ship. The commander orders to abandon ship. There are only a few survivors.
Motor Launch 298, has no Commandos onboard and is expected to wait offshore, engages enemy defences until it is time to evacuate the troops.
During the assault, the ship passes the burning wrecks near the Old Mole and heads towards the Normandie Dock seeking targets of opportunity and German gun sites. Like the other ships in the assault force, they do not escape the enemy’s attention. It suffers various of hits and casualties is eventually sunk by German fire while manoeuvring off the Old Entrance.
Motor Launch 267 carries an 11-man party under command of Regimental Sergeant Major Alan Moss.
Like the Motor Launches in front of her this ship also runs too far upstream. It turns back when it is abreast of the partially completed French aircraft carrier Joffre. She attacks a dredger with grenades, then came in under H.M.S. Campbeltown’s stern and attempts to put her troops ashore in the Old Entrance. Under heavy fire she comes in hard with her bow to the foreshore. Some of the commandos succeed in disembarking but are forced back within minutes. As the Motor Launch prepares to withdraw downstream she is fatally hit and abandoned. She sinks between the Old Entrance and the Old Mole.
Motor Launch 268 carries a 5-man Demolition Party under command of Captain Harry Pennington and their Protection Party commanded by Lieutenant Morgan Jenkins. With them is also a 7-man contingent from Regimental Sergeant Major Alan Moss Party on Motor Launch 267. Pennington is tasked with securing the northern access to the Commando operating area by destroying the bridge M connecting the dry dock to the Caserne des Douanes.
The Motor Launch is hit while preparing to turn into the Old Entrance. The ship explodes immediately, astern of the H.M.S. Campbeltown with heavy casualties to her crew and Commando parties. Just two from a total of 17 Commandos survive the explosion.
Motor Launch 156 carries the first fifteen men of Captain Dick Hooper’s Special Task Party. Their primary task is to take out the suspected gun positions on the foreshore north of the Mole. They then had to silence the ships in the Normandie dock before coming into Newman’s Headquarters as a reserve.
Within sight of the Old Entrance the ship is hit and disabled, with one engine put out of action, her steering gone and casualties mounting. Steering by tiller she makes it out of Saint Nazaire. The ship is scuttled later after transferring her crew and commandos to H.M.S. Atherstone.
Motor Launch 177 carries the second 15-man group of Captain Hooper’s Special Task Party. This group is under command of Troop Sergeant Major George Haines.
The ship successfully manoeuvres into the Old Entrance and lands his commandos. It then takes off many of the crew of the H.M.S. Campbeltown makes her way back down the river with some fifty men on board. Completed his task as planned, it almost makes it to the open sea before being hit by 75 mm shells from the guns on Le Pointeau. The ship sinks post-action with heavy loss of life. Lieutenant Commander Beattie, who is also aboard Motor Launch 177 survives in the water clinging to a piece of the wreckage. The Germans rescue him.
| Motor Gun Boat 314 |
Motor Gun Boat 314 lands Lieutenant Colonel Newman, his five-man Commando Headquarters Party and a two-man Intelligence party. After landing Newman’s Headquarters Motor Gun Boat 314 is damaged in action while taking survivors on board, she bombards the Mole. During this time, the ship is hit numerous times. At some time, it becomes clear to Commander Ryder that there is no longer any chance of completing the Commando evacuation plan. He also realises that there is no hope of survival themselves if departure is delayed a moment longer. Ryder orders Lieutenant Curtis to take the gun boat downriver and make their escape to sea.
| Supporting Craft |
Motor Torpedo Boat 74 is kept in reserve until the moment it is clear that H.M.S. Campbeltown reaches its objective. After that is clear the ship is released. It turns and runs with speed through the Old Entrance firing its special torpedoes against the gates. Here they sink waiting for the moment when their time delay fuses activate.
His job complete Wynn returns to the rear of the H.M.S. Campbeltown to take off more the crew and the wounded commandos. They then head for the river and the open sea. During this the journey, the ship spots two men on a Carley float drifting in mid-river. ignoring the orders that no boat should stop to pick up survivors, the ship moves towards the men on the float. Not knowing they are are right in front of the 170 mm guns on Pointe de l’Eve, the ship is hit by two large shells and is set on fire. Commander Wynn orders to abandon the craft.
Motor Launch 160 is instructed to attack the flak positions in the line of H.M.S. Campbeltown’s approach, then proceeds up-river in search of targets of opportunity. When returning to the area north of the Old Mole, she places herself between the burning Motor Launch 447 and nearby enemy positions and takes off her crew. Although damaged herself she returns to Great Britain.
Motor Launch 270, supporting role, in the area between the Old Entrance and Old Mole. She sustains a hit, aft, which disables her hydraulic steering and requires her crew to fit her secondary tiller, steering while under fire. She makes it downstream and is scuttled after her crew are taken onboard the destroyer H.M.S. Brocklesby.
Since the H.M.S. Campbeltown has successfully rammed the dock gates, Motor Torpedo Boat 74 fires her torpedoes at the Old Entrance lock gates. and takes on board survivors from the H.M.S. Campbeltown and heads for the open sea. On her way out she stops to rescue men on a raft, is hit and destroyed with heavy loss of life.
| Headquarters |
After landing from Motor Gun Boat 314, Lieutenant Colonel Newman immediately begins to organise his headquarters. He chooses a building located just to the south of the bridge and the bridgehead created by Captain Roy. The building chosen by Newman is by coincidence the existing German dockyard Headquarters. Arriving there at the group soon comes under fire from guns across the Submarine Basin. Sergeant Moss and his party are supposed to join him but Motor Launch 267 that transported the party of Moss is hit, and the men go down with it. However, shortly after setting up his headquarters, Sergeant Haines and his men who landed from Motor Launch 177 arrive there. Haines primary objective is gun emplacements on the shore between the Old Entrance and the Old Mole. They find the gun sites empty and make their way to Newman’s Headquarters to get fresh orders. Newman deploys the group as a protection party and waits for news of the rest of his commandos.
Bit by bit news of the assault comes in. The succes of the Demolition Parties around the Normandie Dock. Lieutenant Colonel Newman realises that their own situation is precarious when he becomes aware of the situation on the water and the destruction of many of their evacuation Motor Launches. The reports of Sergeant Maclagan and Lieutenant Watson that the Old Mole is still in enemy hands and that no other Commando Parties have landed from the Motor Launches adds to his concerns.
By then, the commandos assembling at Newman’s Headquarters is growing fast. Major Copland with the demolition parties from around the Normandie Dock have arrived. Every officer from the demolition parties is injured.
When it becomes clear that the evacuation with the Motor Launches is not going to happen Newman and Copland hold a small conference. There have two options: try to flee or surrender. Newman asks Copland “Shall we call it a day?” Copland replies with “Certainly not Colonel, we’ll fight our way out.” All the other men show the same offensive spirit as Copland when the situation is explained to them.
The men are then split up into groups of about twenty. Each group is told to make its own way out of the docks, through the town and into open country, with the aim of making for Spain and on to Gibraltar.
With the old town of Saint Nazaire more or less blocked the groups double back towards Roy’s bridge and then move through the rows of sheds to the side of the Submarine Basin. This brings them under observation from German guns across the basin which causes more casualties to the fire from these guns. Most of the wounded drop out of the groups march and take shelter or hide themselves, knowing they never make it to Spain injured.
A reasonable number of Commandos make it to the Southern Bassin. Ahead of them, fifty metres to their right, is the lifting bridge and the exit from the dockyard. To make to the other side they have to cross the bridge exposed roadway. However, on the bridge and on the other side of the lock, Germans are waiting for them. For a moment, the commandos halt to prepare for the dash across. Sergeant Haines sets up a Bren gun to cover the initial stages of the charge. Then Newman gives the signal, “Away you go, lads.”
Firing their weapons from their hips, the commandos dash across the open ground, straight for the enemy. Surprising them with the fierceness of the attack. The Germans on the bridge, scramble and flee. The Germans on the far side are more prepared and they begin firing on them. The fire makes some casualties among the British, but the majority presses on without hesitation. Some forty or fifty Commandos reach the end of the bridge firing their weapons into the German defenders now at very close range. In seconds, they charge through the cordon and quickly disappear into the back streets of the town. From here on the groups begin to lose their coherence with each other as each man sought his own way out.
Things are quite different in the town. German reinforcements have arrived and troops from 679th Infantry Regiment, 333rd Division, begin to get a grip of St Nazaire. Throughout the night, straggling parties of men are trapped by roadblocks and patrols. One by one the Commandos are captured or shot trying to make a bid for freedom (estimations are that 75 percent of all the commandos making the break from headquarters are wounded).
As for Lieutenant Colonel Newman and about fifteen other Commandos. They are forced to shelter in a cellar to wait for nightfall where they are soon discovered and taken prisoner. Almost every other Commando who made it over the bridge, follows their fate. With the coming of daylight, most of them were captured and the raid is truly over.
| Way Home, March 28th, 1942 |
04.30. Motor Gun Boat 314, Motor Launch 270, Motor Launch 446 and Motor Launch 156 return to the rendezvous area and H.M.S. Atherstone and H.M.S. Tynedale. They transfer their casualties to the H.M.S. Atherstone. Due to their heavy damage Motor Gun Boat 314 and Motor Launch 446 are scuttled. Not expecting any more boats to arrive, the convoy heads for home.
06:44. The H.M.S. Cleveland and H.M.S. Brocklesby reach a position approximately 120 miles West-SouthWest of Saint-Nazaire, when they intercept a signal reporting that H.M.S. Tynedale and H.M.S. Atherstone are engaging enemy torpedo boats. They immediately increase to full speed, steering for the given position, then some 80 miles ahead. After half an hour, a large trawler is sighted to port. As she flew no colors and alters her course away to the northeast at increased speed upon their approach, she is assumed to be an enemy lookout vessel. Seven or eight salvos were fired at her at a range of 4,000 yards, leaving her damaged and stopped.
09:00 Hunt-class destroyers H.M.S. Brocklesby and H.M.S. Cleveland join the return convoy for extra protection.
A few hours later, Motor Launch 160, Motor Launch 307 and Motor Launch 443 also reach the rendezvous area. They wait until 10:00 and head home without the protection of the destroyers, where they arrive the next day.
12:00. The explosive charges in H.M.S. Campbeltown detonate, destroying the dry dock. Forty senior German officers and civilians who are on the H.M.S. Campbeltown are killed.
| March 30th, 1942. |
15:20. The torpedoes from Motor Torpedo Boat 74, explode at the old entrance into the basin. Anxious German guards, mistake workers of organisation Todt for Commandos, open fire and kill some of them.
| Losses |
The Germans reported the following damage as a result of Operation Chariot.
(1) Normandie Dock: The outer gate was completely destroyed. The inner gate, although damaged by explosive charges, managed to prevent water from flooding the dock. The pumping station and the caisson operating machinery were completely destroyed.
(2) East Lock: The outer gate was completely destroyed by an explosion around 15:20 on March 30th. The inner gate withstood the rush of water, despite having been damaged in an air raid a few days earlier.
(3) Ships: The tankers Schledstadt and Passat, which were in the Normandie dock at the time of the explosion, sustained slight damage, broke loose from their moorings, and collided. The tugs Champion and Pornic were sunk by British troops in the Saint-Nazaire Basin alongside the inner gate of the South lock. A Harbour Defence Vessel lying near the East Lock in the Saint-Nazaire basin was scuttled by her commanding officer to prevent it from falling into British hands.
(4) Wharf Installations: The workshops opposite the Normandie Dock (Forges de l’Ouest) were burned down after fires had been started by either gunfire or explosive charges. The efficiency of the installations was impaired for a long time afterwards.
However, the raid resulted in heavy casualties among the British Commandos and the Royal Navy personnel. If a Commando reached the shores of Saint-Nazaire, they were most likely either killed in action or captured. The Royal Navy suffered even greater losses proportionally, as their numbers were double that of the soldiers during the raid.
169 men are killed (105 Royal Navy and sixty-four Commandos) and another 215 become prisoners of war (106 Royal Navy and 109 Commandos). Many of them are wounded. They also lose Motor Gun Boat 314, Motor Torpedo Boat 74, fourteen out of the eightteen Motor Launches. one Armstrong Whitworth Whitley and one Bristol Beaufighter. The H.M.S. Campbeltown was a calculated loss.
Only 228 men make it back England by boat. Corporals Wheeler, Douglas, Howard, and Sims as well as Private Harding escape through neutral Spain and Gibraltar. All five of them re-join their units and see further action.
In total, the mission saw 611 Commandos and sailors engaged, and a staggering 403 of them did not return, showcasing the high price paid during this daring operation. The raid on St. Nazaire remains one of the most audacious and costly raids of World War II, demonstrating the courage and sacrifice of those involved in such perilous wartime operations.
Five men participating in the raid are awarded a Victoria Cross, Able Seaman William Alfred Savage, Sergeant Thomas Frank Durrant, Commander Robert Edward Dudley Ryder, Lieutenant Commander Stephen Halden Beattie and to Lieutenant Colonel Augustus Charles Newman. In addition, four Distinguished Service Orders, 17 Distinguished Service Crosses, 11 Military Crosses, four Conspicuous Gallantry Medals, five Distinguished Conduct Medals, 24 Distinguished Service Medals and 15 Military Medals are awarded. Fifty-one men are mentioned in Dispatches.
The Germans lose somewhere between the 360 and 400 killed men. It is unsure how many wounded the Germans suffered. They also lose two Junkers 88, two tankers and two tugs and most importantly the Normandie Dock and its operating systems.
| Multimedia |
| Aerial Photographs Saint Nazaire |

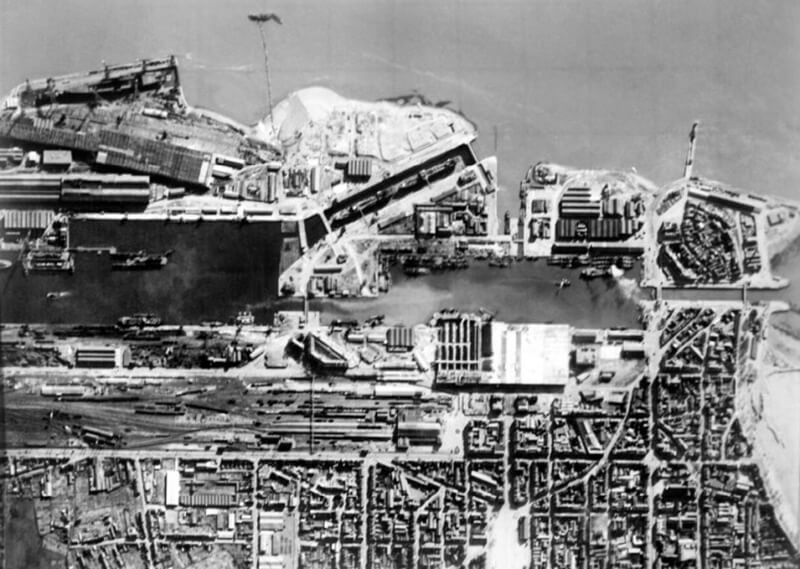
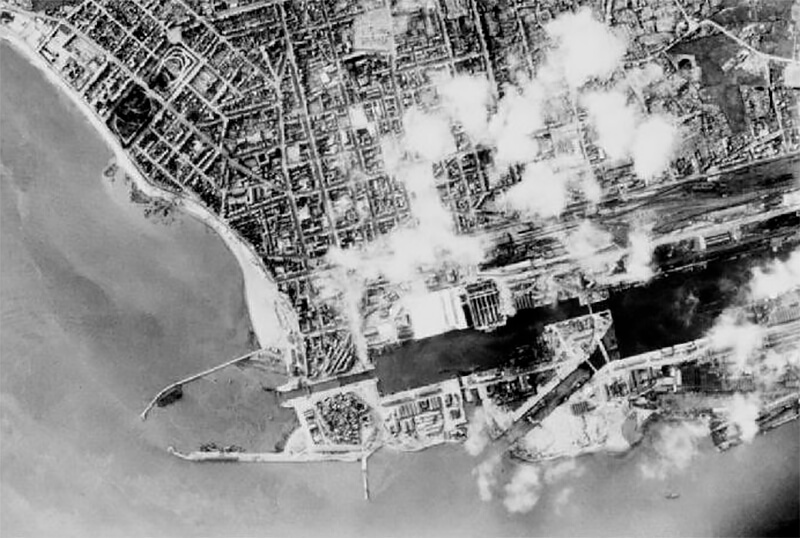
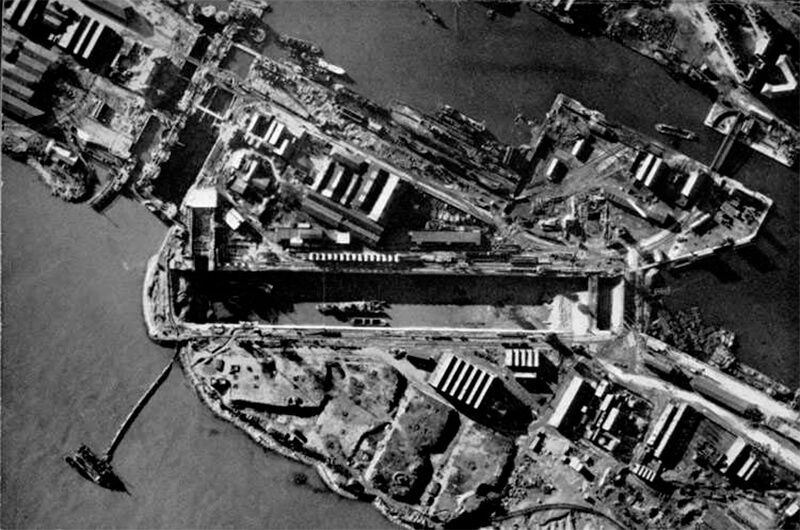
| H.M.S. Campbeltown conversion |
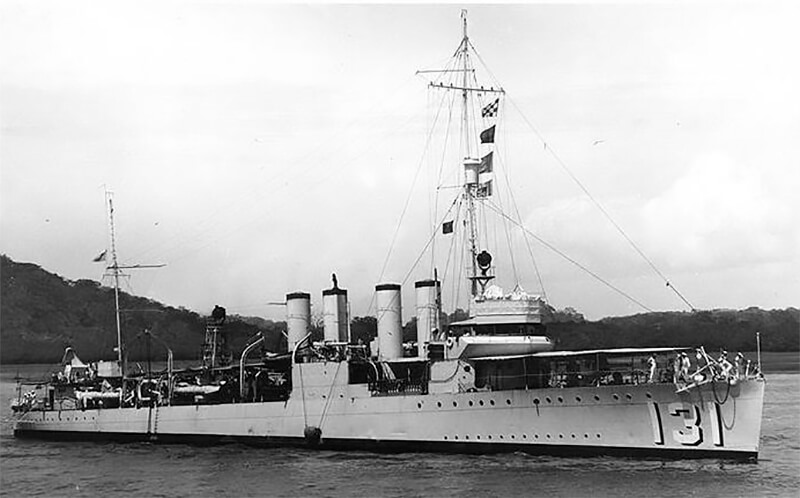
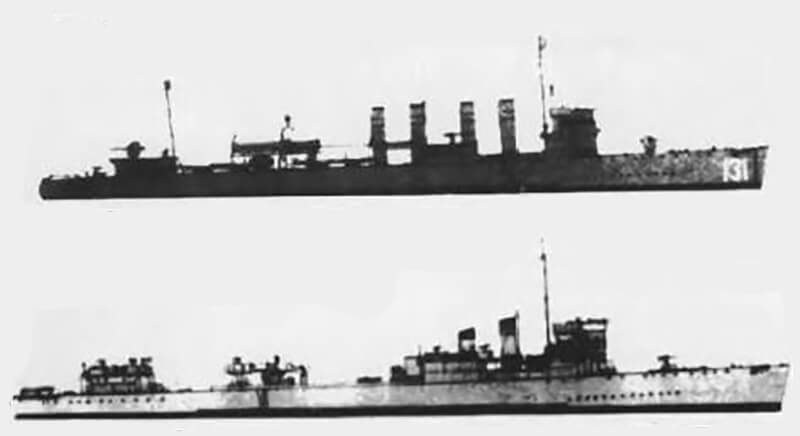
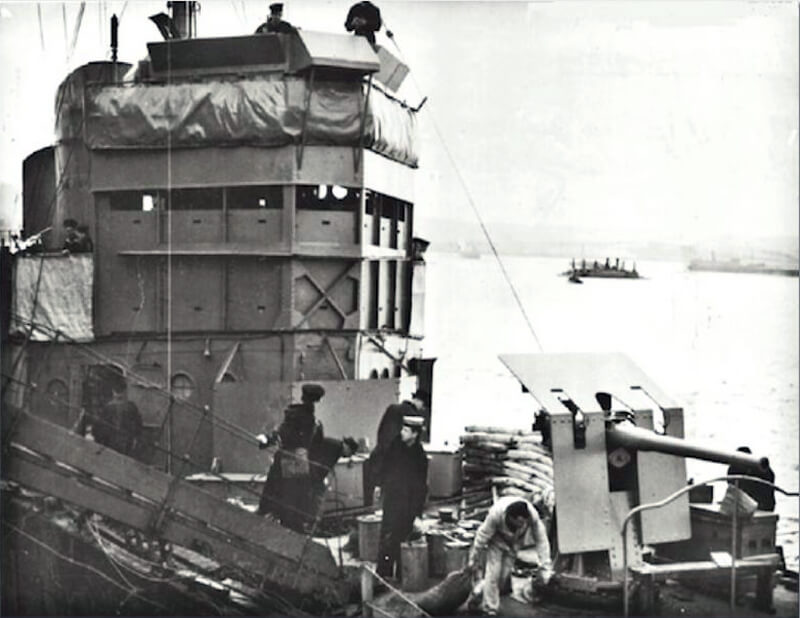
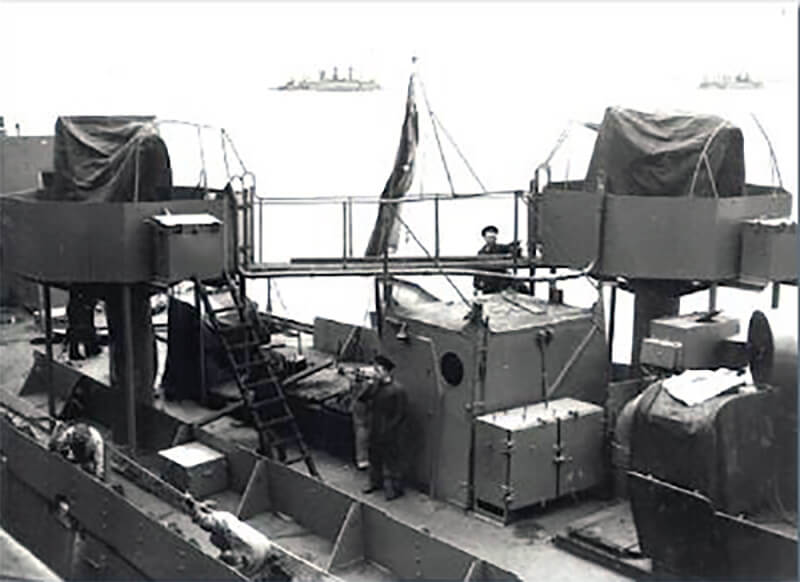
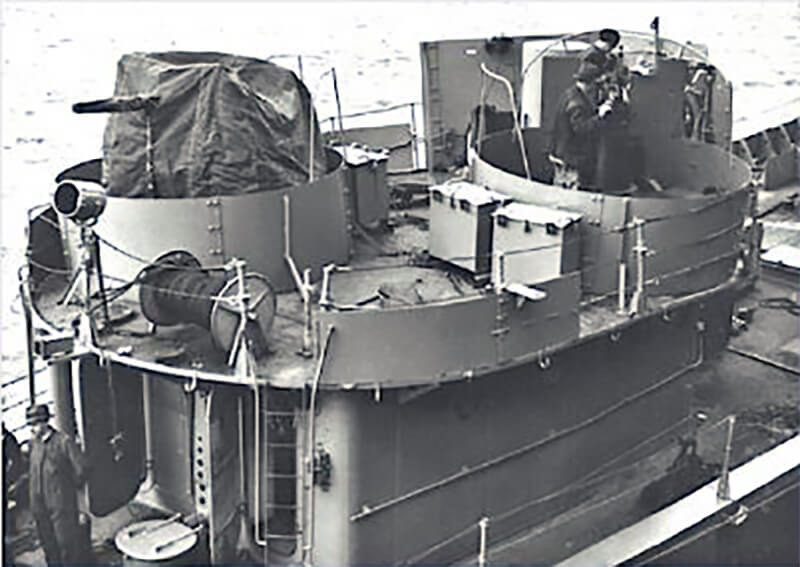
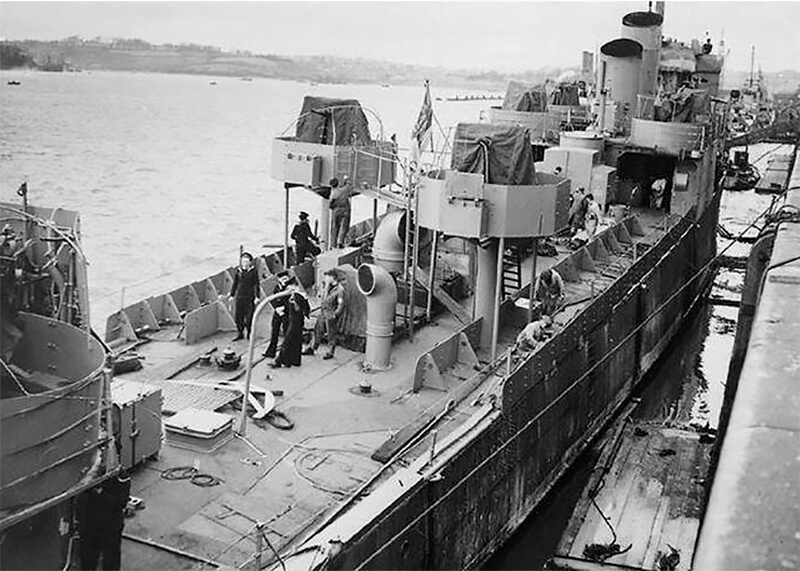
| Battle |
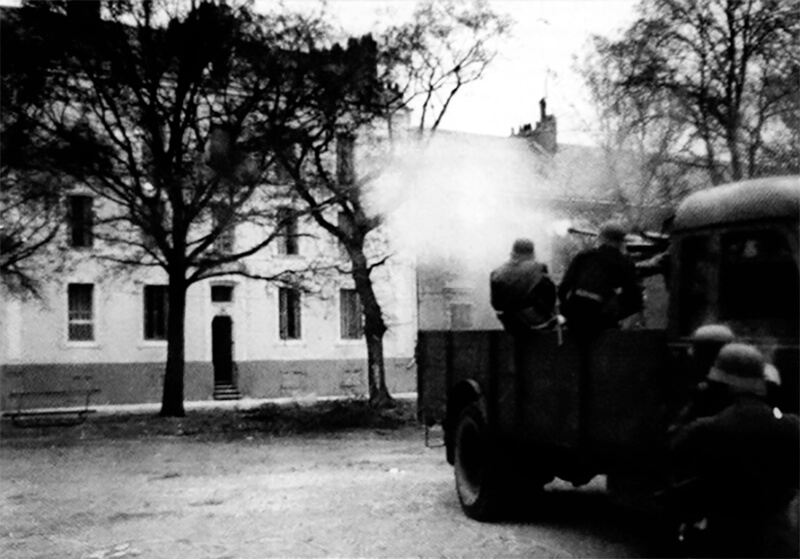

Saint Nazaire.

tiles crashing to the ground.

the aftermath of the raid the German forces were in a state of high tension.
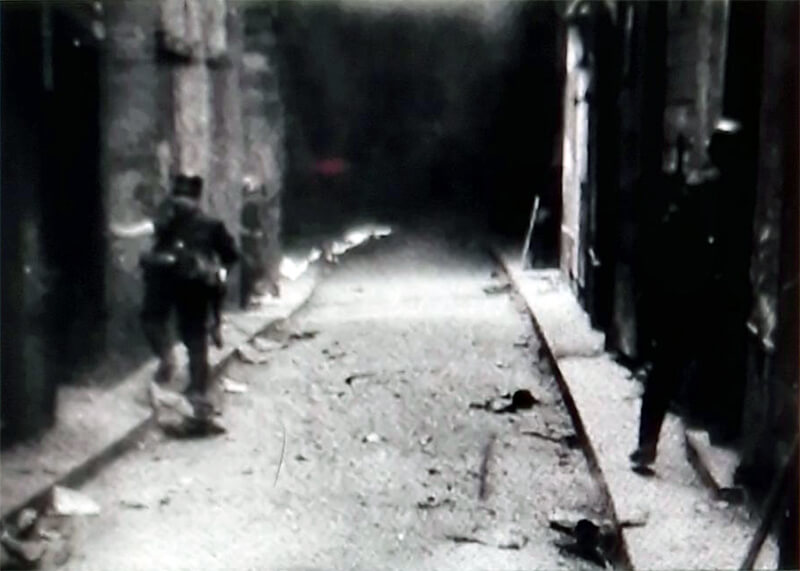
local.

local.
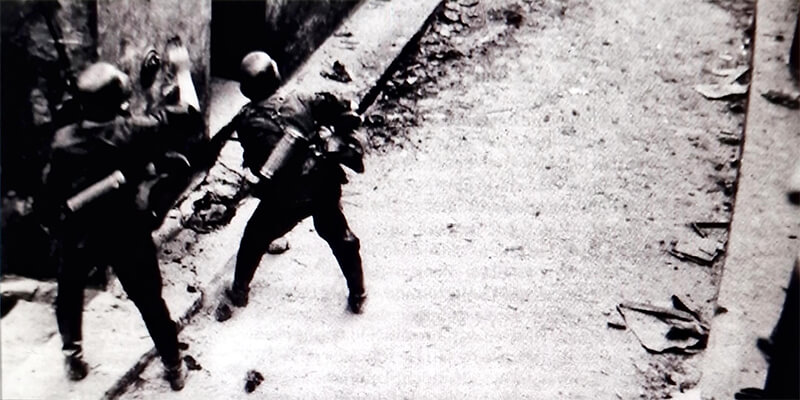
local.

local.
| Aftermath |
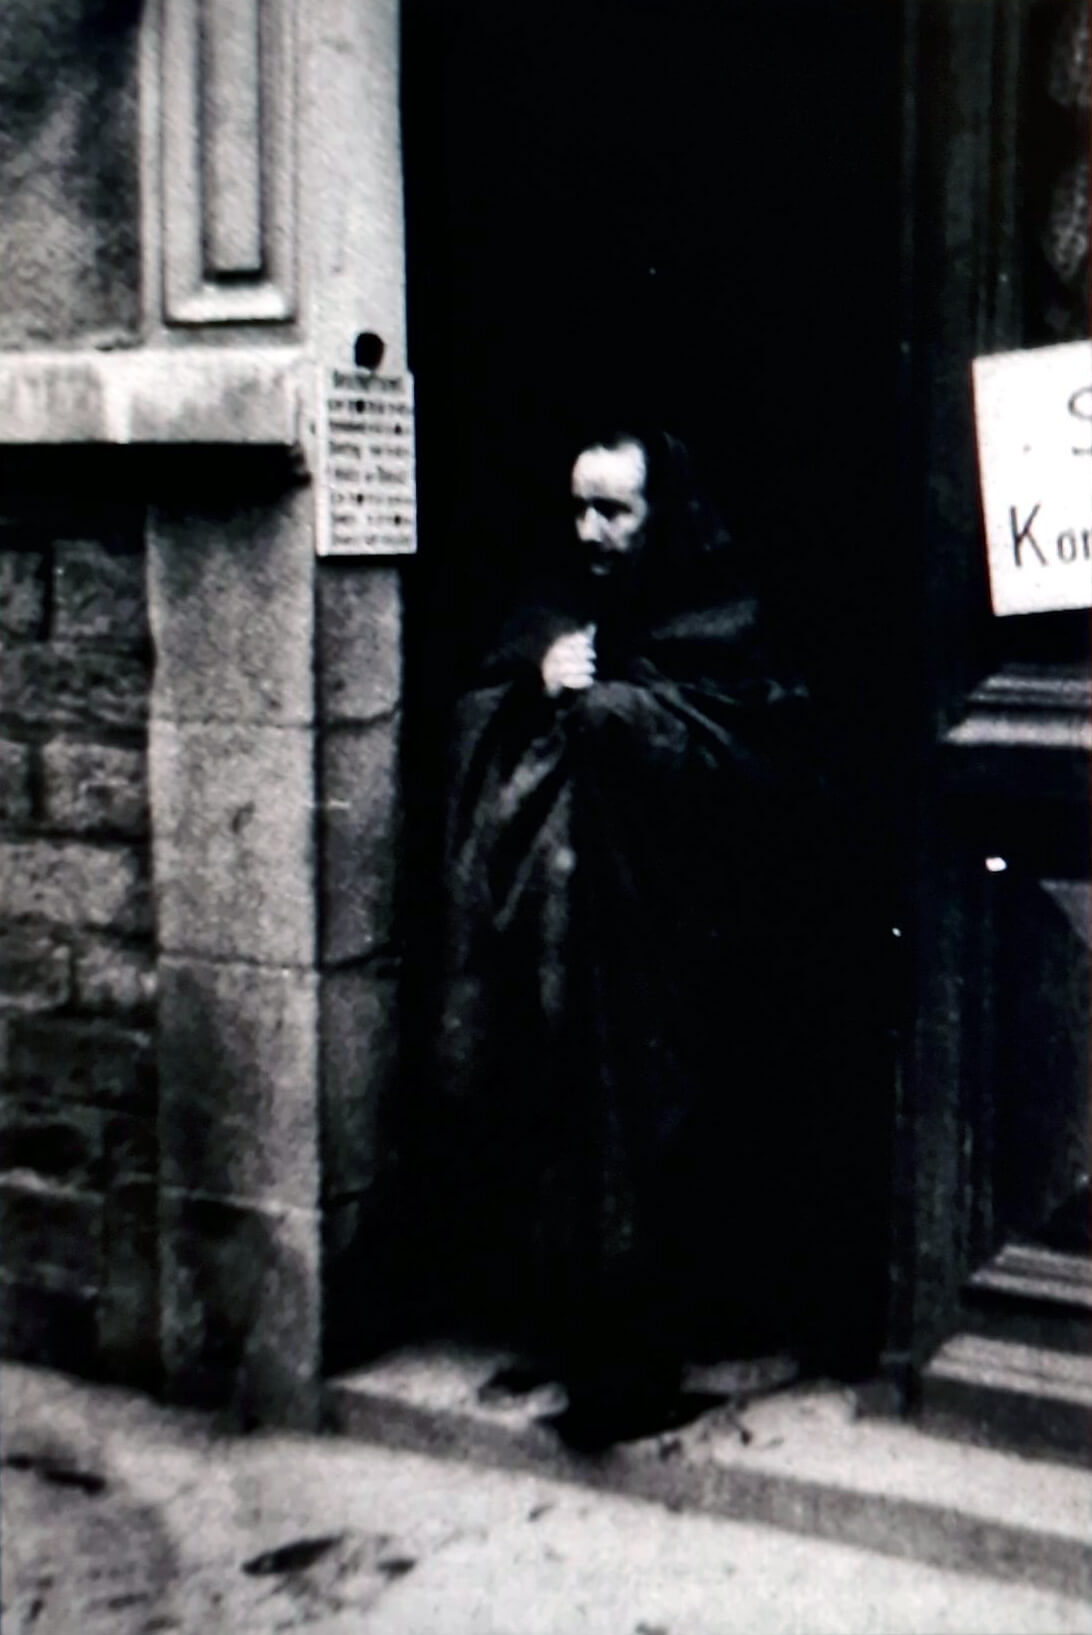
are rescued from the water.

wounded commando. The picture
is looking towards the lifting
bridge and the new part of
St Nazaire town. To the left of
the bridge is the square hut
behind which Pritchard and his
men sheltered and alongside
which Lt Walton’s body was found.
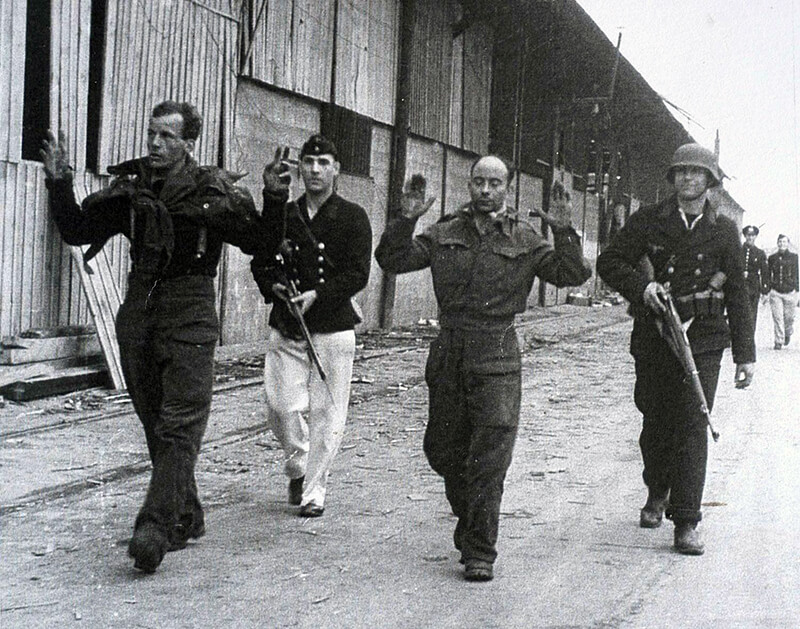
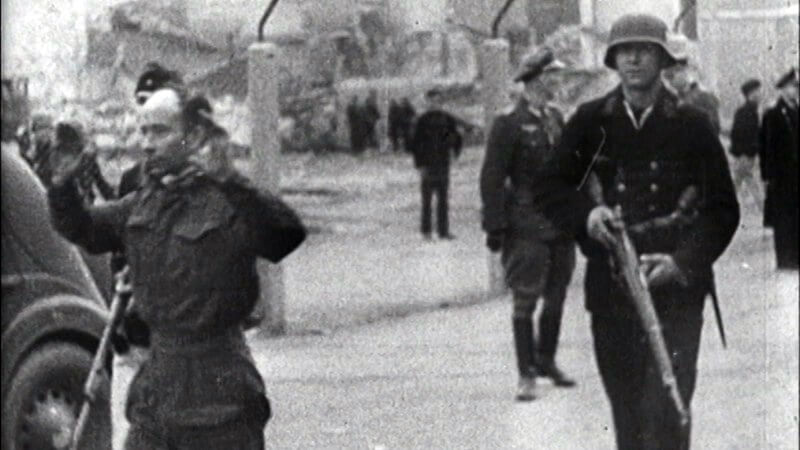
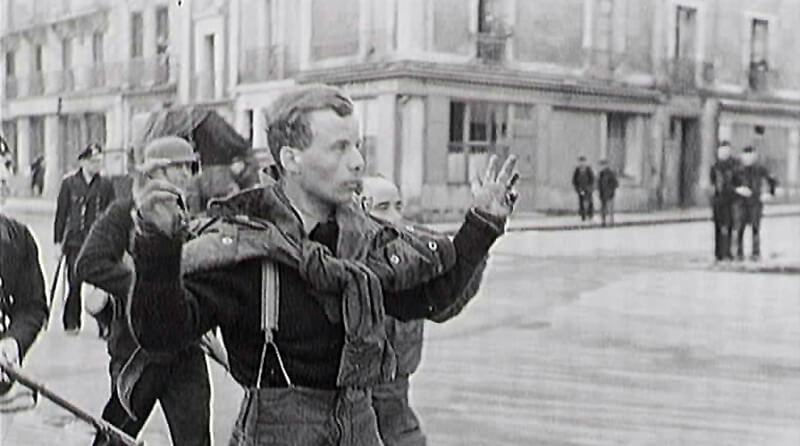
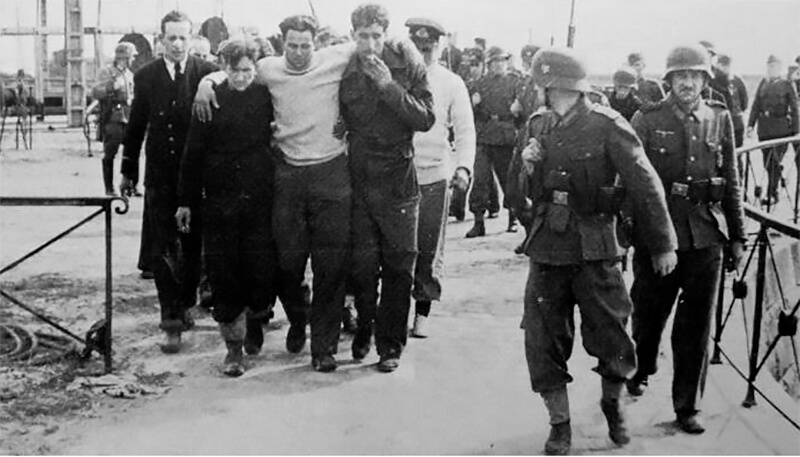

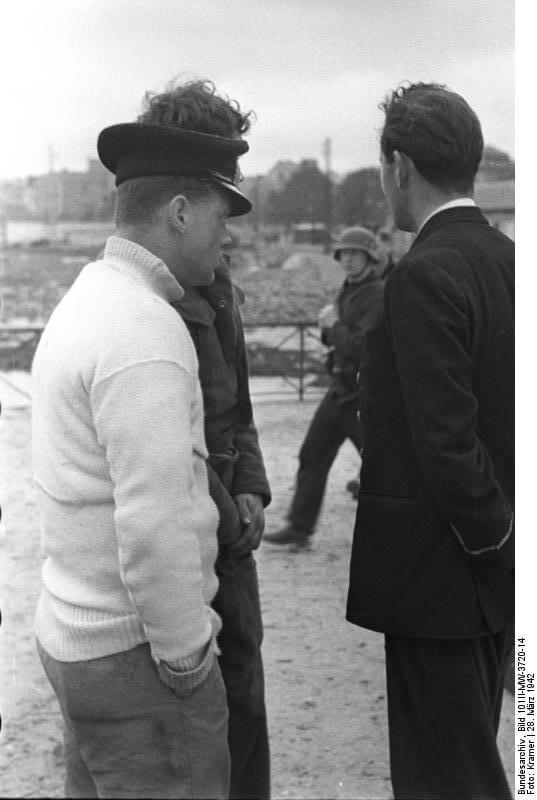
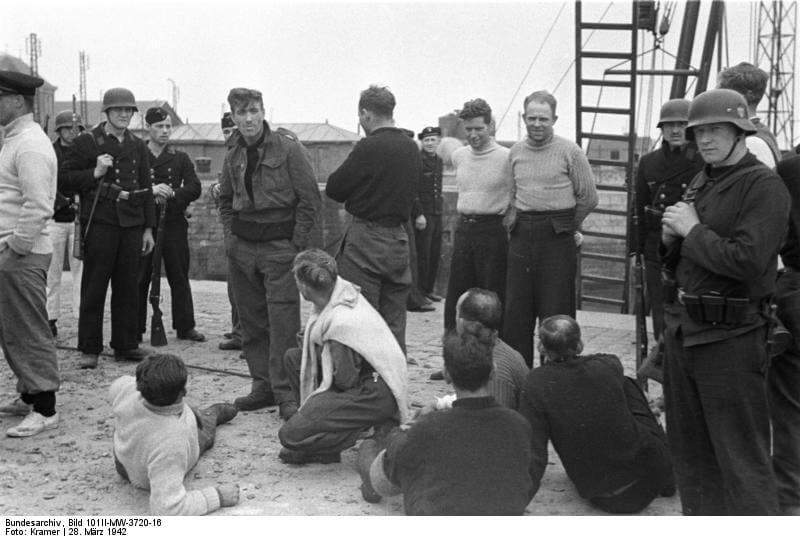
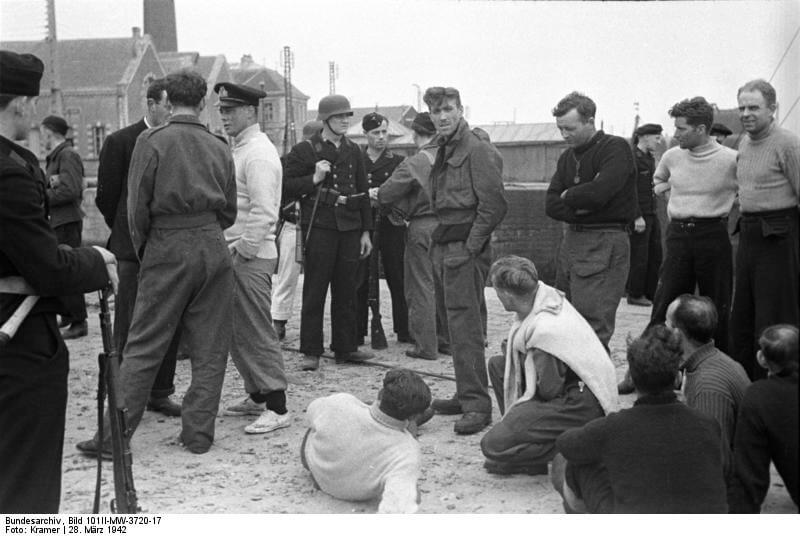
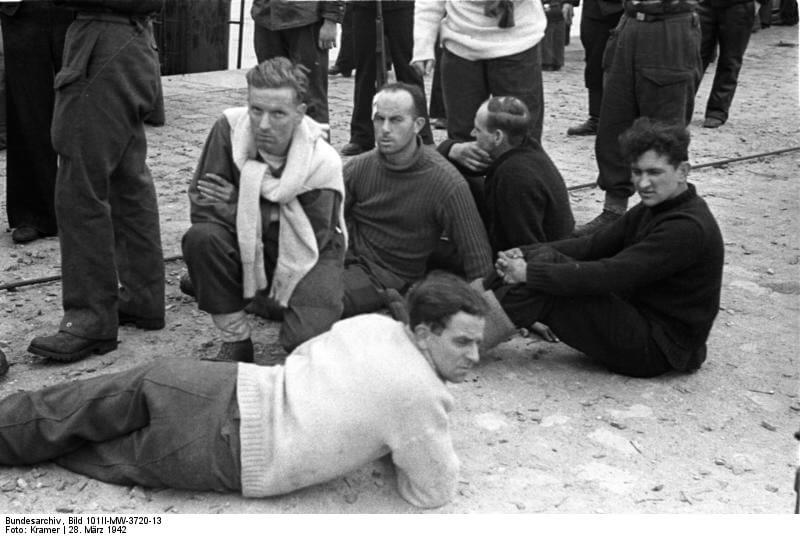


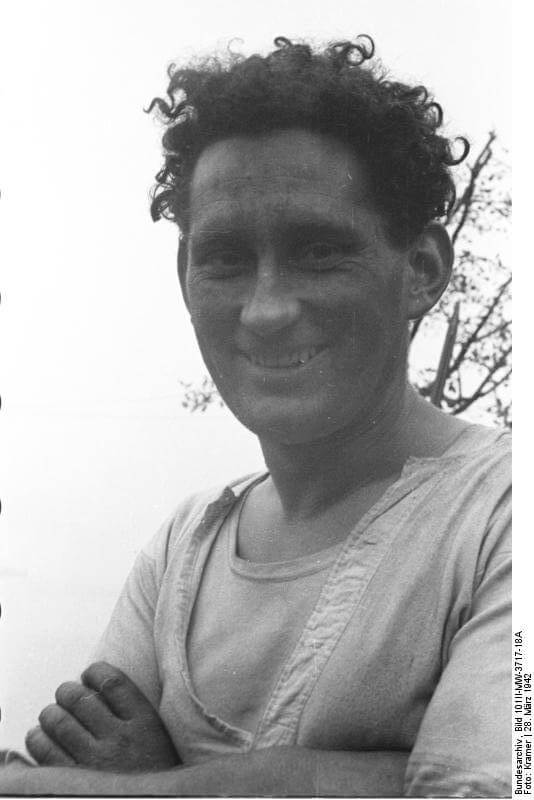

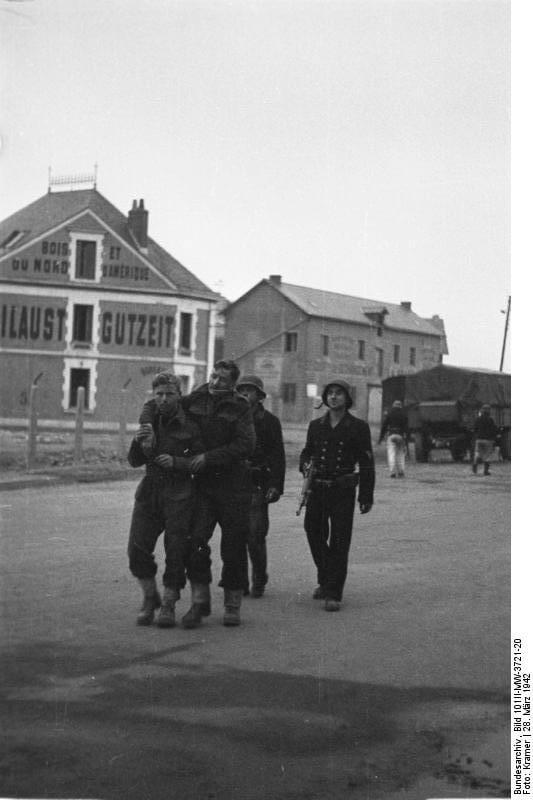
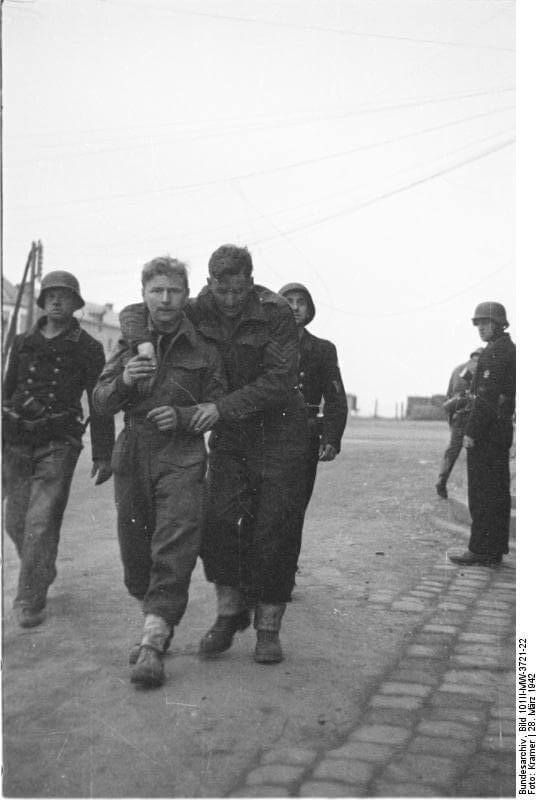
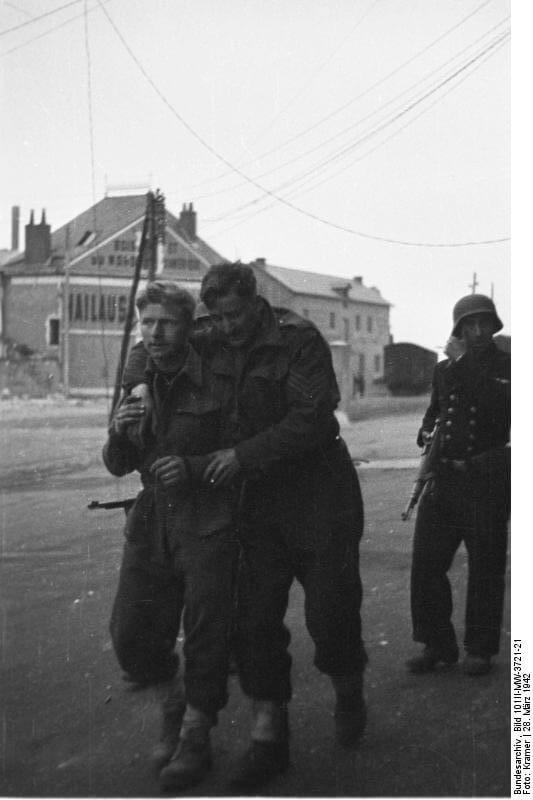
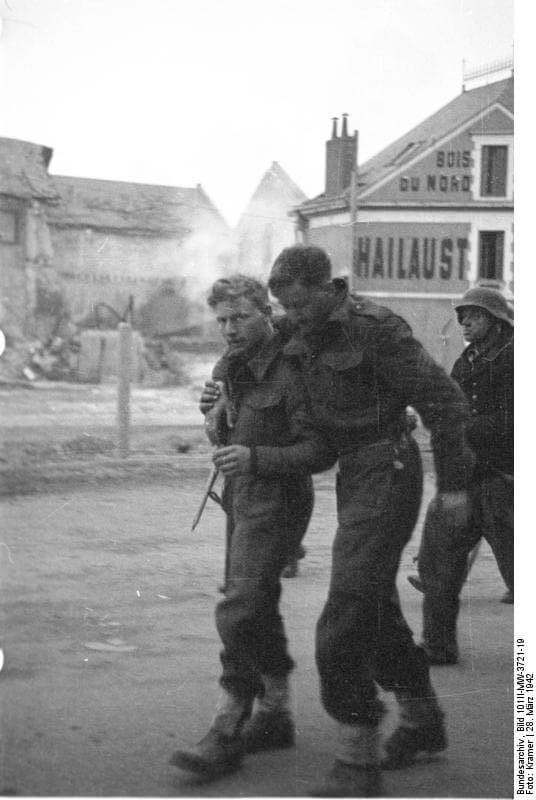
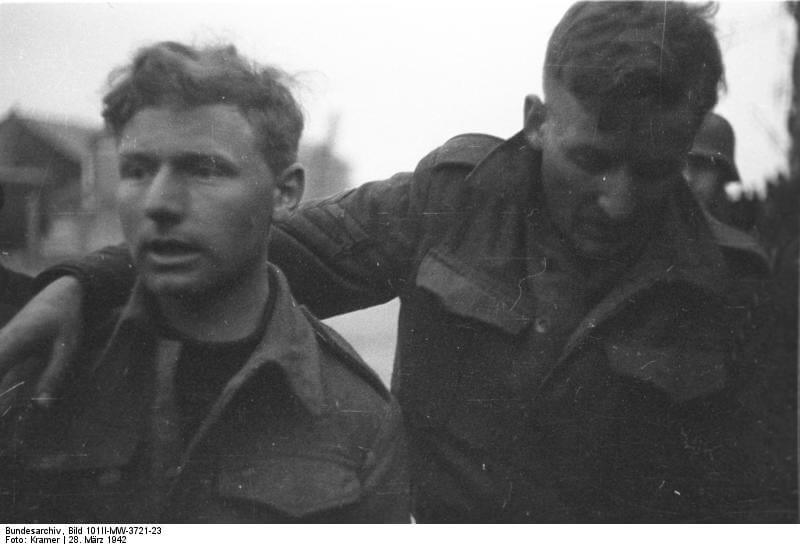
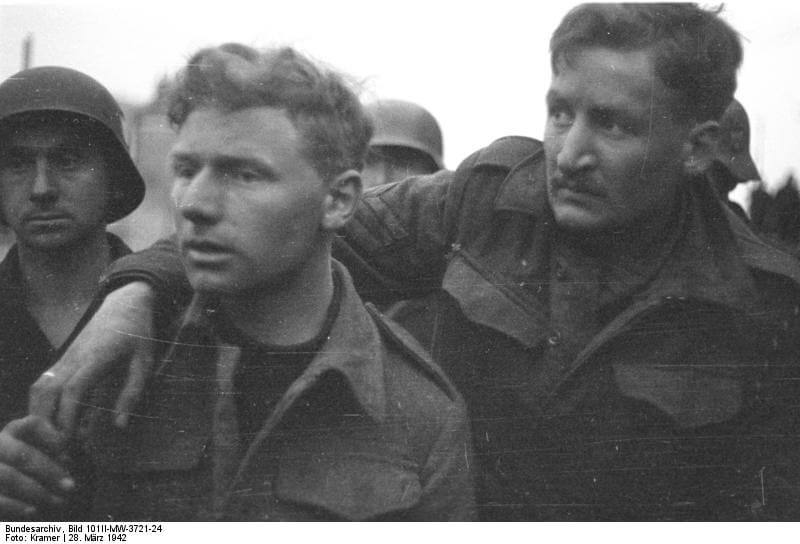
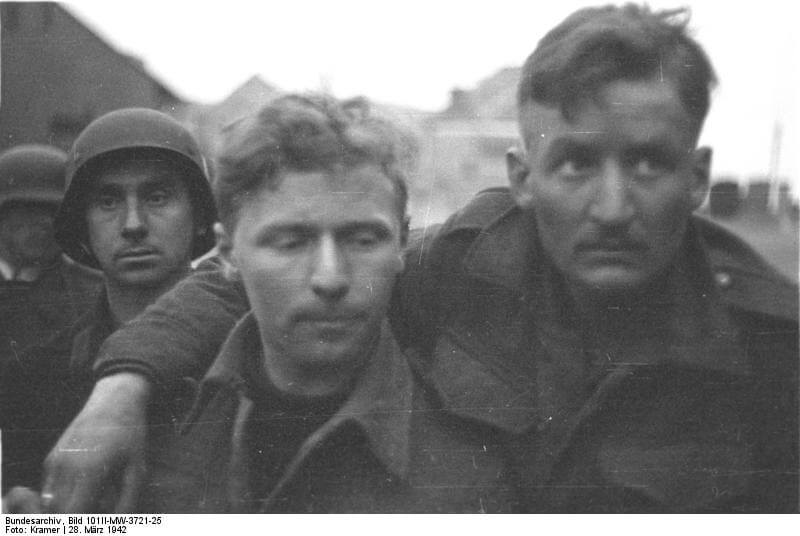
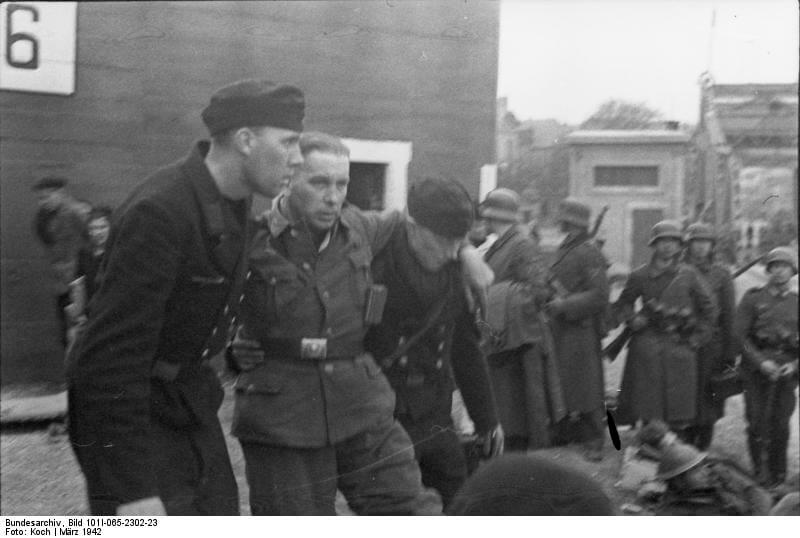
the edge of the Old Town. In the right foreground, Lieutenant Stuart Chant lies wounded on the ground alongside other commandos; in the left background, two French civilians
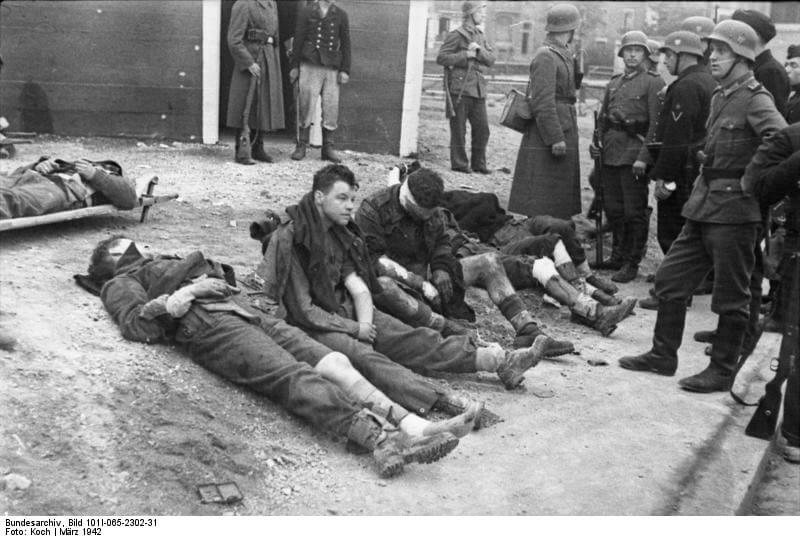
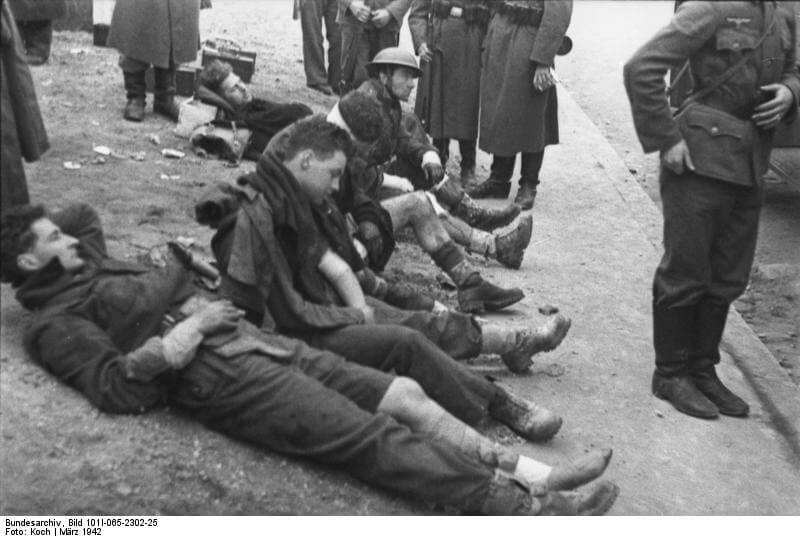

waits for his German guards to
take him away into captivity. On
his left is Sergeant Dick Bradley,
whilst on his right the kilted
figure of Private T. McCormack
endures the wounds that were to
cause his death a few days later.
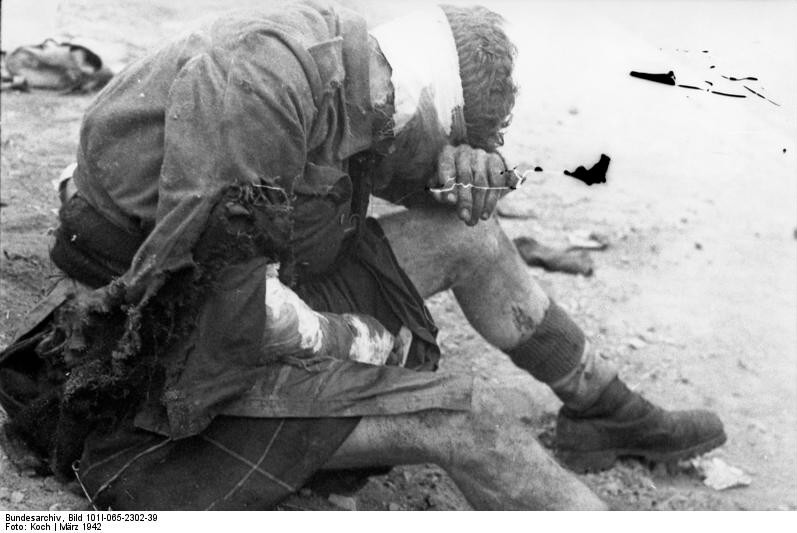
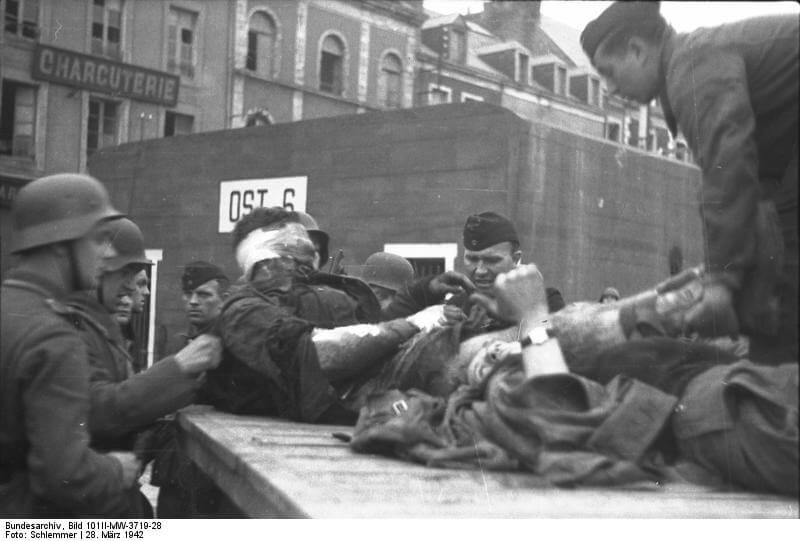
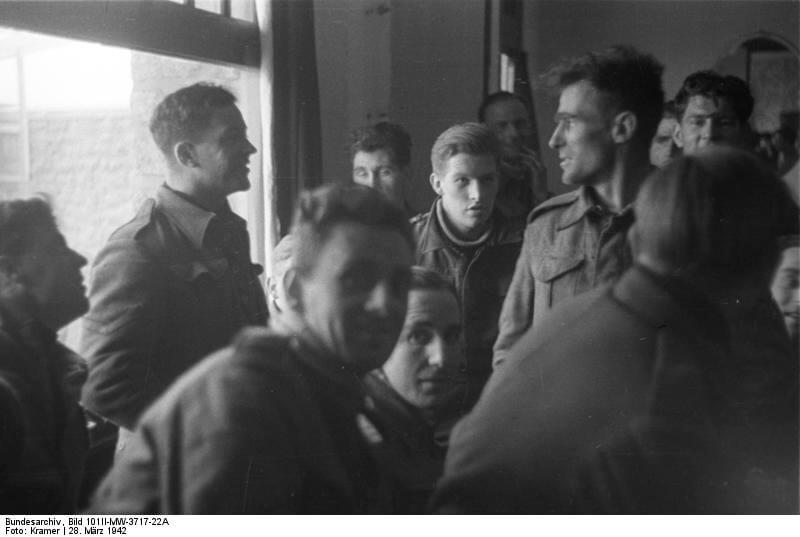
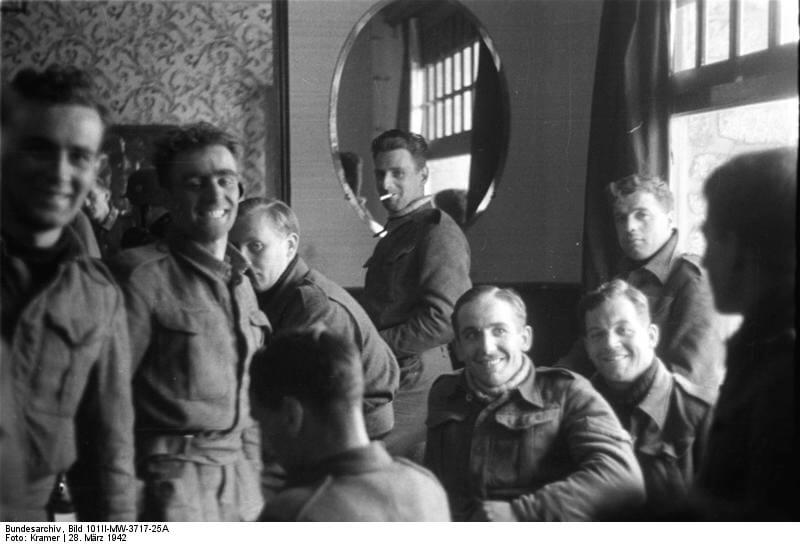
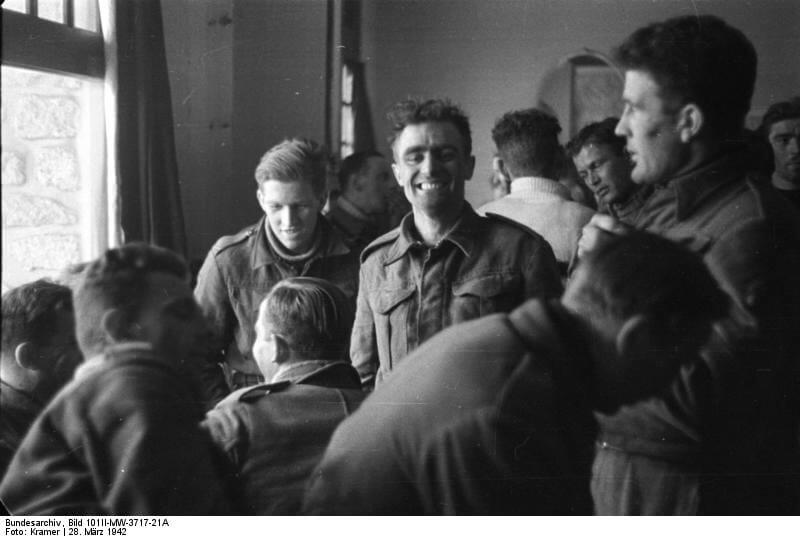
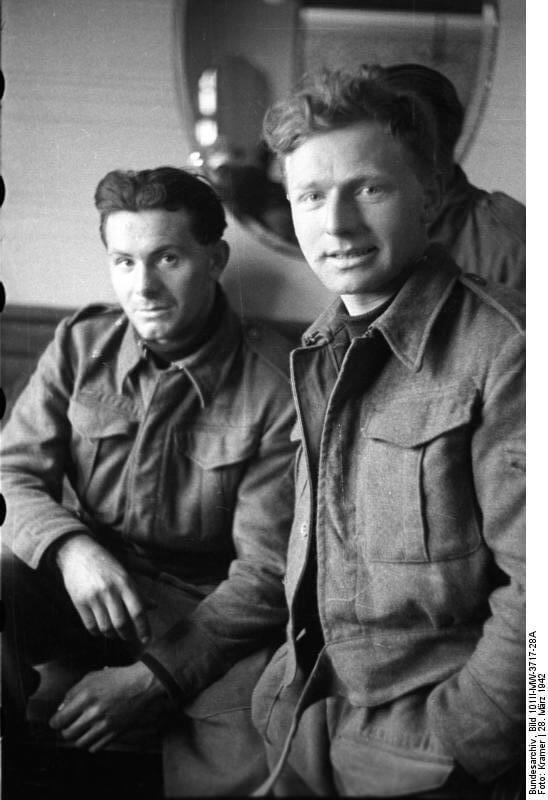
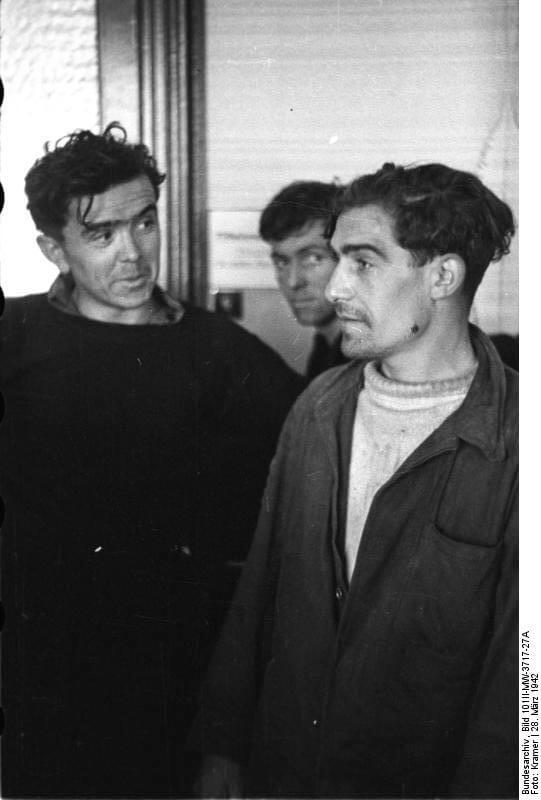
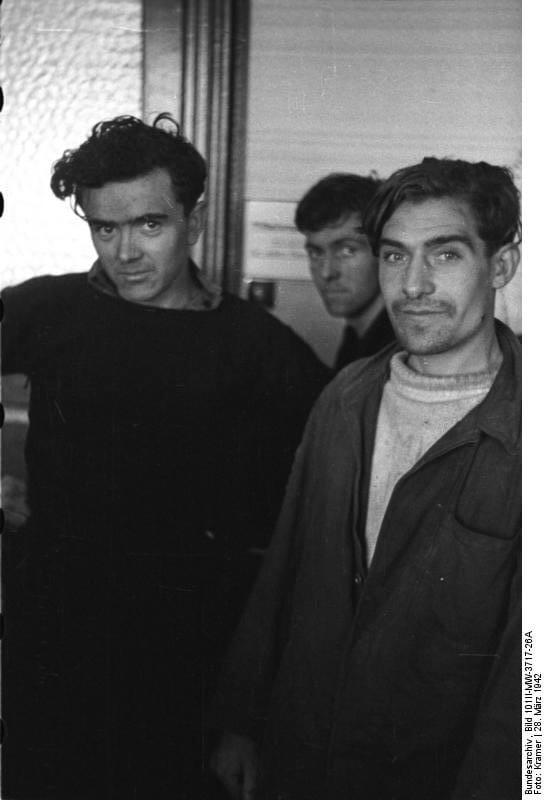
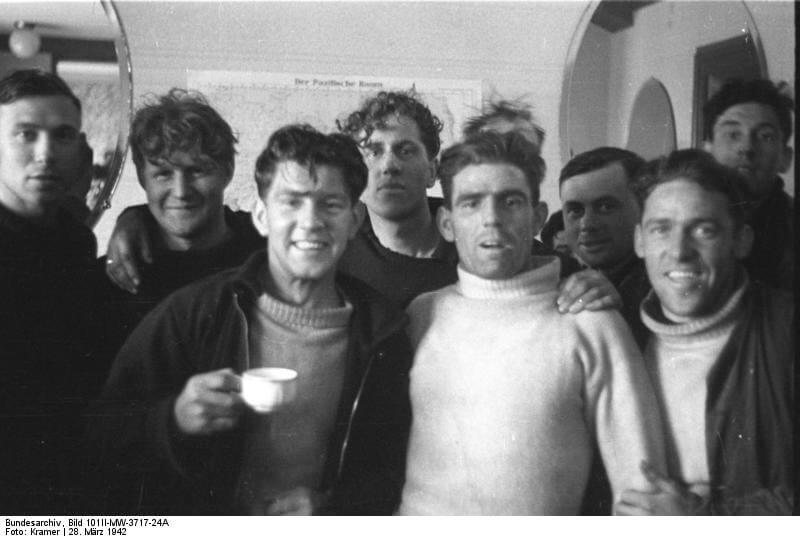
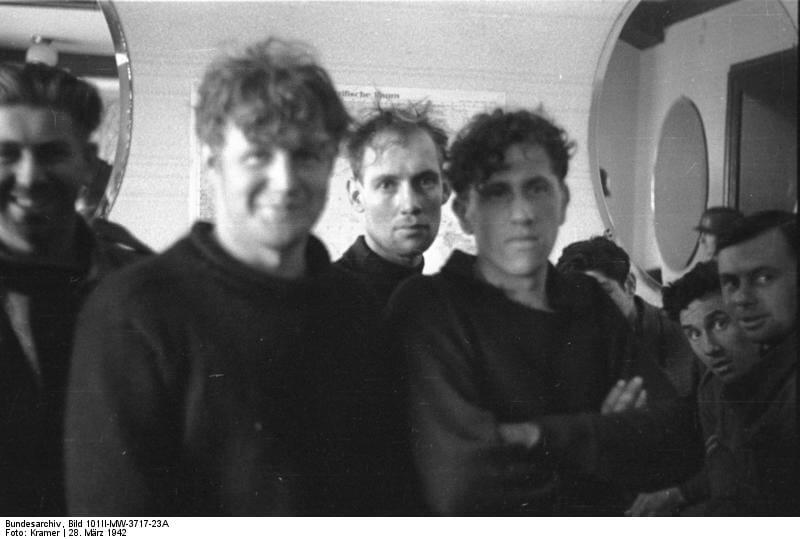

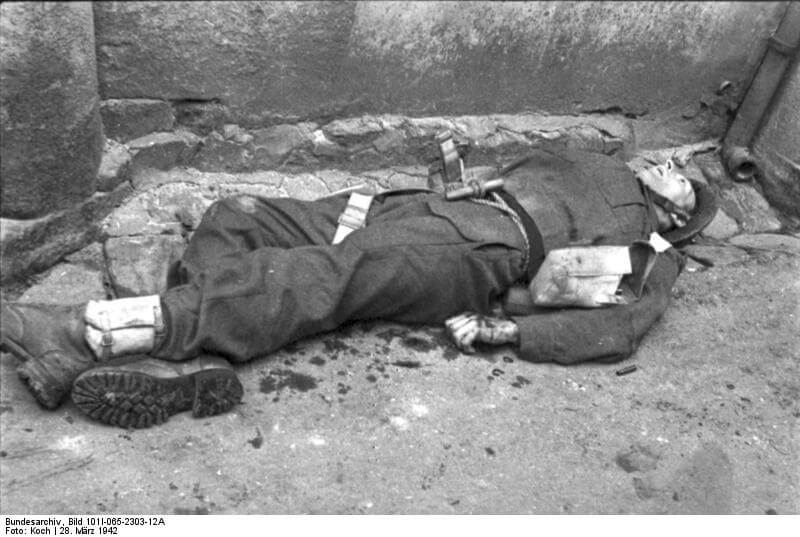
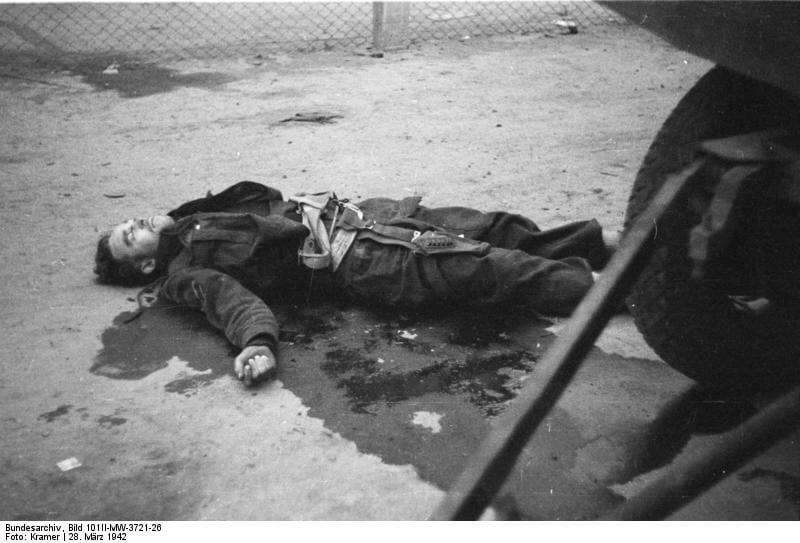
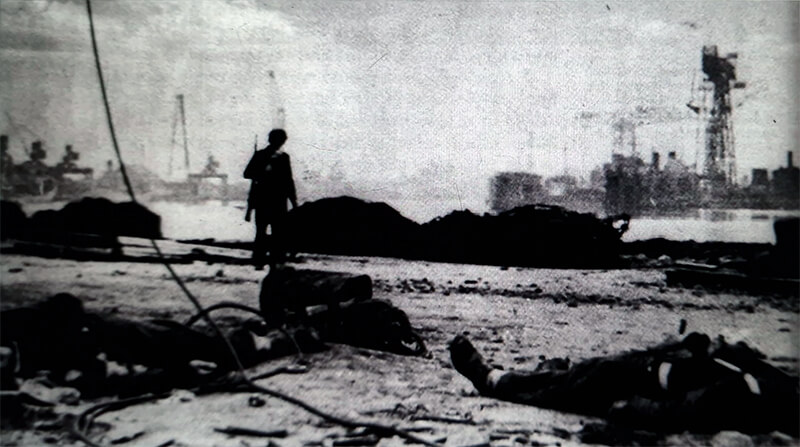
the northern caisson and are probably
from either Purdon’s, Brett’s or Burtenshaw’s team. The white webbing worn that night by all commandos to aid identification can be clearly seen on the bodies.
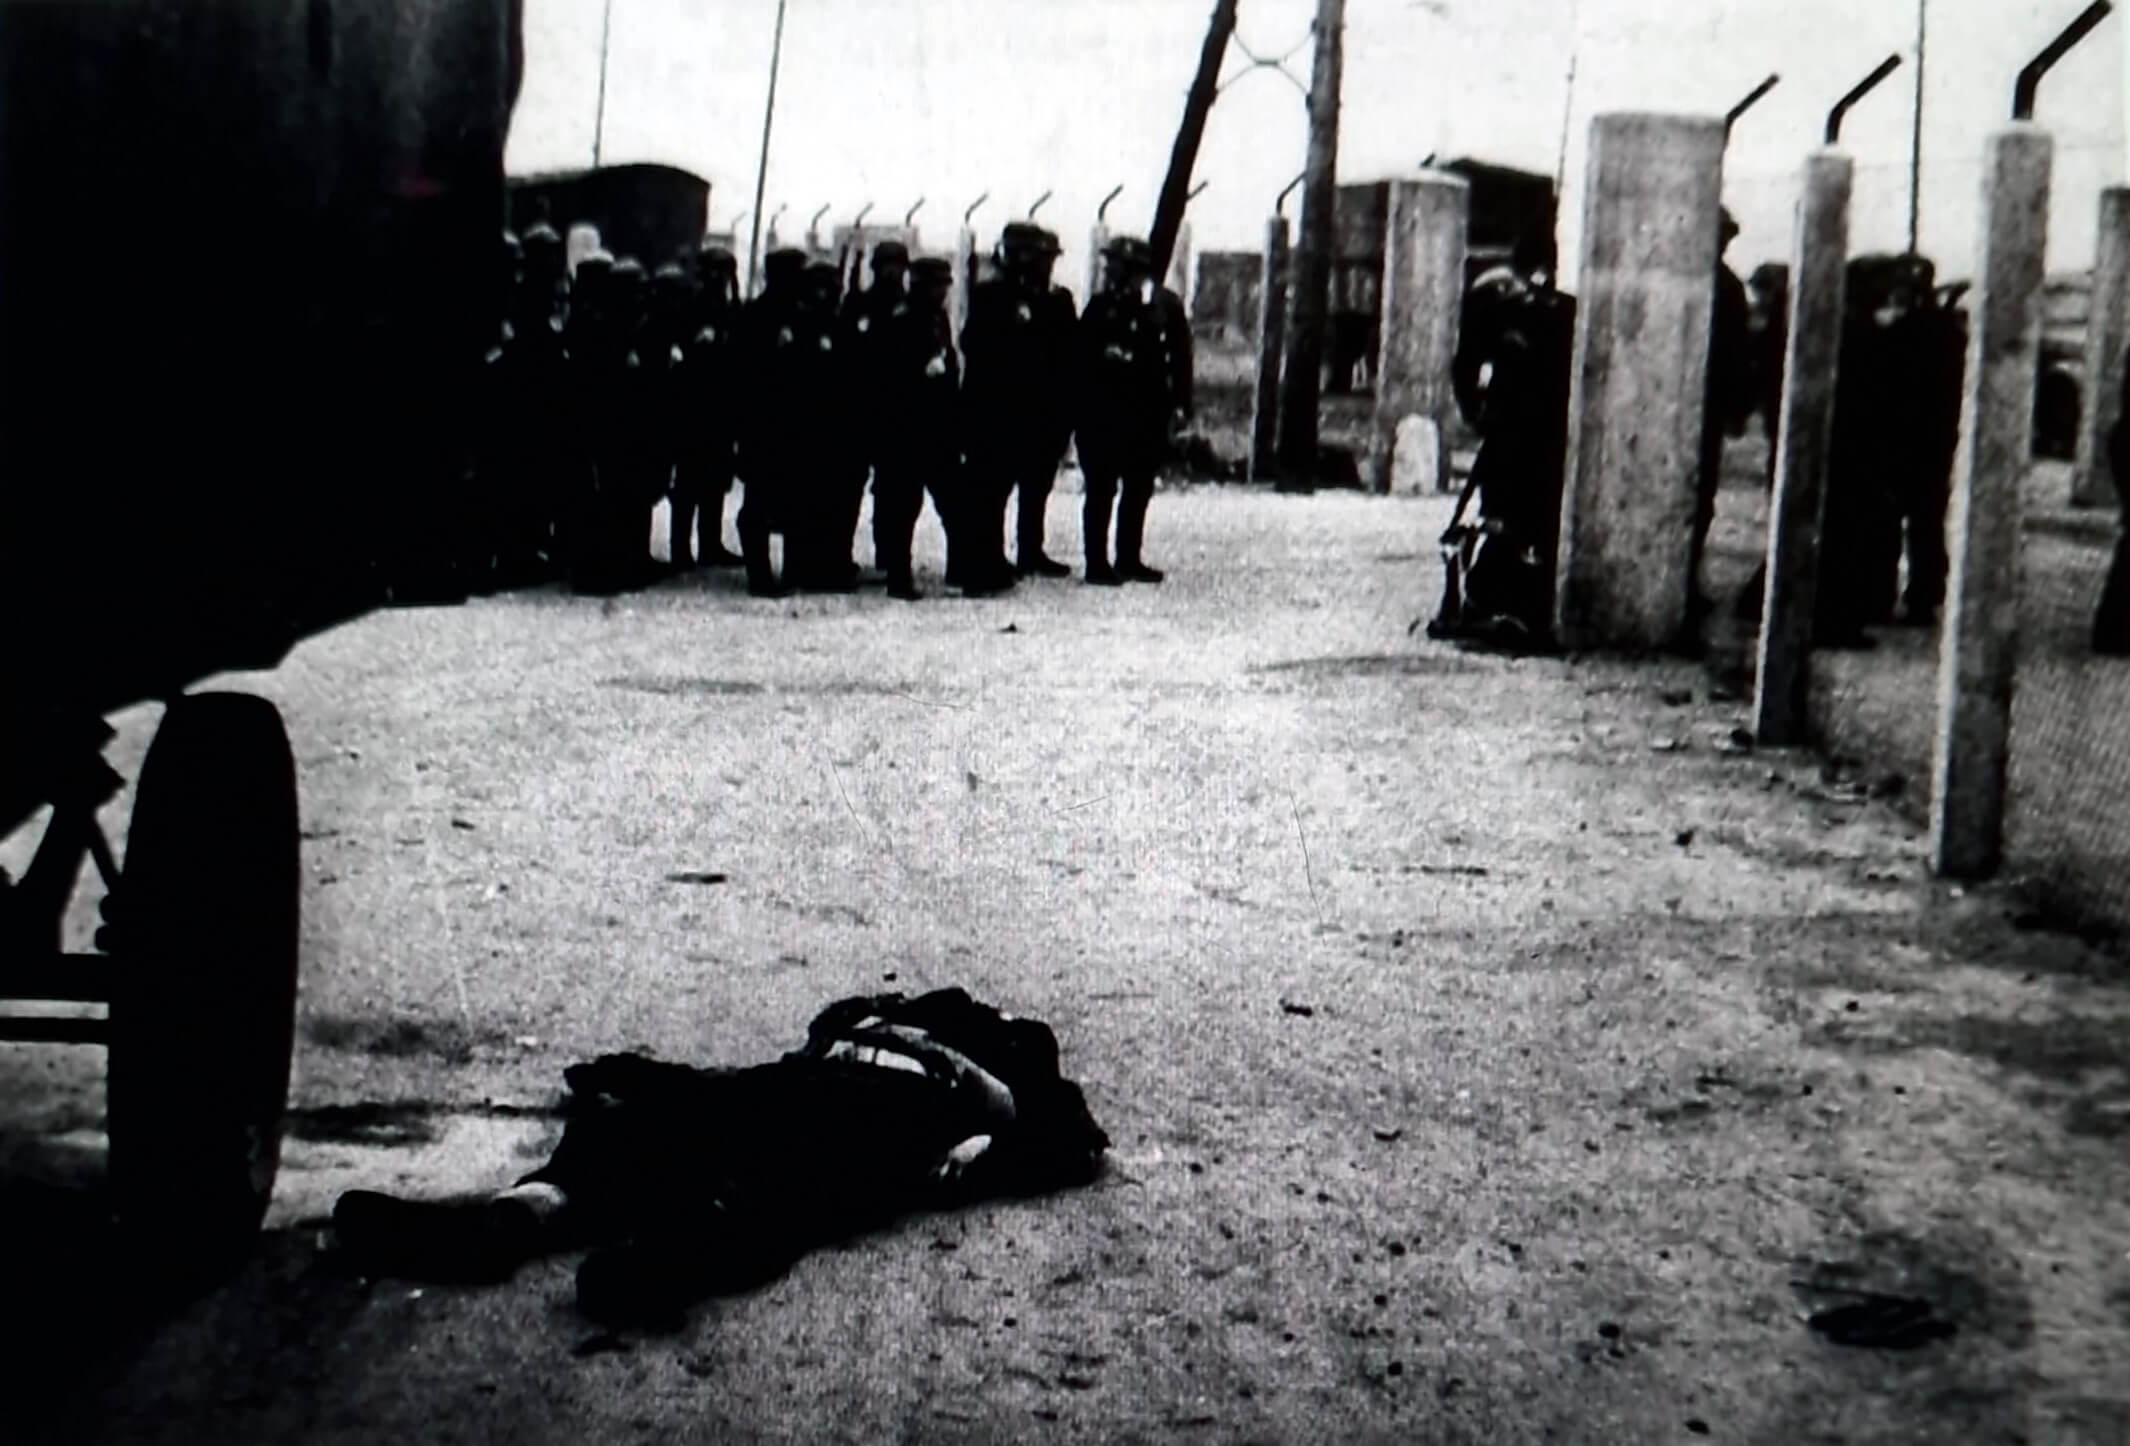
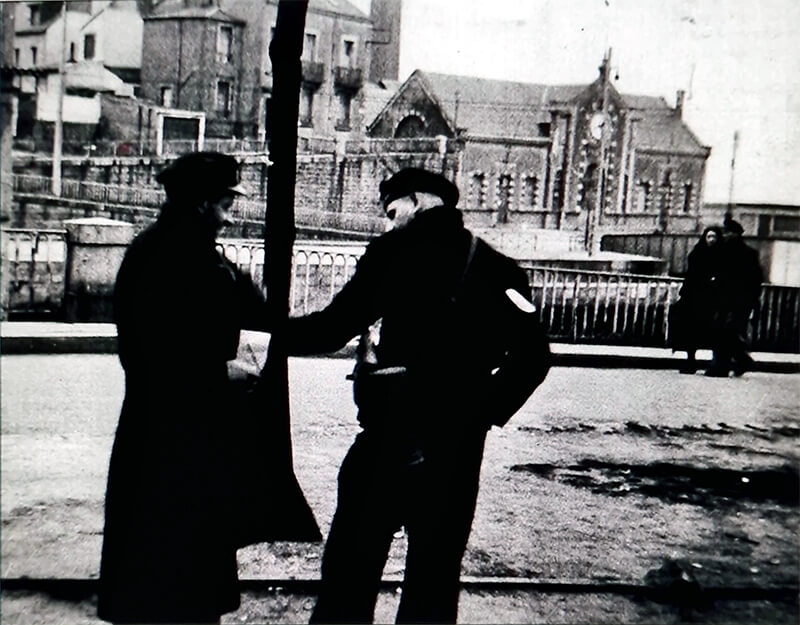
| H.M.S. Campbeltown at the Normandie Dock |
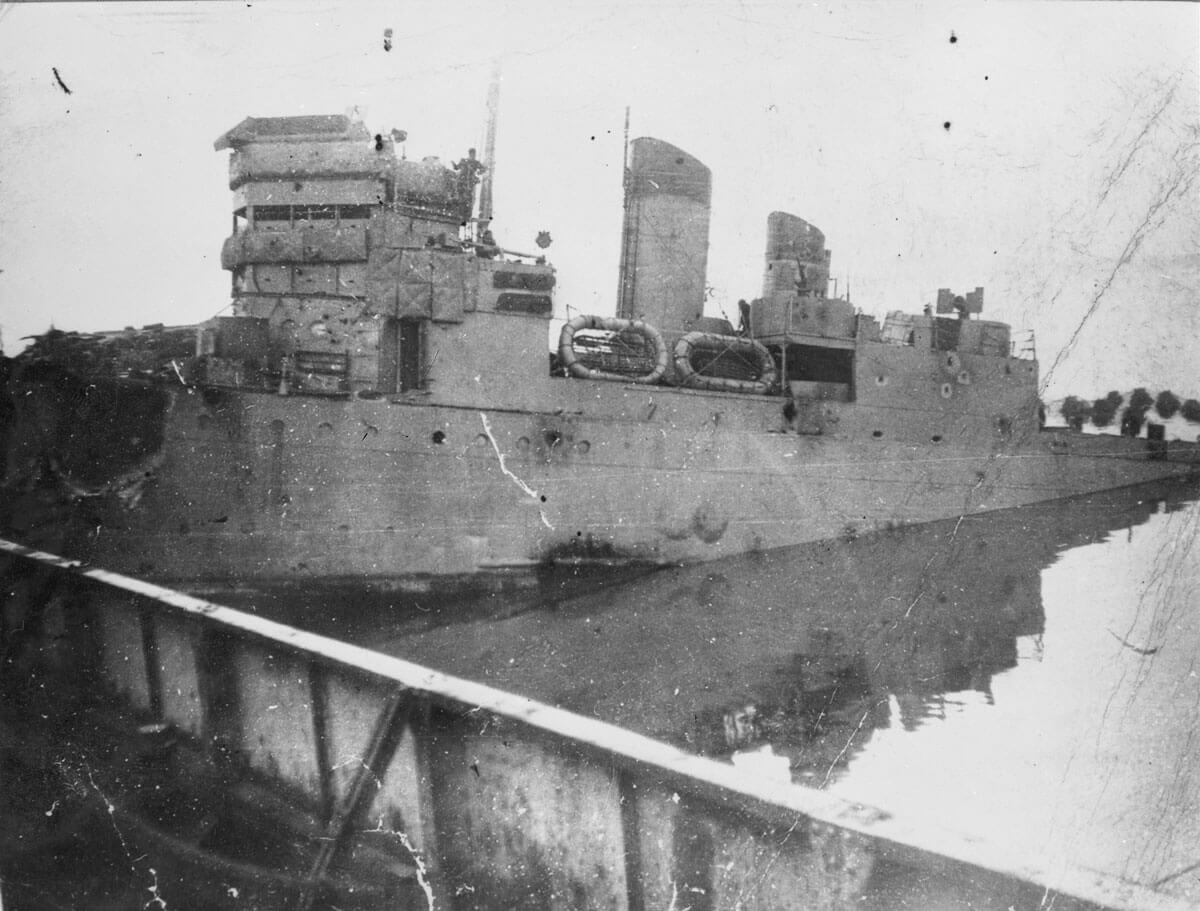
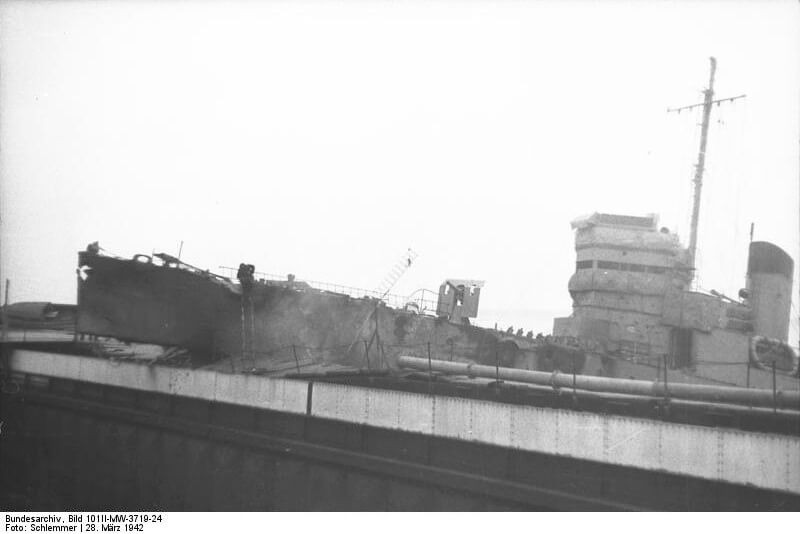
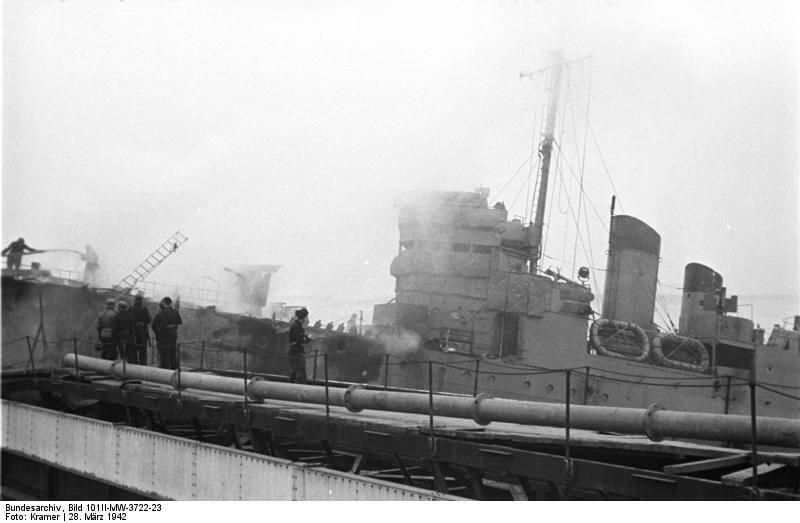
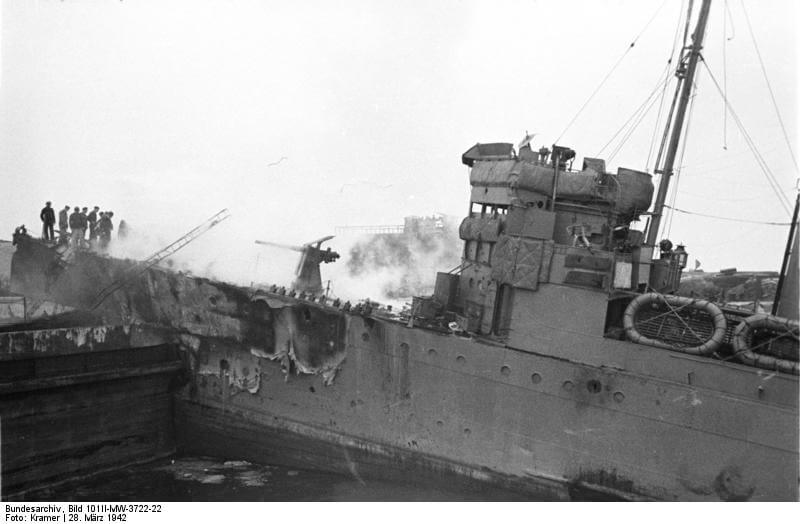
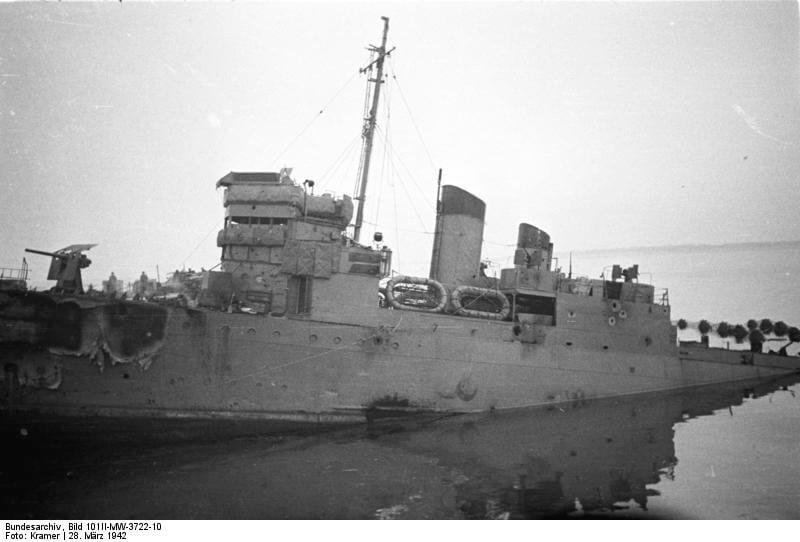
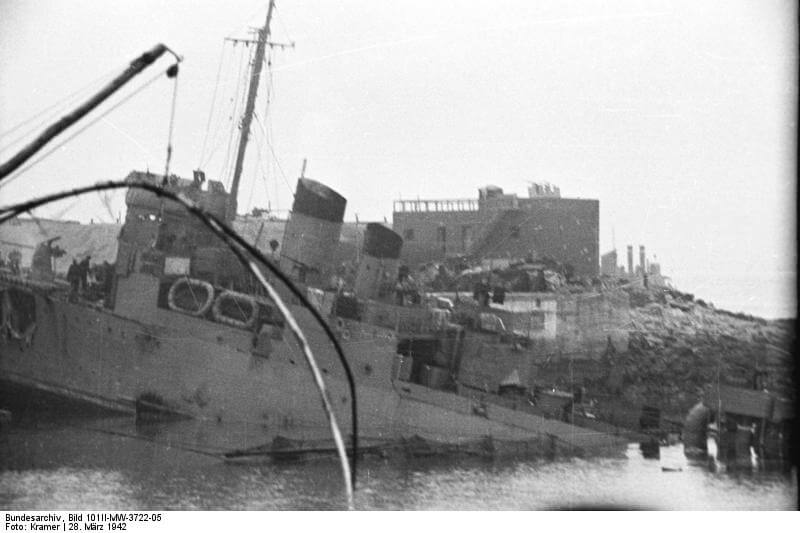
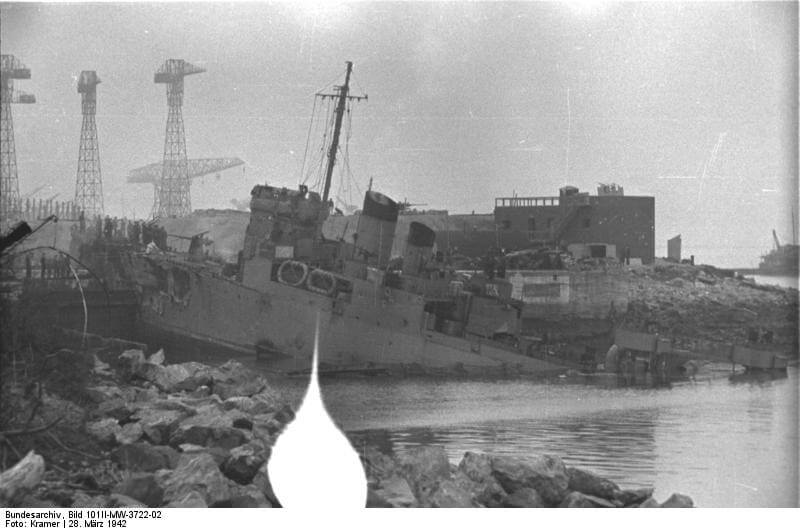
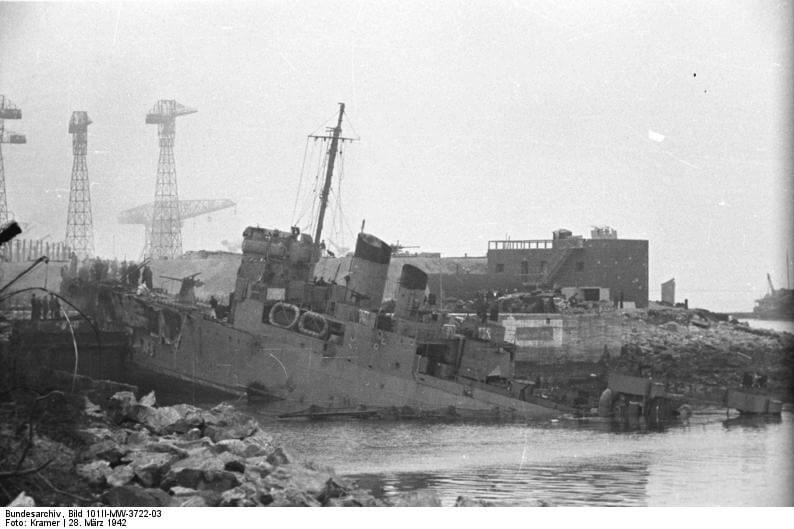
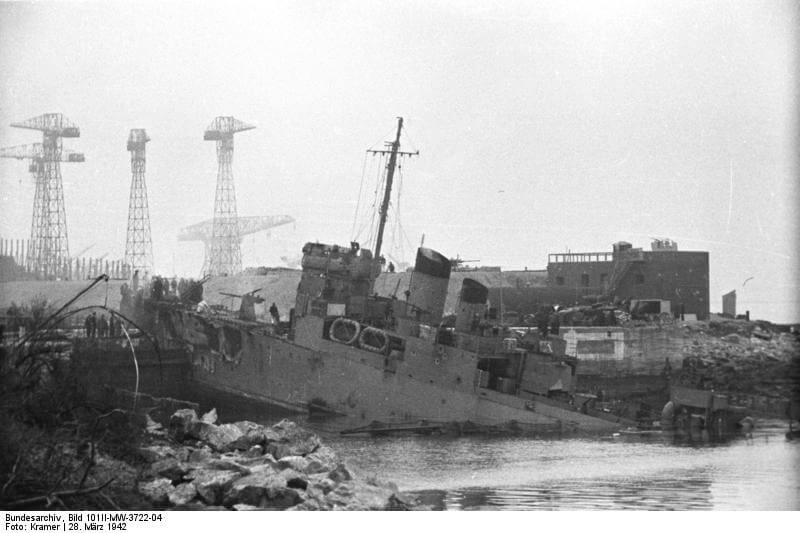
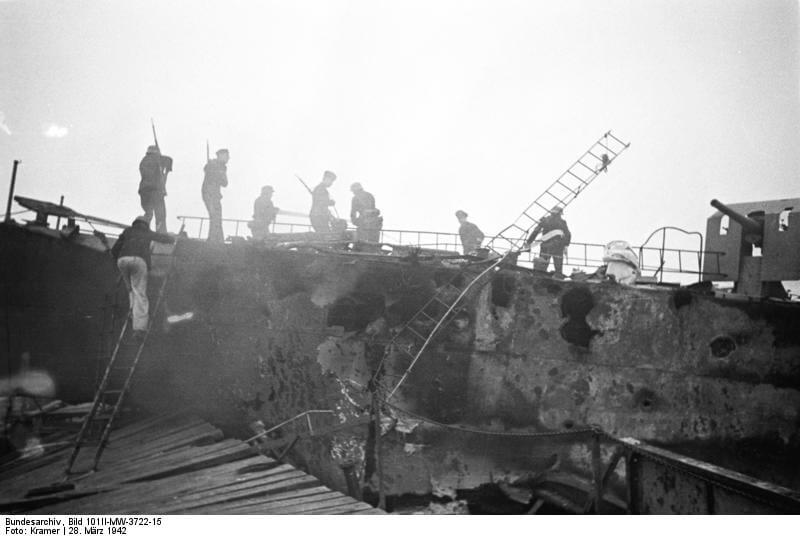
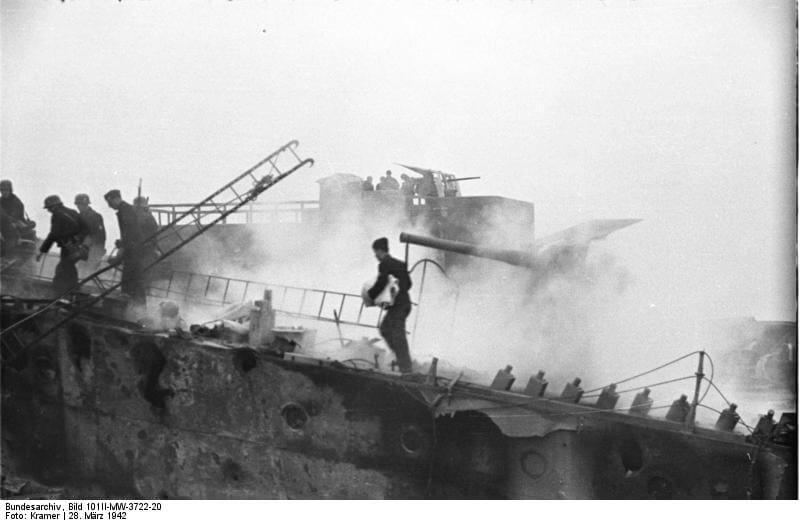
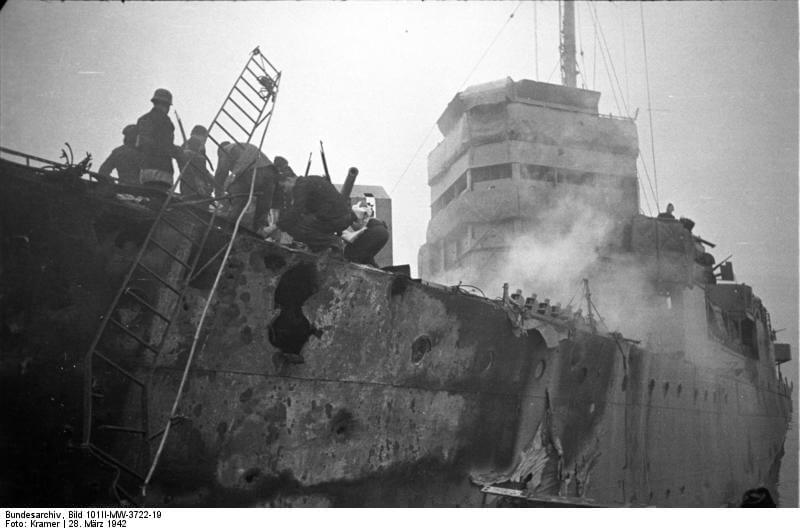
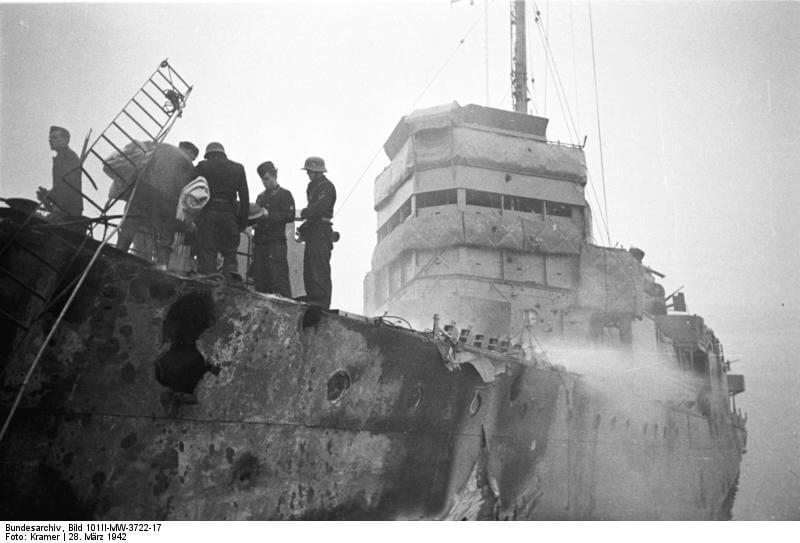

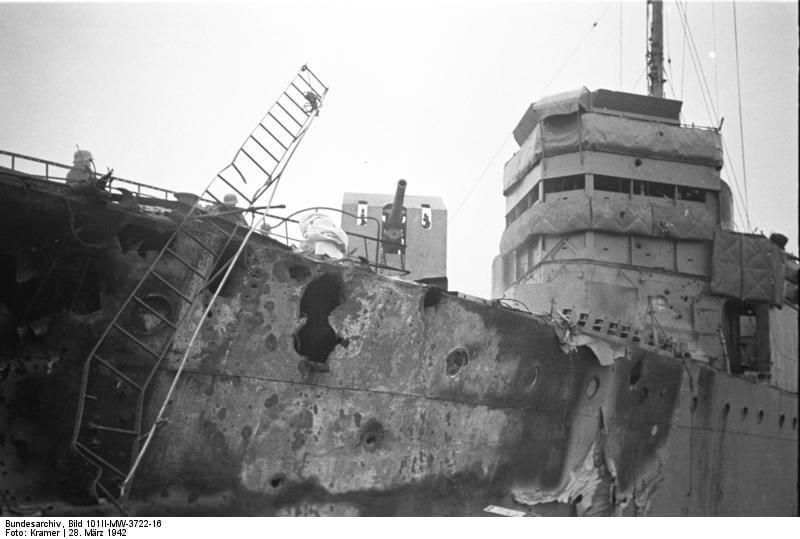
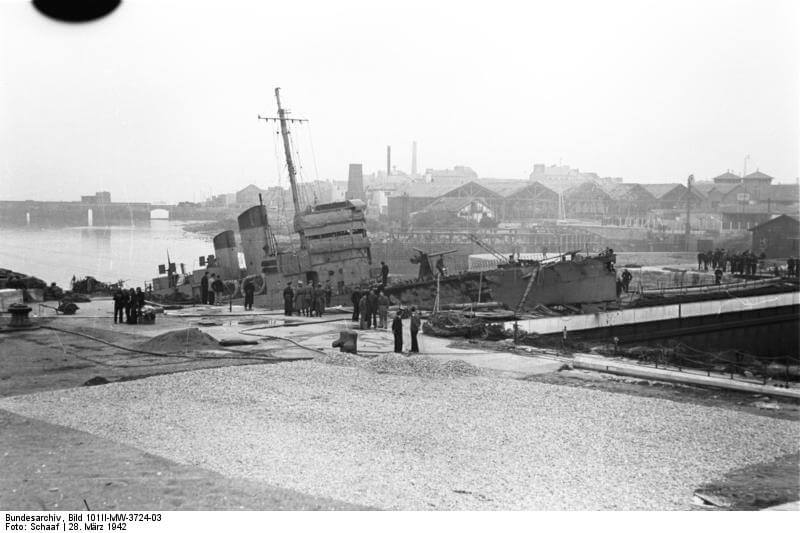

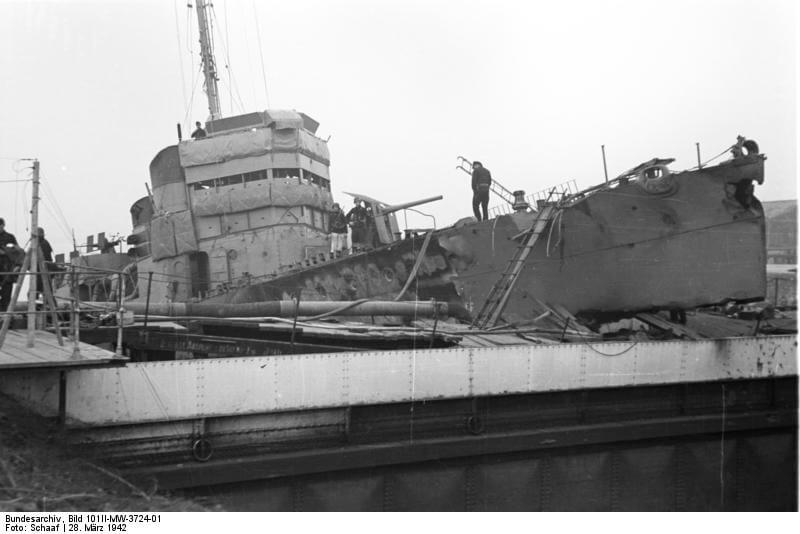


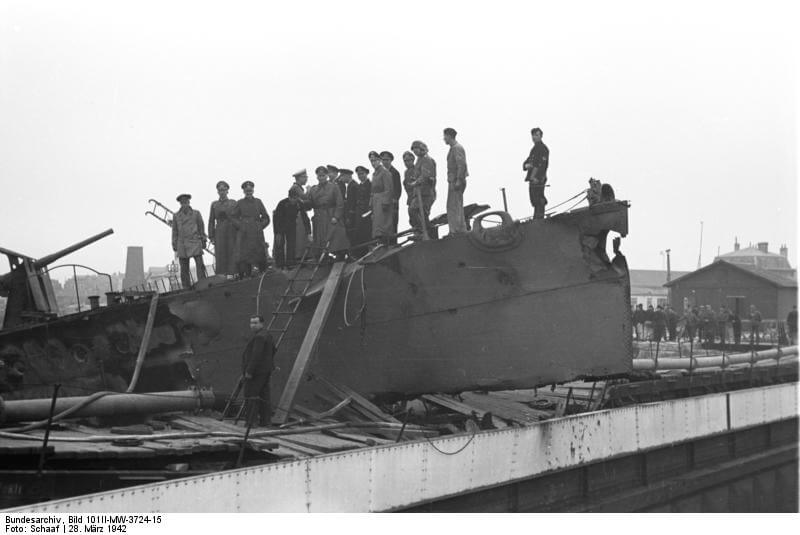

have been cut up as souvenirs
immediately it was hauled down,
clearing the run into the port. Was
Campbeltown flying two German
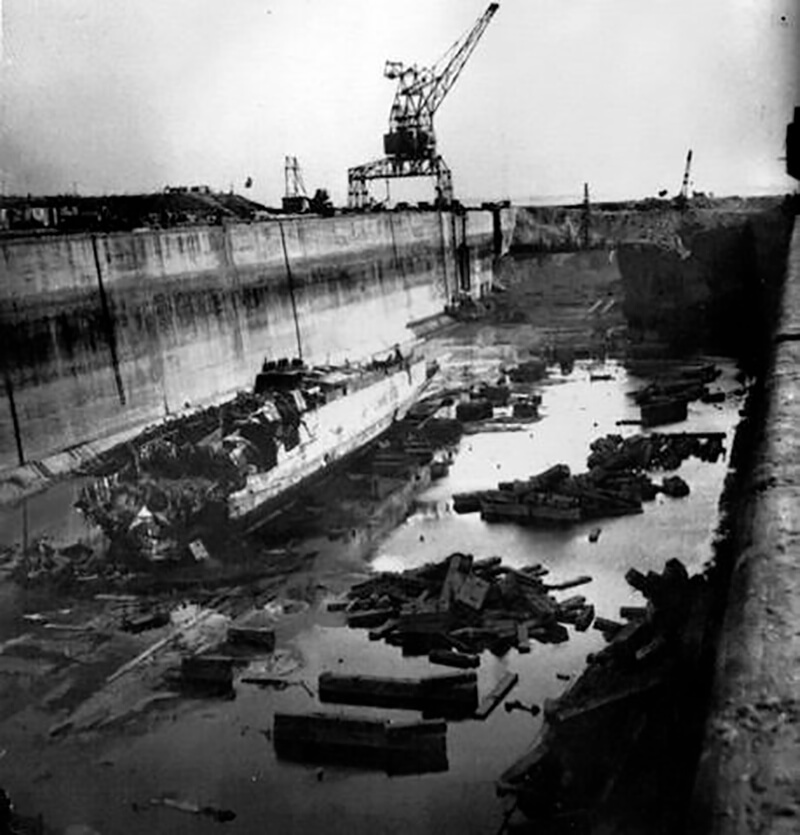

| Damage |